WebSSH turns an SSH terminal into a web page, solving the operations pain point of losing server access whenever you switch devices. When combined with cpolar, you can expose an internal terminal to the public internet and connect instantly from any browser. Keywords: WebSSH, NAT traversal, remote operations.
Technical Specifications at a Glance
| Parameter |
Details |
| Core solution |
WebSSH + cpolar |
| Runtime environment |
Linux / ZSpace NAS |
| Access method |
Browser access over HTTP |
| Underlying protocols |
SSH, HTTP, HTTPS (recommended) |
| Installation languages |
Python, Shell |
| Core dependencies |
pip3, git, systemd, cpolar |
| Default ports |
WebSSH: 8888; cpolar UI: 9200 |
| Open-source info |
WebSSH is open source; the original article did not provide a GitHub star count |
This solution shifts terminal access from client dependency to browser dependency
Traditional SSH workflows depend on local terminal tools, synchronized keys, and a compatible network environment. Once you switch to another computer, use a tablet, or work from a restricted device, that connection path often breaks. WebSSH solves this by moving terminal access into the browser and reducing the cost of switching devices.
With cpolar, the WebSSH page that is normally visible only inside the local network can be mapped to a public address. That means you can open a server terminal from an external network using only a browser, which makes this setup a strong fit for remote operations, temporary troubleshooting, and multi-device collaboration.
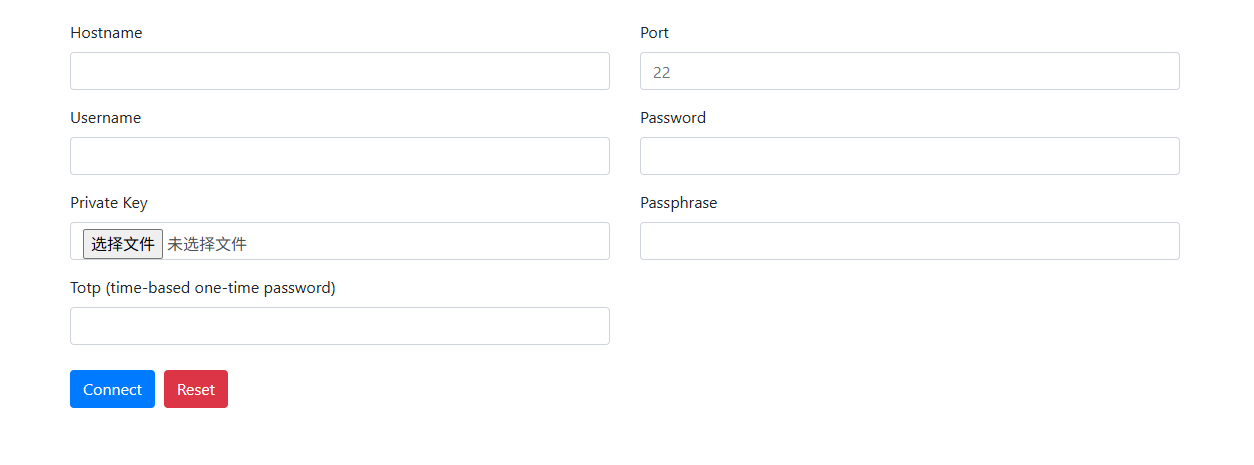 AI Visual Insight: This image shows the overall entry page of the solution and highlights the idea of delivering an SSH terminal through the browser. It fits unified access scenarios across desktop and mobile devices. The core message is that a web page replaces the local SSH client.
You should first confirm that your ZSpace NAS or Linux host accepts SSH logins before deployment
Before deploying WebSSH, you must enable the host machine’s SSH service. All later installation, startup, and troubleshooting steps depend on command-line access, so this is the foundational control plane for the entire solution.
ssh root@<your-zspace-ip> # Connect to the host using the root account
This command verifies that SSH is enabled on the host and establishes the environment required for the remaining installation steps.
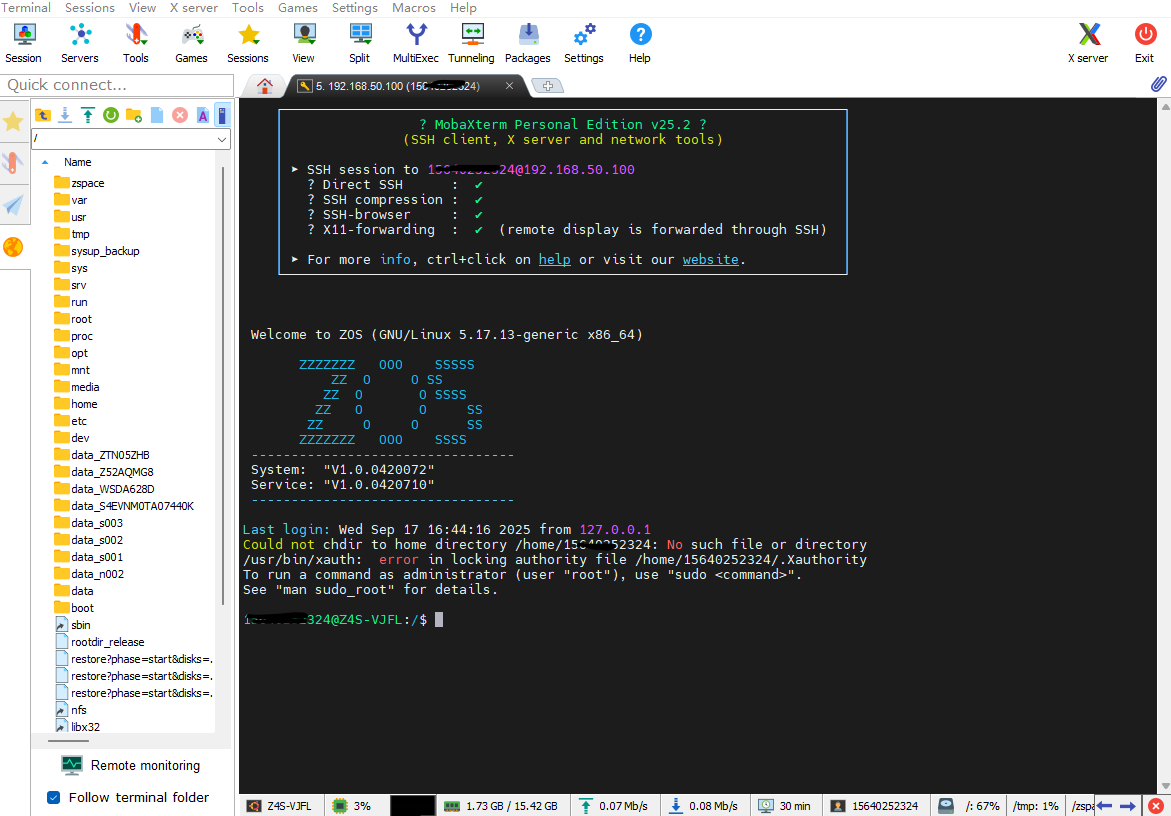 AI Visual Insight: This image reflects the host connection readiness screen after SSH has been enabled. It shows why you still need to keep one native SSH channel available before deploying WebSSH, both for the initial setup and for future maintenance.
The WebSSH installation and startup process is lightweight enough for quick validation
Online installation is the most direct option and works well for Linux environments with internet access. If your environment is restricted, you can also install it offline from source.
pip3 install webssh  # Install WebSSH online
wssh                # Start the WebSSH service; it listens on port 8888 by default
These two commands install and start WebSSH, making them ideal for quickly validating the approach.
git clone https://github.com/huashengdun/webssh.git  # Clone the source code
cd webssh                                            # Enter the project directory
python setup.py install                              # Run the offline installation
Use these commands when you cannot install directly with pip, such as in internal networks or controlled environments.
When the terminal displays Listening on :8888 (http), the service has started successfully. You can then open `http://
:8888` in a browser to reach the connection page.
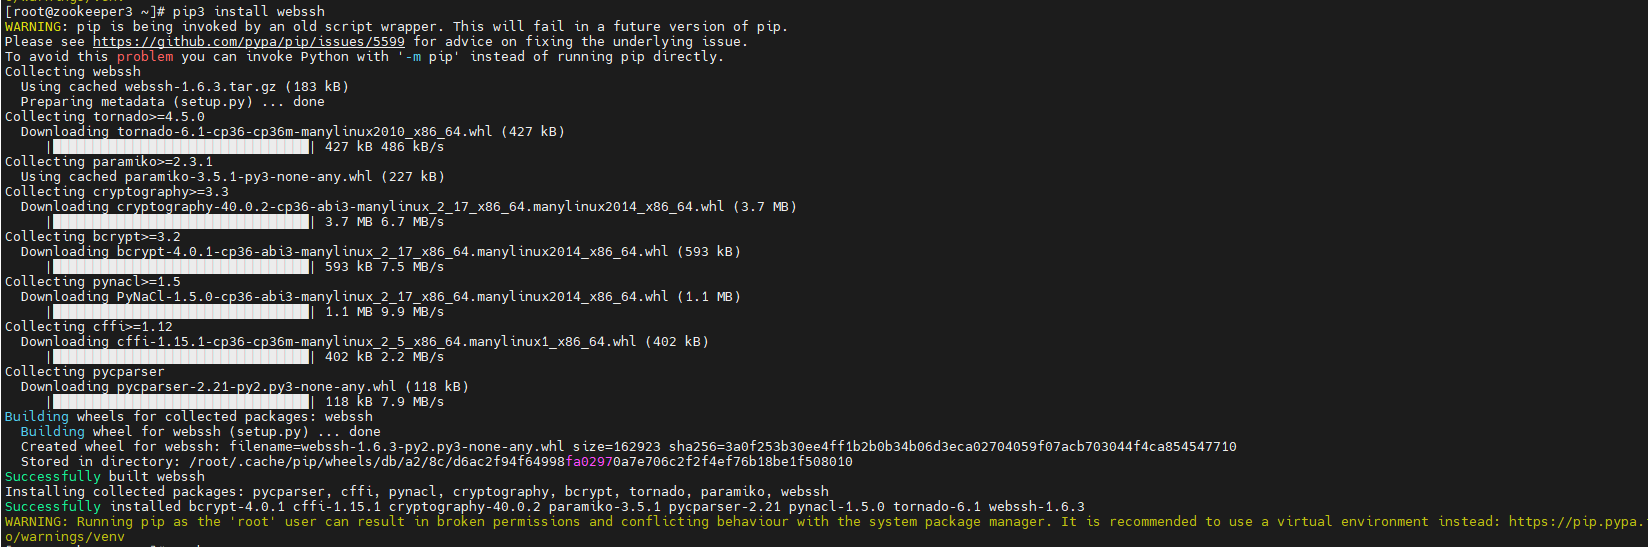
**AI Visual Insight:** This image shows the terminal output from installing WebSSH with pip. It demonstrates that the tool can be deployed directly as a Python package, with a short installation path and minimal dependencies, making it suitable for NAS devices and lightweight Linux hosts.

**AI Visual Insight:** This image shows the listening log after the WebSSH process starts. The key technical signal is that the service has exposed an HTTP page on port 8888, so the browser-based terminal entry point is now available.
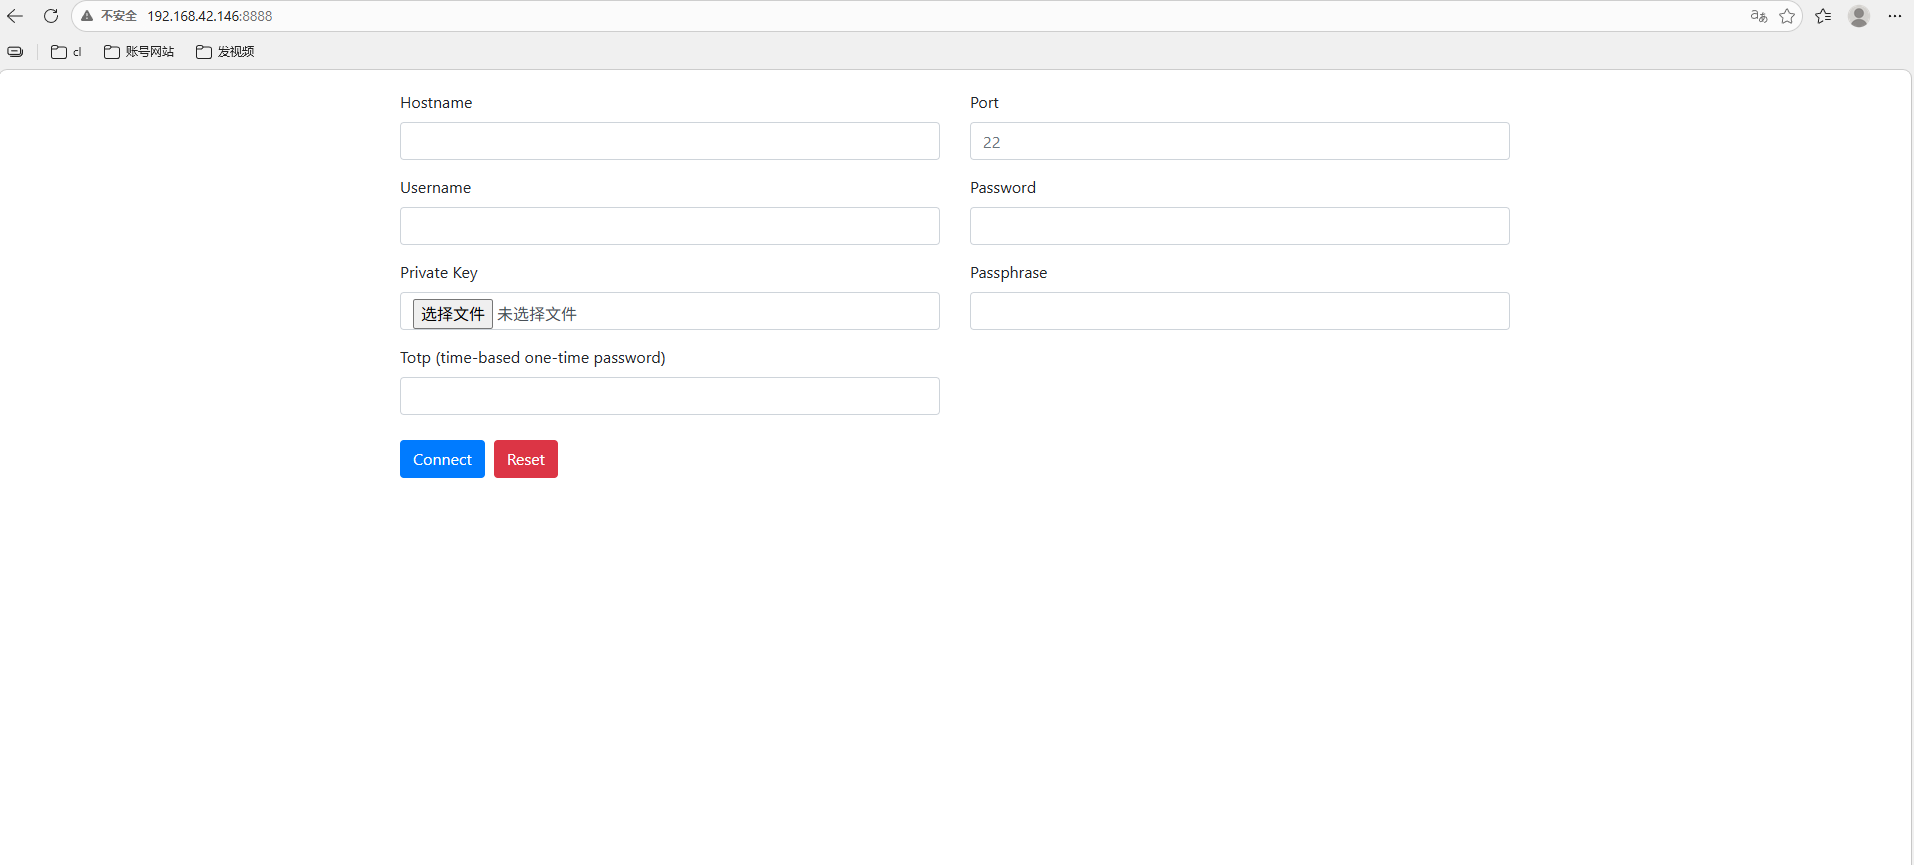
**AI Visual Insight:** This image shows the WebSSH login page in the browser. Users can enter the host address, port, username, and password directly, which means the SSH session has been abstracted into a standard web interaction.
### WebSSH supports UI parameters and URL-based auto-login, but you should use them carefully
WebSSH supports URL hash parameters for font and background customization, and it also supports GET parameters for pre-filling connection details. This is convenient for internal demos, temporary collaboration, and thin-client scenarios.
“`bash
# Change the terminal display theme
http://
:8888/#fontcolor=black&bgcolor=white
# Pre-fill login information through URL parameters
http://
:8888/?hostname=192.168.1.10&username=root&password=&port=22
“`
These examples show that WebSSH provides some front-end customization capabilities, but passing credentials in the URL creates a clear leakage risk.

**AI Visual Insight:** This image shows the WebSSH terminal style after changing the font and background. It demonstrates that the front-end rendering layer can be customized quickly through URL parameters, which is useful for improving readability in high-contrast or mobile scenarios.
## cpolar provides a stable public access bridge for WebSSH
By default, WebSSH is usually available only inside the local network. If you want to access it from the public internet, mobile networks, or a remote office, you need to securely expose local port 8888. That is exactly the role cpolar plays in this architecture.
“`bash
sudo curl https://get.cpolar.sh | sh # Install cpolar with one command
sudo systemctl status cpolar # Check the service status
“`
These commands install cpolar and verify its health so you can confirm that the tunneling service is running normally.
After installation, open `http://
:9200` and sign in to the cpolar web management interface. From there, you can create a tunnel and expose the local WebSSH service to a public address.

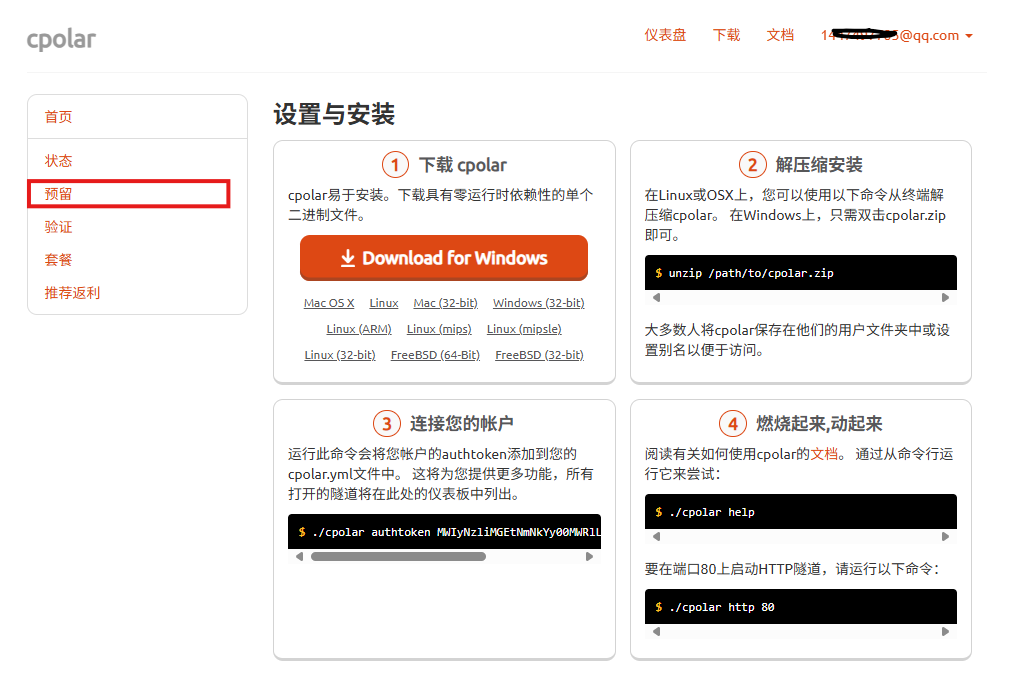
**AI Visual Insight:** This image shows the cpolar one-line installation script in action. It confirms that deployment is also lightweight, which makes cpolar a practical public publishing layer for WebSSH.
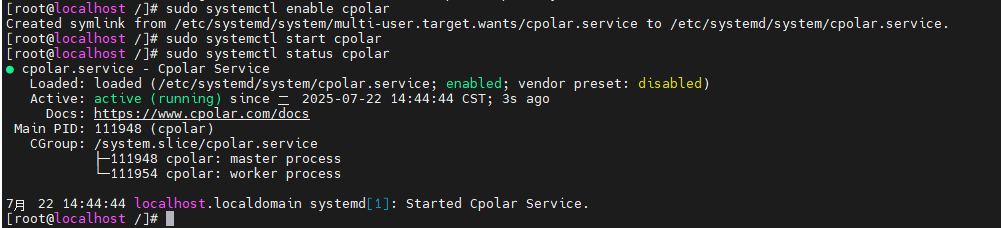
**AI Visual Insight:** This image shows the cpolar service status check under systemd. Its core value is confirming that the tunneling agent is running persistently, which is required before tunnel configuration can take effect.
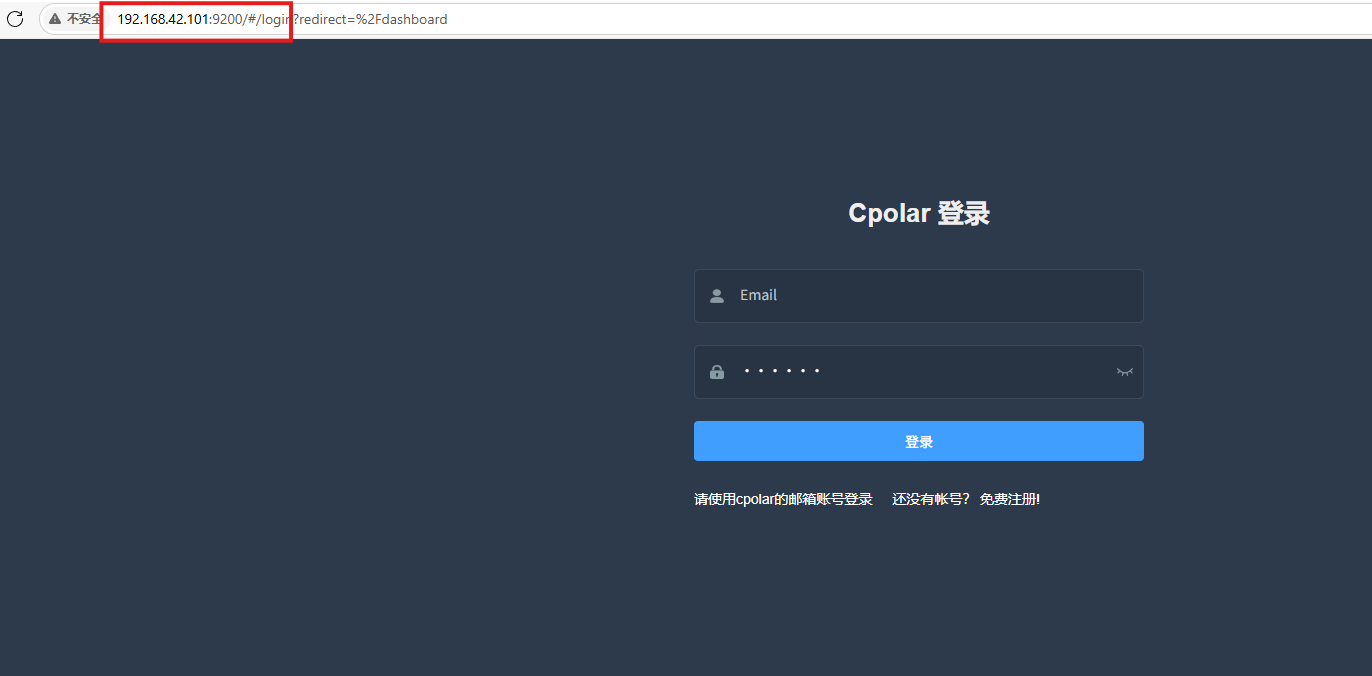
**AI Visual Insight:** This image shows the management interface after signing in to the cpolar web UI. It demonstrates that users can visually manage tunnels, domains, and port mappings in the browser without relying on complex commands.
### Once you create an HTTP tunnel, WebSSH becomes accessible from external browsers
When you create a tunnel in cpolar, only four parameters matter: the tunnel name, protocol type, local port, and domain type. For WebSSH, choose HTTP as the protocol and set the local address to port 8888.
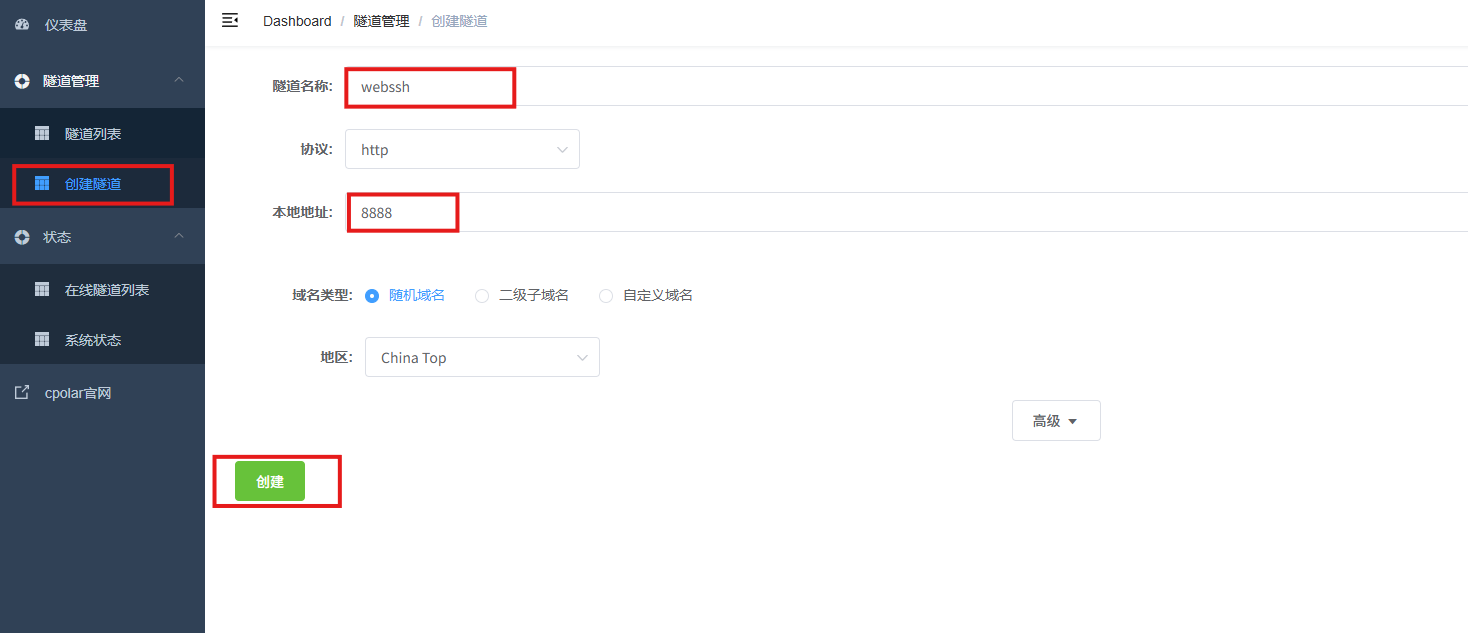
**AI Visual Insight:** This image shows the parameter configuration page for creating a WebSSH tunnel. It indicates that the public entry point has been mapped to local port 8888, which is ideal for quickly generating an external access URL.
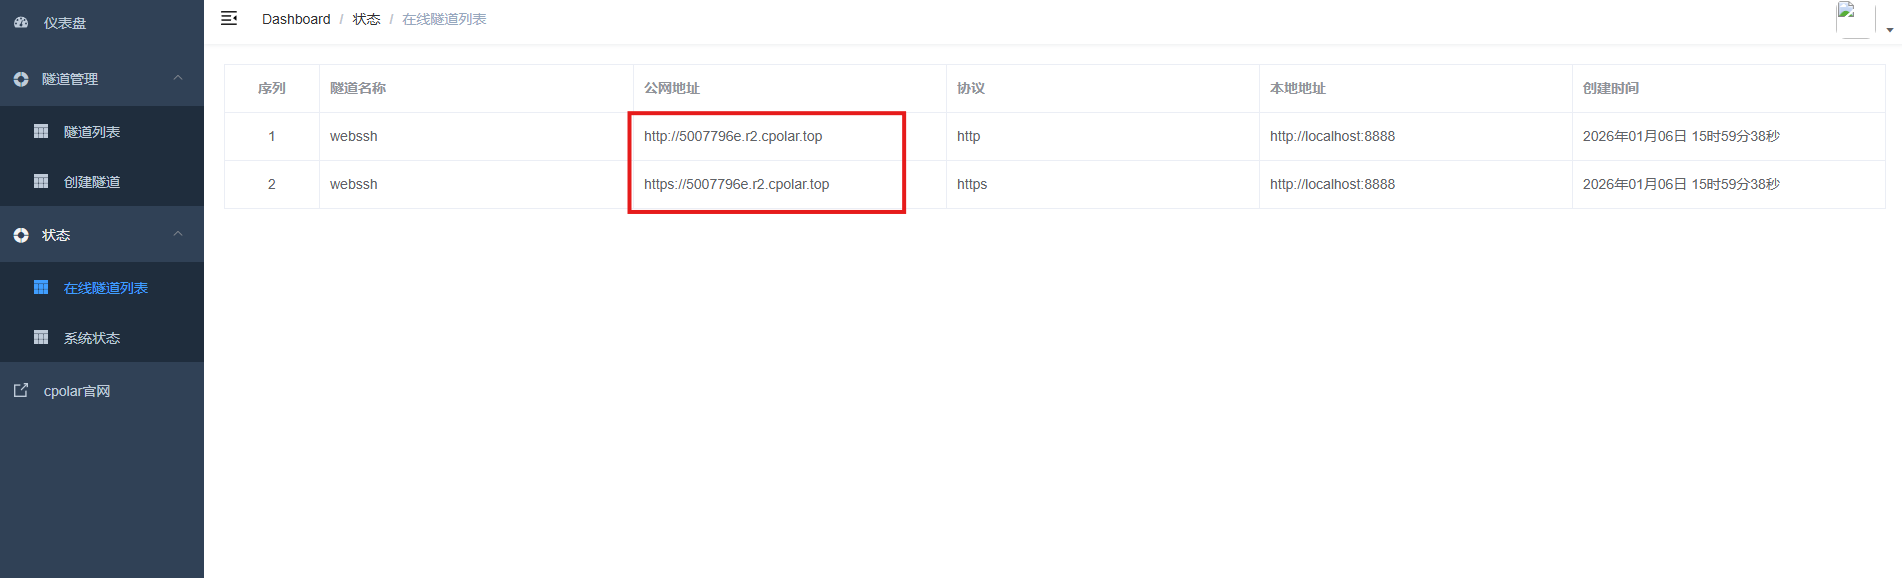
**AI Visual Insight:** This image shows the generated public address in the online tunnel list. It means WebSSH has moved from a LAN-only service to a remotely reachable entry point across networks.
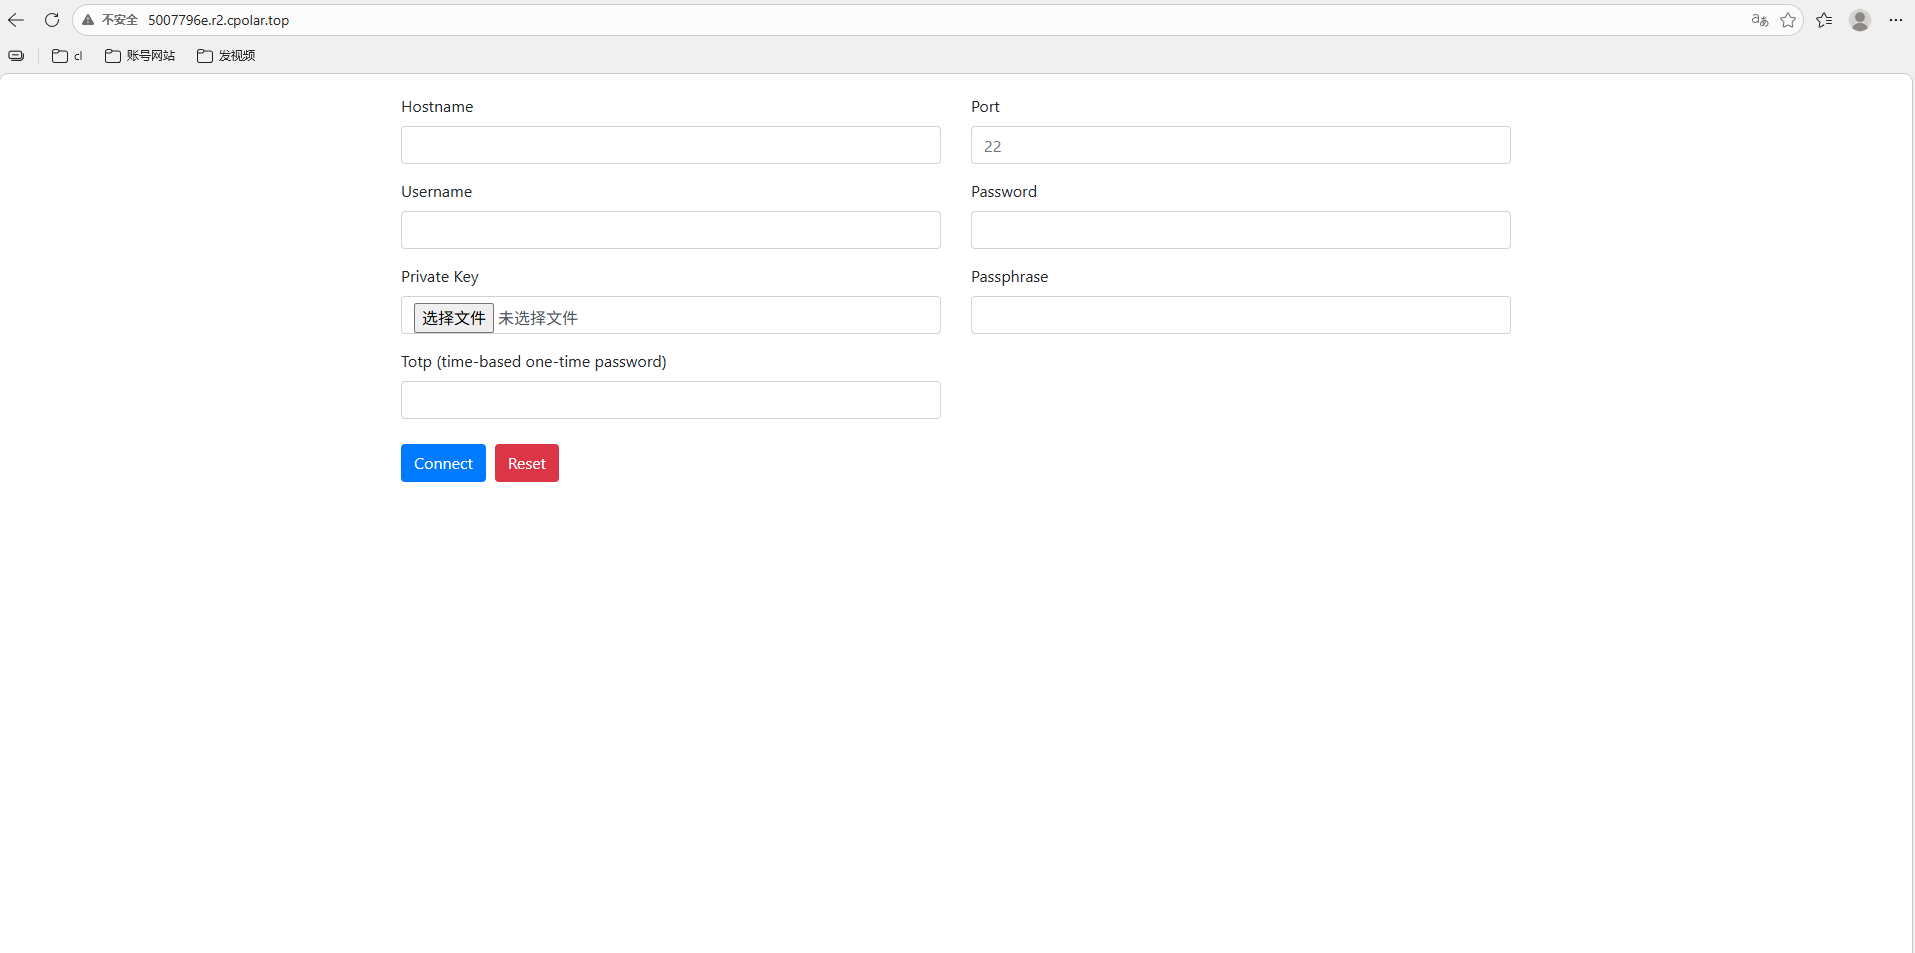
**AI Visual Insight:** This image shows WebSSH opening successfully through the public address, confirming that the browser-based terminal access path now works end to end across networks.
## Fixed subdomain configuration upgrades temporary access into a maintainable long-term entry point
Random URLs are fine for testing, but they are not ideal for long-term operations. If you want to use the browser terminal as a persistent entry point, bind a reserved second-level subdomain to the cpolar tunnel so the address does not keep changing.
**AI Visual Insight:** This image shows cpolar’s reserved domain capability. It demonstrates how a public endpoint can move from a random URL to a fixed identifier, which is much better for team sharing and documented maintenance.
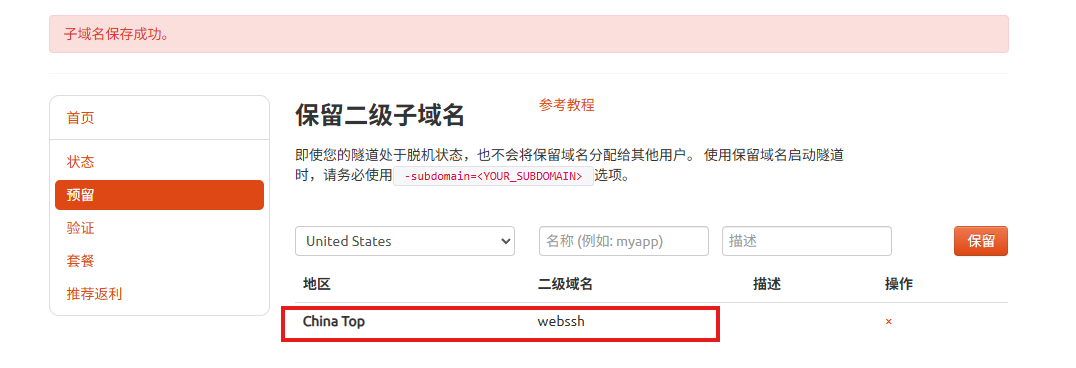
**AI Visual Insight:** This image shows the form used to reserve a second-level subdomain. The key detail is that the region and subdomain name must stay consistent with the tunnel configuration you apply later.
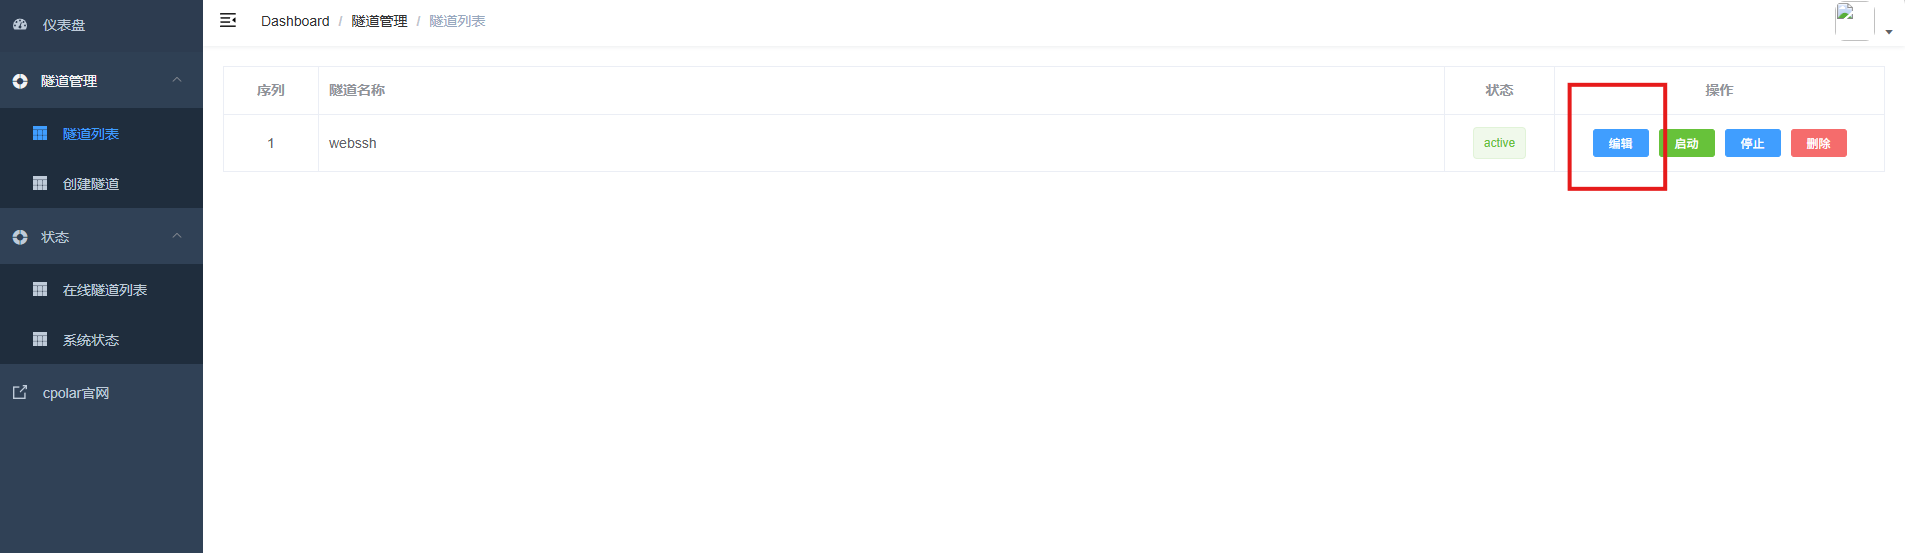
**AI Visual Insight:** This image shows an existing tunnel being edited to apply a fixed subdomain. It indicates that the original random public endpoint has been replaced with a more stable named access method.
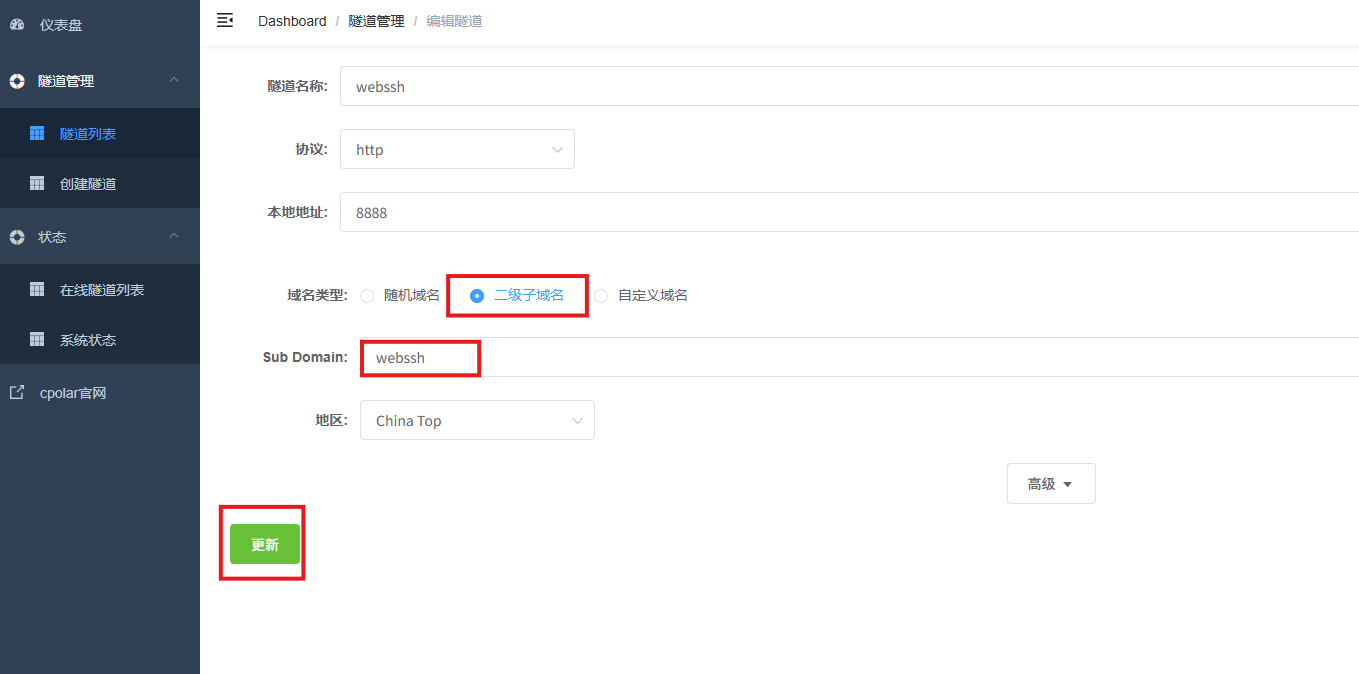
**AI Visual Insight:** This image shows the confirmation page after the tunnel configuration is updated, which means the fixed subdomain has been bound successfully to the local WebSSH service.
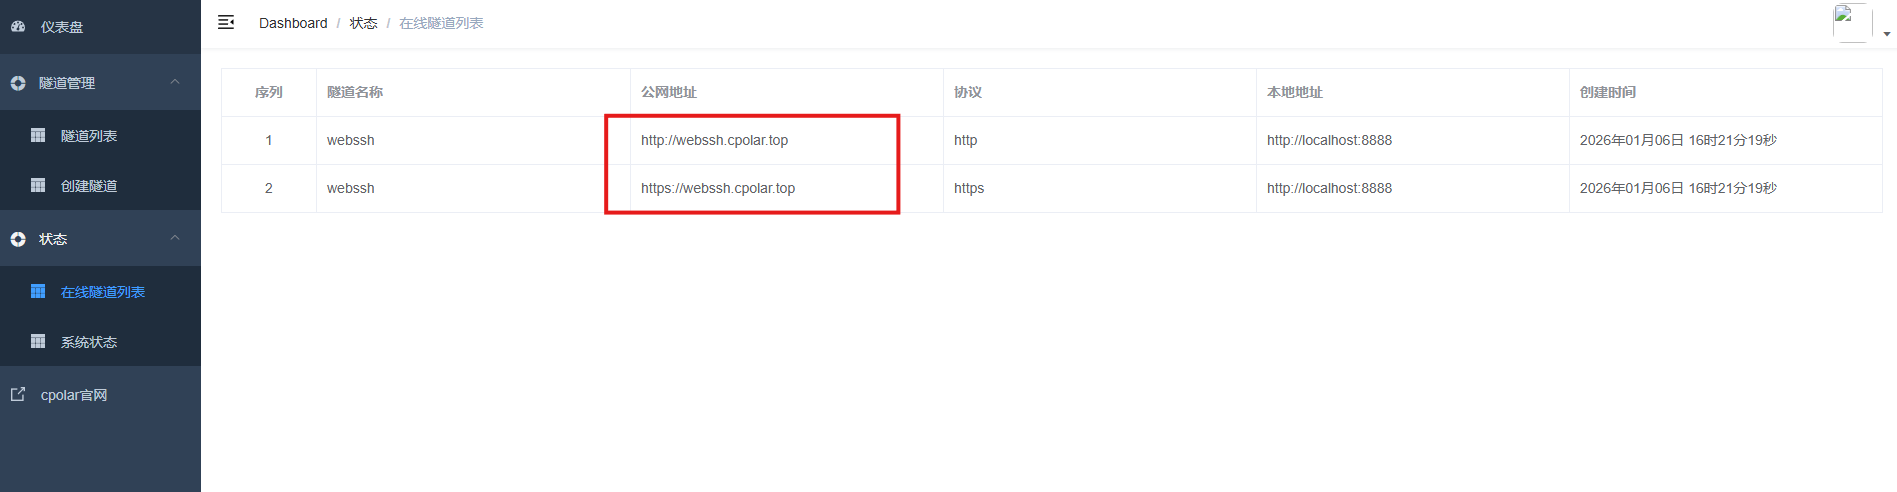
**AI Visual Insight:** This image shows the updated online tunnel list. It confirms that the public address has changed from a random URL to a fixed subdomain, making it easier to remember and distribute over time.
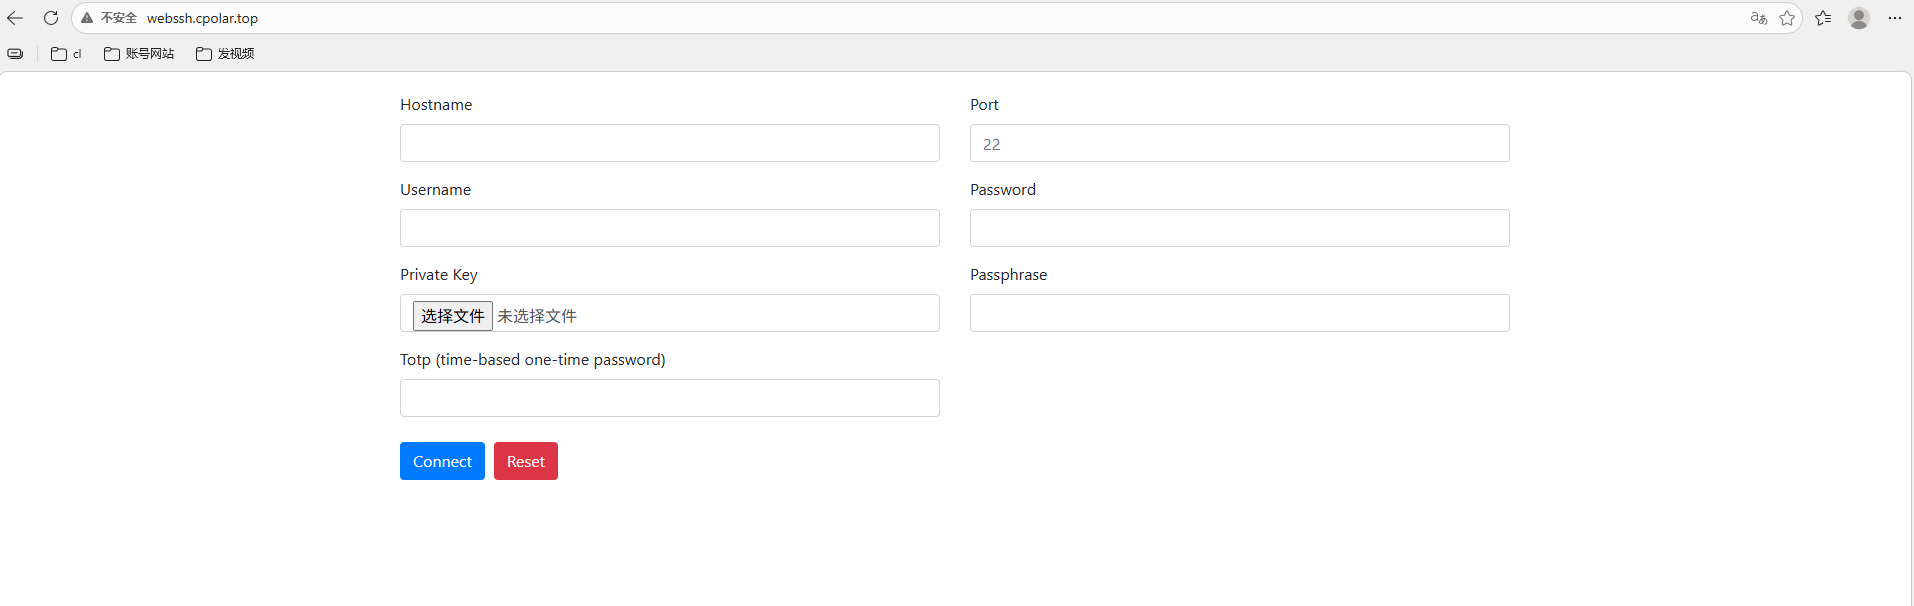
**AI Visual Insight:** This image shows the final result of accessing WebSSH through a fixed public address, proving that the solution now supports stable cross-device remote terminal access for long-term use.
### The solution works, but you must add a security layer before exposing it publicly
WebSSH starts with HTTP by default, which is not suitable for direct public exposure. At a minimum, you should add HTTPS, access authentication, source restrictions, or a reverse proxy. Otherwise, the terminal entry point becomes a potential attack surface.
At the same time, URL-based auto-login improves convenience, but even if the password is Base64-encoded, it is still not encrypted. A safer approach is to use this feature only for short-lived scenarios and rotate credentials immediately after the session ends.
“`bash
# Minimum security recommendations
# 1. Add an HTTPS reverse proxy in front of the public endpoint
# 2. Disable long-lived credential links in plain text
# 3. Enable strong passwords or key-based authentication for host SSH
# 4. Restrict allowed source IP addresses
“`
This checklist reminds deployers that convenience should never come at the cost of remote access security.
## FAQ
### Q1: Can WebSSH completely replace a local SSH client?
A: For daily inspections, emergency logins, and lightweight operations, it can cover most needs. But for advanced use cases such as batch scripting, port forwarding, and complex key management, a local client is still more flexible.
### Q2: Why use cpolar at all? Can’t I just open port 8888 directly?
A: In theory, yes. But that assumes you already have a public IP address, router configuration control, and the ability to secure the exposed service properly. cpolar simplifies public exposure and is better suited for home networks, NAS deployments, and temporary remote access scenarios.
### Q3: Why is URL-based auto-login not recommended for long-term use?
A: Because credentials can appear in shared links, browser history, logs, or collaboration records. Base64 is encoding, not encryption, so using this approach long term significantly increases the risk of credential leakage.
## Core Summary
This article reconstructs the deployment workflow for WebSSH and cpolar and explains how to quickly build a browser-based SSH terminal in Linux environments such as ZSpace. It also shows how to gain public access through tunneling. The guide focuses on installation, startup, tunnel configuration, fixed domain binding, and critical security considerations.