Lanhu MCP lets developers start the
lanhu-mcpservice using only a Lanhu cookie, then connect Claude and Codex to read design files, analyze pages, and generate requirements documents. It solves a core limitation: AI tools cannot directly understand content locked inside Lanhu. Keywords: Lanhu MCP, Claude, Codex.
Technical Specifications Snapshot
| Parameter | Description |
|---|---|
| Project name | lanhu-mcp |
| Primary language | Python 3.10+ |
| Protocol | HTTP / MCP |
| Runtime port | 8000 |
| Clients | Claude, Codex |
| Core dependencies | playwright, uvicorn, Python venv |
| Repository | dsphper/lanhu-mcp |
| Star count | Not provided in the source |
Lanhu MCP Connects the Design System to the AI Workflow
The goal of Lanhu MCP is straightforward: allow AI clients to directly read Lanhu projects, pages, design files, and comments so they can understand requirements, analyze screens, and produce documentation. For engineering, QA, and product collaboration, it effectively serves as a bridge from design assets to AI agents.
The biggest pain point in the original workflow is that Lanhu content is typically sealed inside a web interface, which prevents AI from consistently accessing structured context. lanhu-mcp solves this by using cookie-based authentication and exposing capabilities through MCP, turning Lanhu pages into a set of queryable, analyzable, and orchestratable tools.
The Cookie Retrieval Flow Is the Only Required Input Before Startup
First, sign in to the Lanhu web app. Then open your browser developer tools and copy the full Cookie value from the Request Headers of any Fetch/XHR request. The original article emphasizes that the token mentioned in the guide is actually the full cookie string.
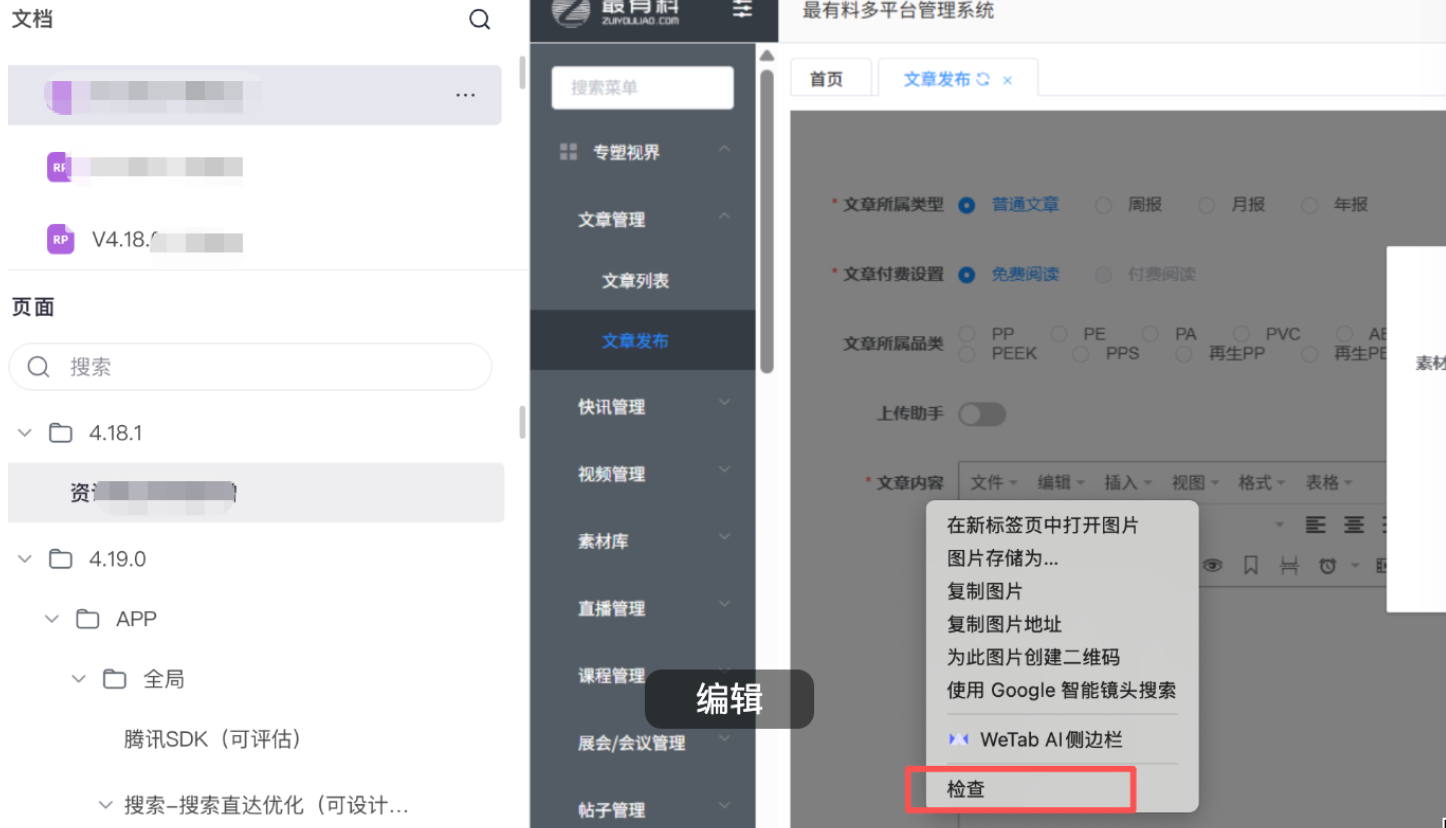 AI Visual Insight: This image shows the main browser developer tools interface and highlights the first step: after logging in to Lanhu, open the debugging panel so you can extract authentication data from network requests.
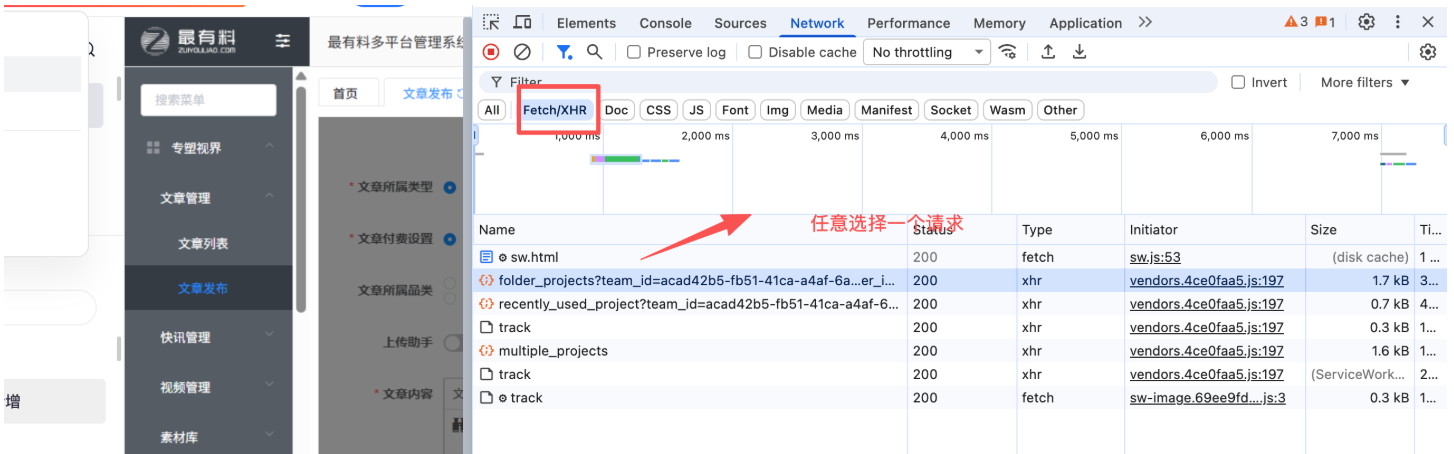 AI Visual Insight: This image focuses on the
 Network panel and its Fetch/XHR request list, showing that you should capture headers from real application requests rather than infer credentials indirectly from page scripts or browser storage.
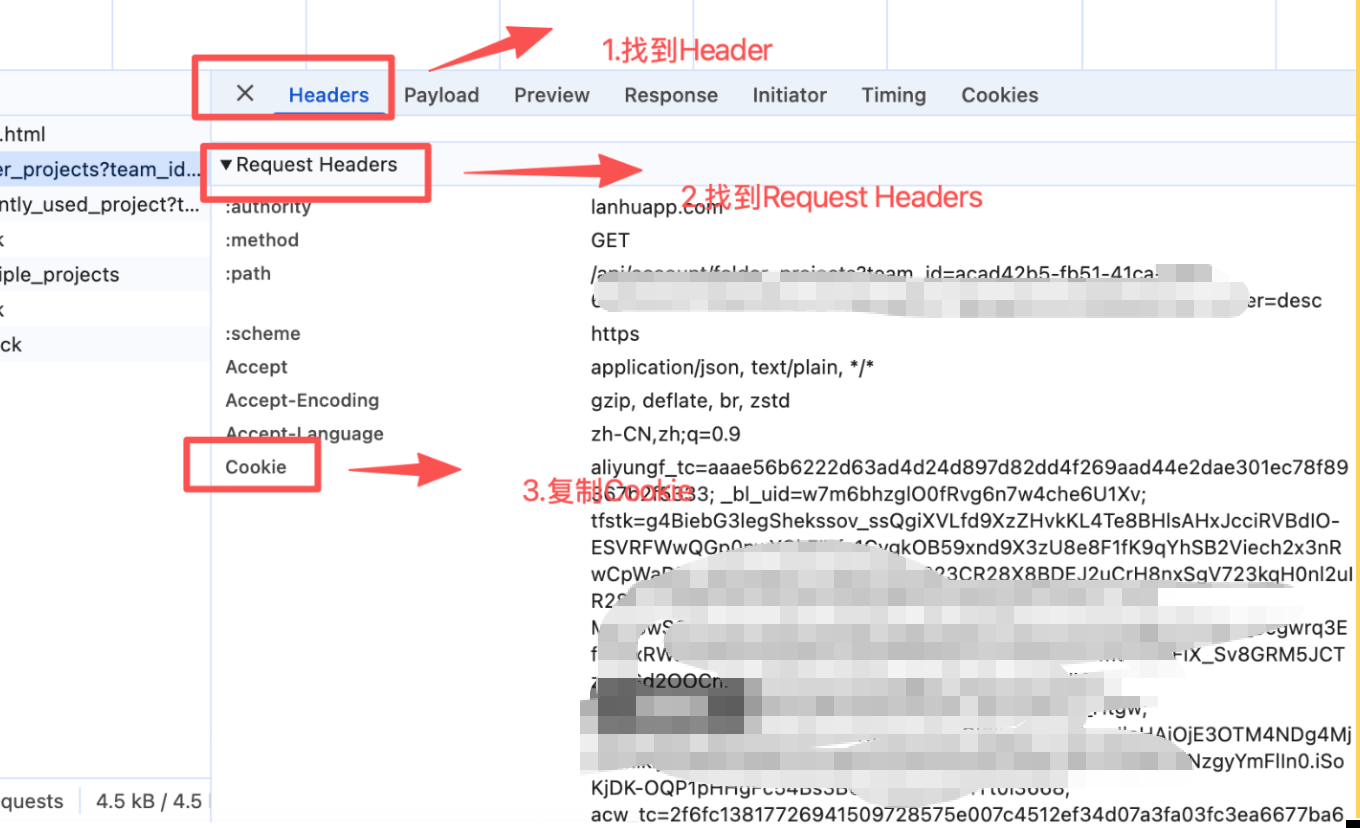 AI Visual Insight: This image shows the
 Request Headers section in the request details view. The key action is to copy the full Cookie field and later write it into LANHU_COOKIE in .env.
export PROJECT_DIR="$HOME/path/to/your-project"   # Business project directory
export LANHU_MCP_DIR="$HOME/lanhu-mcp-main"      # Local lanhu-mcp directory
This snippet pins both the business project directory and the MCP service directory to avoid path confusion later.
The Initial Installation Should Complete Environment Setup, Dependencies, and Configuration in One Pass
On the first machine setup, you need to verify the Python, npm, and git versions, clone the repository, copy the .env template, write the Lanhu cookie, and install both Python and Playwright dependencies. The critical factor is not the number of commands, but the order in which you run them.
python3 --version   # Check the Python version
npm -v              # Check the Node.js environment
git --version       # Check the Git environment

[ -d "$LANHU_MCP_DIR" ] || git clone https://github.com/dsphper/lanhu-mcp.git "$LANHU_MCP_DIR"
cd "$LANHU_MCP_DIR"
cp -f .env.example .env

export LANHU_TOKEN='Replace this with your Lanhu cookie'  # Write the full cookie
if grep -q '^LANHU_COOKIE=' .env; then
  sed -i '' "s|^LANHU_COOKIE=.*|LANHU_COOKIE=\"${LANHU_TOKEN}\"|" .env  # Overwrite the existing value
else
  printf '\nLANHU_COOKIE="%s"\n' "${LANHU_TOKEN}" >> .env                # Append a new value
fi

python3 -m venv venv                     # Create a virtual environment
source venv/bin/activate                 # Activate the virtual environment
python -m pip install -U pip setuptools  # Upgrade base tooling
pip install -r requirements.txt          # Install project dependencies
python -m playwright install chromium    # Install the browser runtime
This sequence completes repository initialization, credential injection, and runtime dependency installation. It is the standard entry point for a first-time deployment.
Starting the Service in the Business Directory Helps Avoid Permission Issues
The original article specifically notes that lanhu-mcp writes to the relative path data/messages. If you previously started it with sudo, the directory owner may have become root, causing normal users to hit PermissionError when writing data.
For that reason, the best practice is to start the service inside the business project directory and create the message directory in advance. This binds the runtime context to the project assets and also makes collaboration with Claude, Codex, and project files easier.
cd "$PROJECT_DIR"          # Switch to the business project directory
mkdir -p data/messages      # Pre-create the message persistence directory

export LANHU_COOKIE="$(awk -F'"' '/^LANHU_COOKIE=/{print $2}' "$LANHU_MCP_DIR/.env")"  # Read the cookie
export SERVER_PORT=8000     # Set the listening port

"$LANHU_MCP_DIR/venv/bin/python" "$LANHU_MCP_DIR/lanhu_mcp_server.py"  # Start the MCP service
This snippet starts the service inside the business directory and reuses the Lanhu credentials already saved in .env.
After a successful startup, the log should include the following marker:
Uvicorn running on http://0.0.0.0:8000This means the HTTP service is now exposing the MCP endpoint correctly.
Claude and Codex Connect Through the Local HTTP MCP Endpoint
Once the service is running, both Claude and Codex can register the same local MCP address. The original example uses query parameters such as role and name to define the connection context.
claude mcp remove lanhu >/dev/null 2>&1 || true
claude mcp add --transport http lanhu "http://localhost:8000/mcp?role=测试&name=Lucas"  # Connect Claude
claude mcp list

codex mcp remove lanhu >/dev/null 2>&1 || true
codex mcp add lanhu --url "http://localhost:8000/mcp?role=测试&name=Lucas"                # Connect Codex
codex mcp list
This registers the local Lanhu MCP service in both AI clients and completes the toolchain integration.
The lanhu-requirements-doc Skill Generates Requirements Documents Directly from Design Links
After integration, the most practical capability is lanhu-requirements-doc. It supports two scenarios: scanning a single page when the URL includes pageId, and scanning all pages in a version when pageId is omitted. Output files follow the naming pattern Requirements-[Project Name]-[Page Name]-[YYYYMMDD].md or the full version name for bulk output.
For Claude, the skill files are located under .claude/skills/lanhu-requirements-doc/ in the project root. For Codex, they are located under $CODEX_HOME/skills/lanhu-requirements-doc/. If Codex does not expose Slash Skills, you can invoke the same rule chain through an equivalent prompt.
/lanhu-requirements-doc https://lanhuapp.com/web/#/item/project/product?...&docId=...&pageId=...

$lanhu-requirements-doc https://lanhuapp.com/web/#/item/project/product?...&docId=...
These commands trigger Lanhu link recognition, page analysis, and template-based requirements document generation.
Lanhu MCP Covers the Full Loop of Reading, Analysis, and Collaboration
Based on the source material, Lanhu MCP does more than read pages. It covers invite link parsing, page list retrieval, design file list retrieval, AI-based page association analysis, design slice retrieval, and full comment CRUD operations. That means AI is not limited to passively looking at designs; it can participate in real collaboration workflows.
The most important tools include lanhu get pages, lanhu get designs, lanhu_get_ai_analyze_design, lanhu get design_slices, lanhu_say, and lanhu get members. These interfaces give engineering, QA, and product teams a shared data source for design reviews and requirements capture.
Most Common Failures Come from Permissions, Environment Versions, and Sandbox Restrictions
From a troubleshooting perspective, the most common problems fall into four categories: configuration files are not writable, data/messages lacks write permission, the Python version is too old, or the codex exec sandbox blocks the MCP call chain. If you hit ResolutionImpossible, deleting the old venv and recreating it is usually the fastest fix.
For a quick acceptance check, confirm only four things: the service log shows Uvicorn running, claude mcp list shows lanhu, codex mcp list shows lanhu, and a Lanhu link successfully completes one lanhu-requirements-doc run.
FAQ
Q1: What is the minimum required input to run Lanhu MCP?
A: The minimum input is a valid full Lanhu Cookie. Once you write it to LANHU_COOKIE in .env, you can start lanhu-mcp.
Q2: Why should I start the service in the business directory instead of directly in the repository directory?
A: Because the service writes to the relative path data/messages. Starting it in the business directory helps avoid permission drift and keeps message data aligned with the project context.
Q3: Is there a big difference between connecting Claude and Codex?
A: Not really. Both connect through the same local HTTP MCP endpoint, and only the command syntax differs slightly. Claude requires --transport http, while Codex uses --url.
AI Readability Summary
This article reconstructs the installation, startup, integration, and troubleshooting flow for Lanhu MCP. It focuses on how to bring up lanhu-mcp quickly with only a Lanhu cookie, then use Claude and Codex to read design files and generate requirements documents. It is especially useful for developers who want to connect Lanhu design assets, AI agents, and engineering workflows.