This guide explains how to deploy Plex on a Synology NAS and use cpolar to enable remote access without a public IP. The setup addresses three common pain points: finding media, managing playback across devices, and exposing services externally. It is well suited for home media management and lightweight private streaming use cases. Keywords: Synology NAS, Plex, cpolar.
This is a lightweight private streaming solution designed for home media management
| Parameter | Description |
|---|---|
| Deployment platform | Synology NAS / DSM 7.x |
| Core application | Plex Media Server |
| Remote access protocol | HTTP (example), extensible to HTTPS |
| Default service port | 32400 |
| Core dependencies | Plex, cpolar, Synology Package Center |
| Operating mode | GUI-based installation, no command line required |
| Star count | Not provided in the original article |
The core value of this solution is not simply storing media files. It transforms scattered media assets into a searchable, browsable, and cross-device streaming service. Plex handles media cataloging, metadata scraping, and the unified playback interface. Synology NAS provides reliable storage, while cpolar securely maps local services to a publicly accessible endpoint.
Compared with searching for videos directly in folders, this approach feels much closer to a self-hosted version of Netflix. Poster walls, summaries, categories, and cross-device playback significantly reduce media management overhead, especially for households with larger collections and a mix of device types.
The image below shows the original solution overview cover
 AI Visual Insight: This image introduces the overall “Synology + Plex + Remote Access” scenario. It highlights the shift from local disk-based media files to a unified streaming interface, where the NAS acts as the media source and Plex serves as the presentation and playback layer.
Installing Plex on Synology is straightforward and beginner-friendly
In DSM, open Package Center, search for Plex, and complete the installation. The process is essentially a standard graphical wizard: search, install, next, finish. For users who are not familiar with Docker or manual deployment, this path has the lowest learning curve.
After installation, Plex opens as a web interface. On the first launch, you mainly need to complete two steps: link your account and define the server name. The server name should include a device identifier or household context, such as home-plex-ds3622, so you can recognize it easily later during remote access.
# The default Plex port on Synology is usually 32400
# If you need to troubleshoot access inside the LAN, first verify that the port is reachable
curl http://127.0.0.1:32400/web
This command verifies whether the Plex web service is responding correctly on the local port.
The images below show the Plex installation entry in Synology Package Center
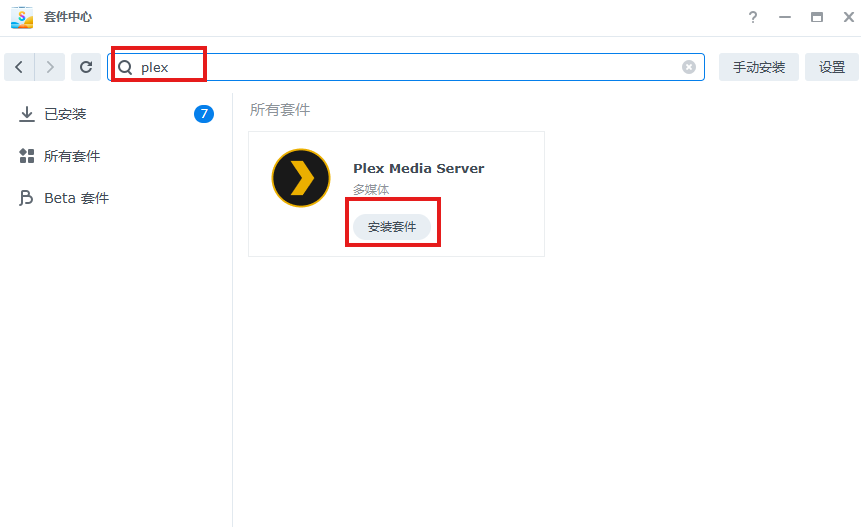 AI Visual Insight: This image demonstrates the application distribution model of DSM Package Center. It shows that Plex can be installed directly as a standard package, without requiring users to manually manage containers, dependencies, or service daemon configuration.
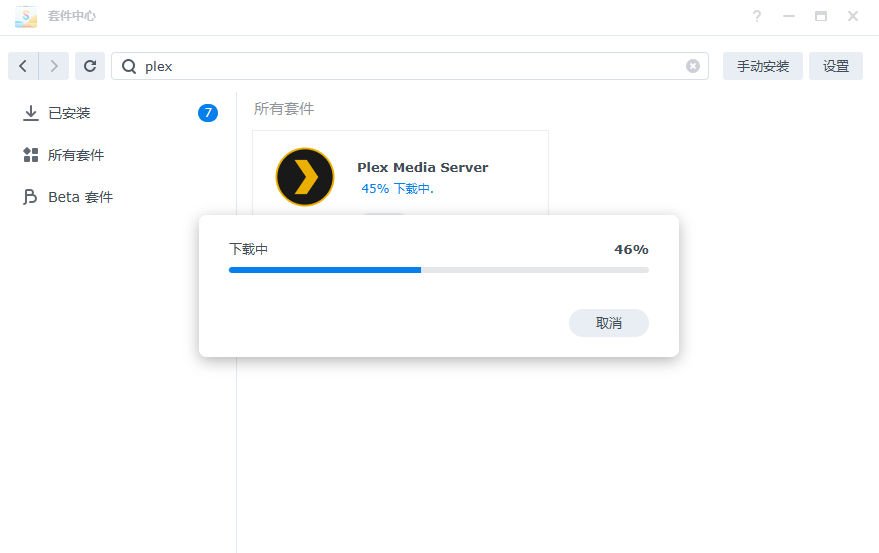 AI Visual Insight: This screen shows that the installation wizard has already identified the target package. The user only needs to proceed step by step, reflecting Synology’s mature integration model for third-party media services.
The real Plex experience depends on library organization and naming conventions
Installation is easy. What really determines the user experience is the media library configuration. Plex scans directories and attempts to match posters, summaries, subtitles, and category data. If file names are inconsistent, matching accuracy drops noticeably. For that reason, it is best to adopt a normalized naming convention such as Movie Title (Year).
The original workflow first demonstrates adding a photo library to validate the basic functionality, then expands to video libraries. This is a practical method: first confirm that scanning, rendering, and access all work correctly, then bulk-import movies and TV shows. That approach reduces troubleshooting complexity.
library:
  type: movie        # Library type. Options include movie/show/photo
  path: /volume1/media/movies  # Use a dedicated directory for movie management
  naming: "Movie Title (Year)"   # Standardized naming improves metadata matching accuracy
  quality: original  # Prefer original quality inside the local network
This configuration illustrates the basic organizational principles of a high-quality Plex media library.
The images below show the key steps for adding a media library and browsing directories
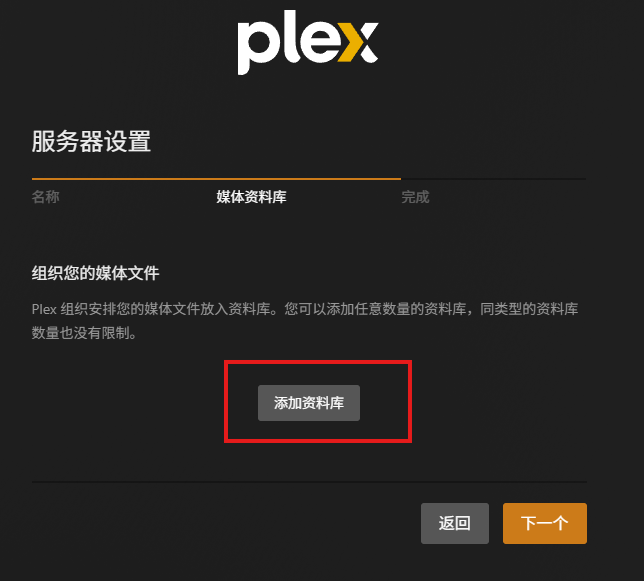 AI Visual Insight: This interface shows that Plex abstracts content into library objects. Different media types use different metadata scraping strategies, which is one of the platform’s core advantages over a standard file browser.
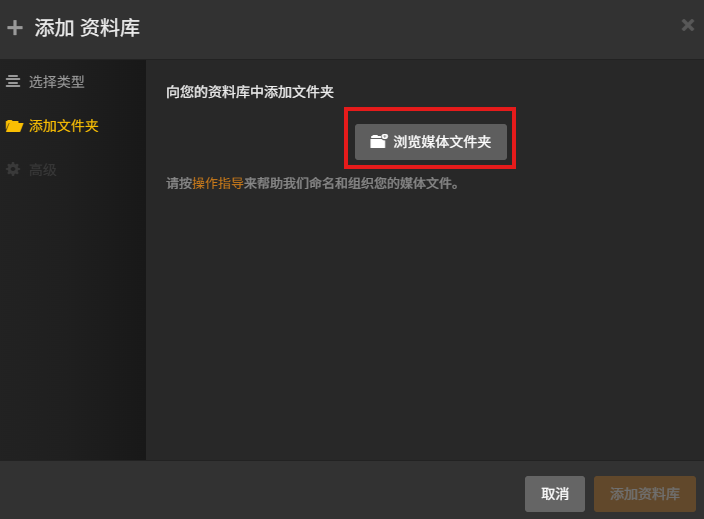 AI Visual Insight: This image shows the media directory mapping process. In essence, it binds physical paths in the NAS file system to Plex logical libraries so that scanning, indexing, and poster-wall generation can happen later.
Remote access turns Plex from a local player into a private streaming platform
Using Plex only inside the local network is just the first stage. The real improvement comes when you can still access your home media library from the office, a hotel, or a mobile network. Traditional methods often depend on a public IP address, port forwarding, and router policies, which are more complex to configure and maintain.
The value of cpolar is that it exposes the local port 32400 through a tunnel and provides a public entry point, eliminating the need to obtain a public IP or manually configure router mappings. For typical home networks, this is a much more practical remote-access path.
# Creating a public mapping really requires only three key parameters
# 1. Protocol 2. Local port 3. External access domain
local_port=32400   # Default Plex service port
protocol=http      # This example uses HTTP; evaluate HTTPS for production
region=ChinaTop    # Choose the access region based on your network environment
This example highlights the minimum set of parameters required for remote-access configuration.
The images below show cpolar installation on Synology and its Web UI entry
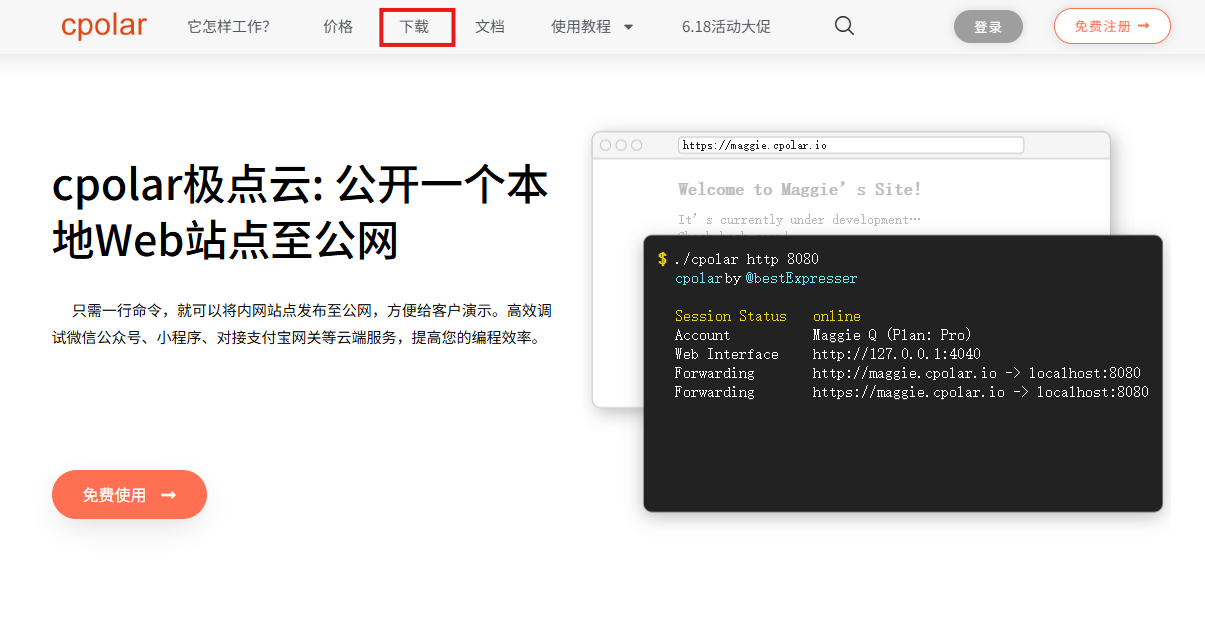 AI Visual Insight: This image shows that cpolar provides a dedicated distribution entry for NAS platforms, which implies that its installation package has already been adapted for Synology architecture and DSM versions.
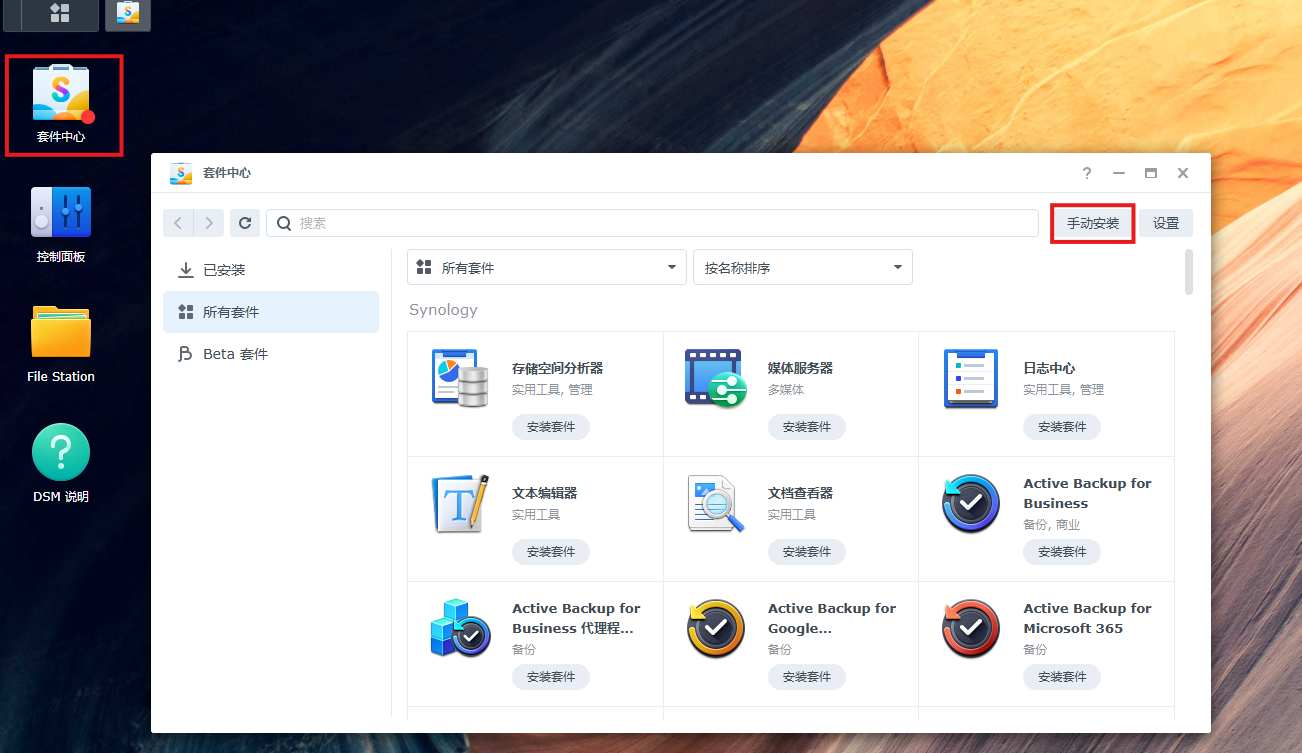 AI Visual Insight: This interface reveals the standard integration method for third-party Synology packages: manual installation through an
 .spk package, allowing non-official repository applications to be managed within DSM.
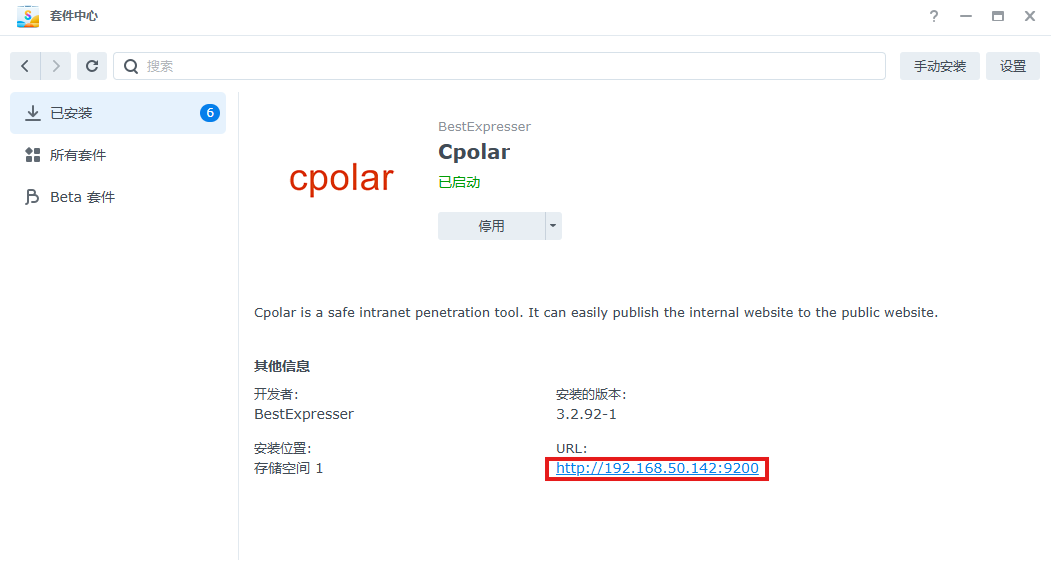 AI Visual Insight: This image shows that cpolar uses a Web UI as its control plane. Users can create tunnels, view public addresses, and inspect service status directly in the browser, which lowers the barrier to internal network tunneling.
A fixed subdomain is more suitable for long-term use than a random address
A random address is fine for quickly validating connectivity, but it is not ideal for bookmarks, sharing with family members, or integrating with third-party players. A better long-term approach is to reserve a subdomain and bind that subdomain to the Plex tunnel.
This delivers three clear benefits: a stable address, lower memory burden, and a consistent access entry for the whole household. It is especially useful in multi-device environments, such as TV browsers, tablets, and phones, because users do not need to update the access URL repeatedly.
Tunnel Name: plex
Protocol: http
Local Address: 32400
Domain Type: Subdomain
Region: China Top
Sub Domain: your-plex-name
These parameters are enough to create a remote access entry point that you can reuse over time.
The images below show tunnel creation and fixed domain binding results
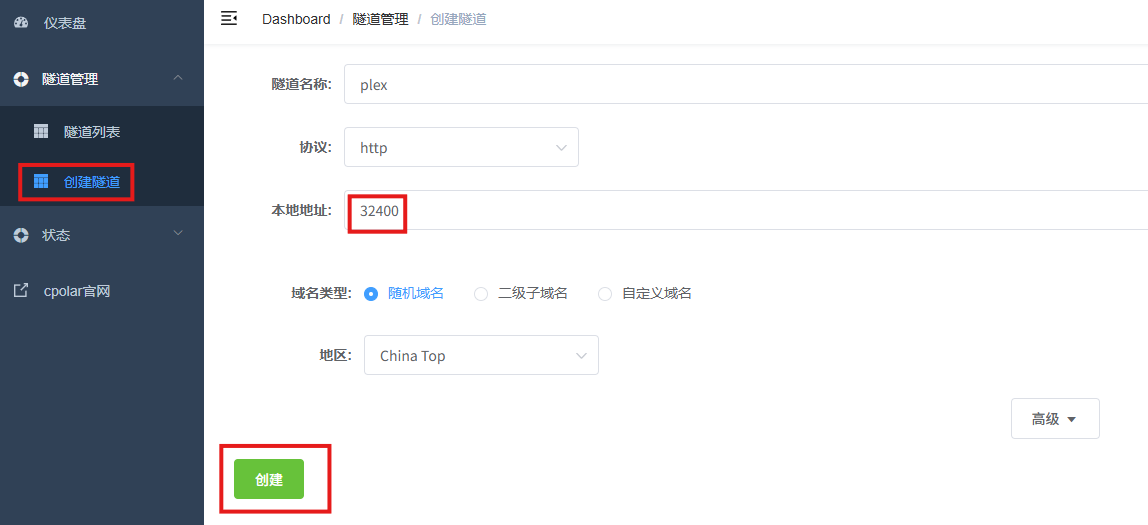 AI Visual Insight: This interface reflects a typical reverse-proxy tunnel configuration model: map a local service port to a cloud-side entry address so users do not need to deal with NAT or home network boundaries directly.
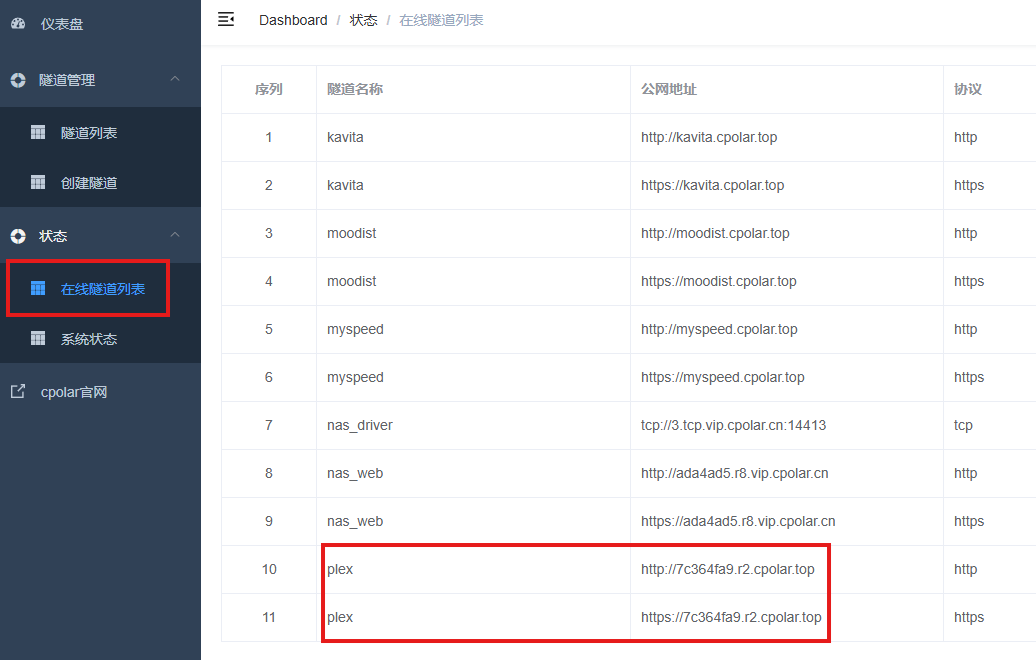 AI Visual Insight: This image shows the generated public access address, indicating that the tunnel has been established successfully and that external devices can now use the endpoint to reach the Plex service inside the NAS.
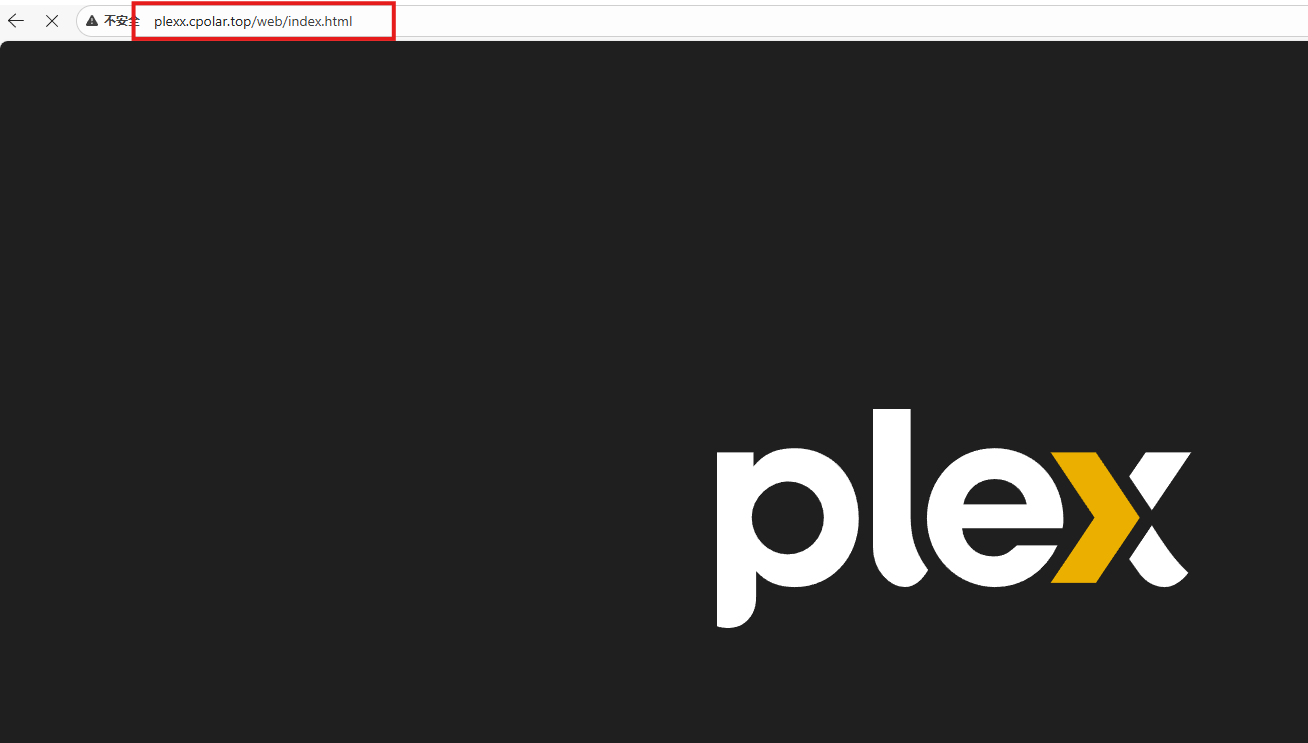 AI Visual Insight: This image represents the final delivered state: accessing the Plex page from the public internet through a fixed subdomain. It confirms that service discovery, tunnel forwarding, and application-layer response are all working end to end.
This solution is ideal for getting started, but you should understand its performance and experience limits
The advantages are clear: a low deployment barrier, a polished interface, efficient media management, and simple remote-access enablement. For users who already own a Synology NAS, this is one of the lowest-cost and most immediately rewarding upgrades for home media consumption.
The limitations are equally concrete. First, poor naming conventions reduce scraping quality. Second, lower-performance NAS models can slow down during scanning and transcoding. Third, free tunneling bandwidth is limited, so high-bitrate 4K playback over the public internet may stutter.
Practical recommendations and target users
If your goal is to organize an existing media collection efficiently and play it across multiple devices at home, this solution is more than practical enough. If you also need high concurrency, multiple users, hardware transcoding, and stable 4K external streaming, you should further evaluate the NAS CPU, GPU capabilities, Plex Pass, and a more robust public-access architecture.
FAQ
Q1: Do I need Docker to deploy Plex on Synology?
No. The original solution installs Plex directly from Synology Package Center, which is suitable for most beginners. Docker is more appropriate only when you need strict version control, complex dependency isolation, or advanced customization.
Q2: Why did Plex install successfully, but posters and metadata still match poorly?
The main reason is usually inconsistent naming. Use a standardized format such as Movie Title (Year) or Show Name/Season 01, and separate movies, TV shows, and photos into different directories. This will significantly improve metadata recognition accuracy.
Q3: Can cpolar fully replace a public IP and router port forwarding?
For most home remote-access scenarios, yes. It can quickly open the access path. However, for use cases that require higher bitrates, lower latency, and stronger long-term stability, a public IP, reverse proxy, and HTTPS architecture still offer a higher ceiling.
[AI Readability Summary]
This article reconstructs a complete solution for deploying Plex on a Synology NAS and combining it with cpolar for remote access. It covers installation, media library configuration, internet exposure, fixed subdomains, and practical experience trade-offs, helping you build a private cross-device streaming center with a low setup barrier.