This article focuses on the practical use of Swagger / SpringDoc in Spring Boot: automatically generating API documentation, standardizing response structures, improving frontend-backend integration efficiency, and enabling online debugging. It addresses three core pain points: outdated documentation, scattered API descriptions, and disconnected testing workflows. Keywords: Swagger, SpringDoc, API Documentation.
Technical Specifications Snapshot
| Parameter | Description |
|---|---|
| Core Language | Java |
| Framework | Spring Boot |
| Documentation Standard | OpenAPI 3 |
| Primary Protocols | HTTP / JSON |
| Core Dependency | springdoc-openapi-starter-webmvc-ui:2.2.0 |
| Documentation Entry Point | /swagger-ui/index.html |
| Applicable Scenarios | Frontend-backend separation, microservice API governance |
| GitHub Stars | Not provided in the source |
Unified API documentation significantly reduces collaboration costs
In frontend-backend separated projects, API documentation that depends on manual maintenance tends to become inaccurate very quickly. Once the backend changes a field while the frontend still parses the old structure, integration efficiency drops immediately.
The value of Swagger goes beyond simply displaying APIs. It returns documentation ownership to the code. API definitions, parameter descriptions, response structures, and testing entry points become part of one sustainably maintainable workflow.
A unified response model is the starting point of API governance
If every API returns a different structure, the frontend must maintain multiple parsing logics, and error handling cannot be reused. A more reliable approach is to define a unified response body `R
` first. “`java public class R { private int code; // Business status code private String msg; // Response message private T data; // Business data } “` This code defines a unified response wrapper, making it easier for Swagger to generate a consistent response structure across all APIs. ### Business status codes fit complex systems better than raw HTTP status codes HTTP status codes work well for transport-layer results, but they cannot fully express business semantics. Real-world projects usually need finer-grained status definitions, such as user not found, parameter validation failed, or unauthorized access. “`java @Getter @AllArgsConstructor public enum ResultCode { SUCCESS(1000, “Operation successful”), ERROR(2000, “The service is busy. Please try again later”), FAILED(3000, “Operation failed”), FAILED_UNAUTHORIZED(3001, “Unauthorized”), FAILED_PARAMS_VALIDATE(3002, “Parameter validation failed”), FAILED_NOT_EXISTS(3003, “Resource does not exist”), FAILED_ALREADY_EXISTS(3004, “Resource already exists”), FAILED_USER_EXISTS(3101, “User already exists”), FAILED_USER_NOT_EXISTS(3102, “User does not exist”); private final int code; // Unified business code private final String msg; // Unified message } “` This code standardizes business exception semantics, making response outcomes easier to declare precisely in the documentation. ## SpringDoc is the more modern Swagger implementation for Spring Boot Swagger is often used as a general term, but in actual Spring Boot 3 projects, the mainstream practice is usually SpringDoc. It implements the OpenAPI specification, automatically scans Controllers, parameters, and model definitions, and generates interactive documentation. Compared with earlier solutions, SpringDoc provides more direct support for the newer Spring ecosystem, uses lighter dependencies, and reduces maintenance costs. For teams that want to adopt OpenAPI 3 quickly, it is the more practical choice. ### Adding the dependency is the first step to integrating a documentation system First, add the SpringDoc dependency in a shared module or in the current service: “`xml org.springdoc springdoc-openapi-starter-webmvc-ui 2.2.0 “` This configuration enables OpenAPI document generation and the Swagger UI page. ### Configuring OpenAPI metadata improves document discoverability Adding the dependency alone is not enough. It is best to explicitly declare the document title, description, and version so that multiple services can be distinguished more easily. “`java import io.swagger.v3.oas.models.OpenAPI; import io.swagger.v3.oas.models.info.Info; import org.springframework.context.annotation.Bean; import org.springframework.context.annotation.Configuration; @Configuration public class SwaggerConfig { @Bean public OpenAPI openAPI() { return new OpenAPI() .info(new Info() .title(“Online OJ System”) // Set the document title .description(“API documentation for the Online OJ System”) // Set the document purpose .version(“v1”)); // Set the document version } } “` This code adds project-level metadata to the generated API documentation, making team identification and version management easier. ### Auto-configuration makes a shared documentation module reusable If you package Swagger configuration into a shared module, it is better to let business services activate it automatically after adding the dependency, instead of copying the configuration class into every service. “`text com.site.common.swagger.config.SwaggerConfig “` After writing the fully qualified class name into `META-INF/spring/org.springframework.boot.autoconfigure.AutoConfiguration.imports`, you can reuse the documentation capability through auto-configuration. ## Annotations turn API documentation from usable into readable Automatic scanning can generate only the basic skeleton. Truly high-quality API documentation still depends on annotations to complete the business semantics. The key areas are grouping, endpoint descriptions, response codes, and parameter location descriptions. ### `@Tag` establishes controller-level grouping “`java @RestController @RequestMapping(“/sysUser”) @Tag(name = “Admin User API”) // Group the controller for better UI clustering public class SysUserController { } “` This code groups APIs by business domain, making Swagger UI easier for multiple team members to navigate. ### `@Operation` and `@ApiResponse` define capability boundaries precisely “`java @Operation(summary = “Create admin user”, description = “Create a new administrator user based on the provided information”) @PostMapping(“/add”) @ApiResponse(responseCode = “1000”, description = “Operation successful”) @ApiResponse(responseCode = “2000”, description = “The service is busy. Please try again later”) @ApiResponse(responseCode = “3101”, description = “User already exists”) public R add(@RequestBody SysUserSaveDTO saveDTO) { return null; // Implementation omitted in this example } “` This code adds usage details and key business response codes for a single endpoint, improving predictability during integration. ### `@Parameter` makes path and query parameters explicit “`java @DeleteMapping(“/{userId}”) @Operation(summary = “Delete user”, description = “Delete a user by user ID”) @Parameters({ @Parameter(name = “userId”, in = ParameterIn.PATH, description = “User ID”) }) public R delete(@PathVariable Long userId) { return null; // Delete the target user by path parameter } “` This code clarifies the source and meaning of the path parameter, helping callers avoid passing incorrect values. “`java @Operation(summary = “User details”, description = “Query user details based on the given conditions”) @GetMapping(“/detail”) @Parameters({ @Parameter(name = “userId”, in = ParameterIn.QUERY, description = “User ID”), @Parameter(name = “sex”, in = ParameterIn.QUERY, description = “User gender”) }) public R detail(Long userId, @RequestParam(required = false) String sex) { return null; // Return user details based on query conditions } “` This code adds query parameter descriptions, which is especially useful for search, filtering, and pagination endpoints. ## Swagger UI directly provides online debugging capabilities 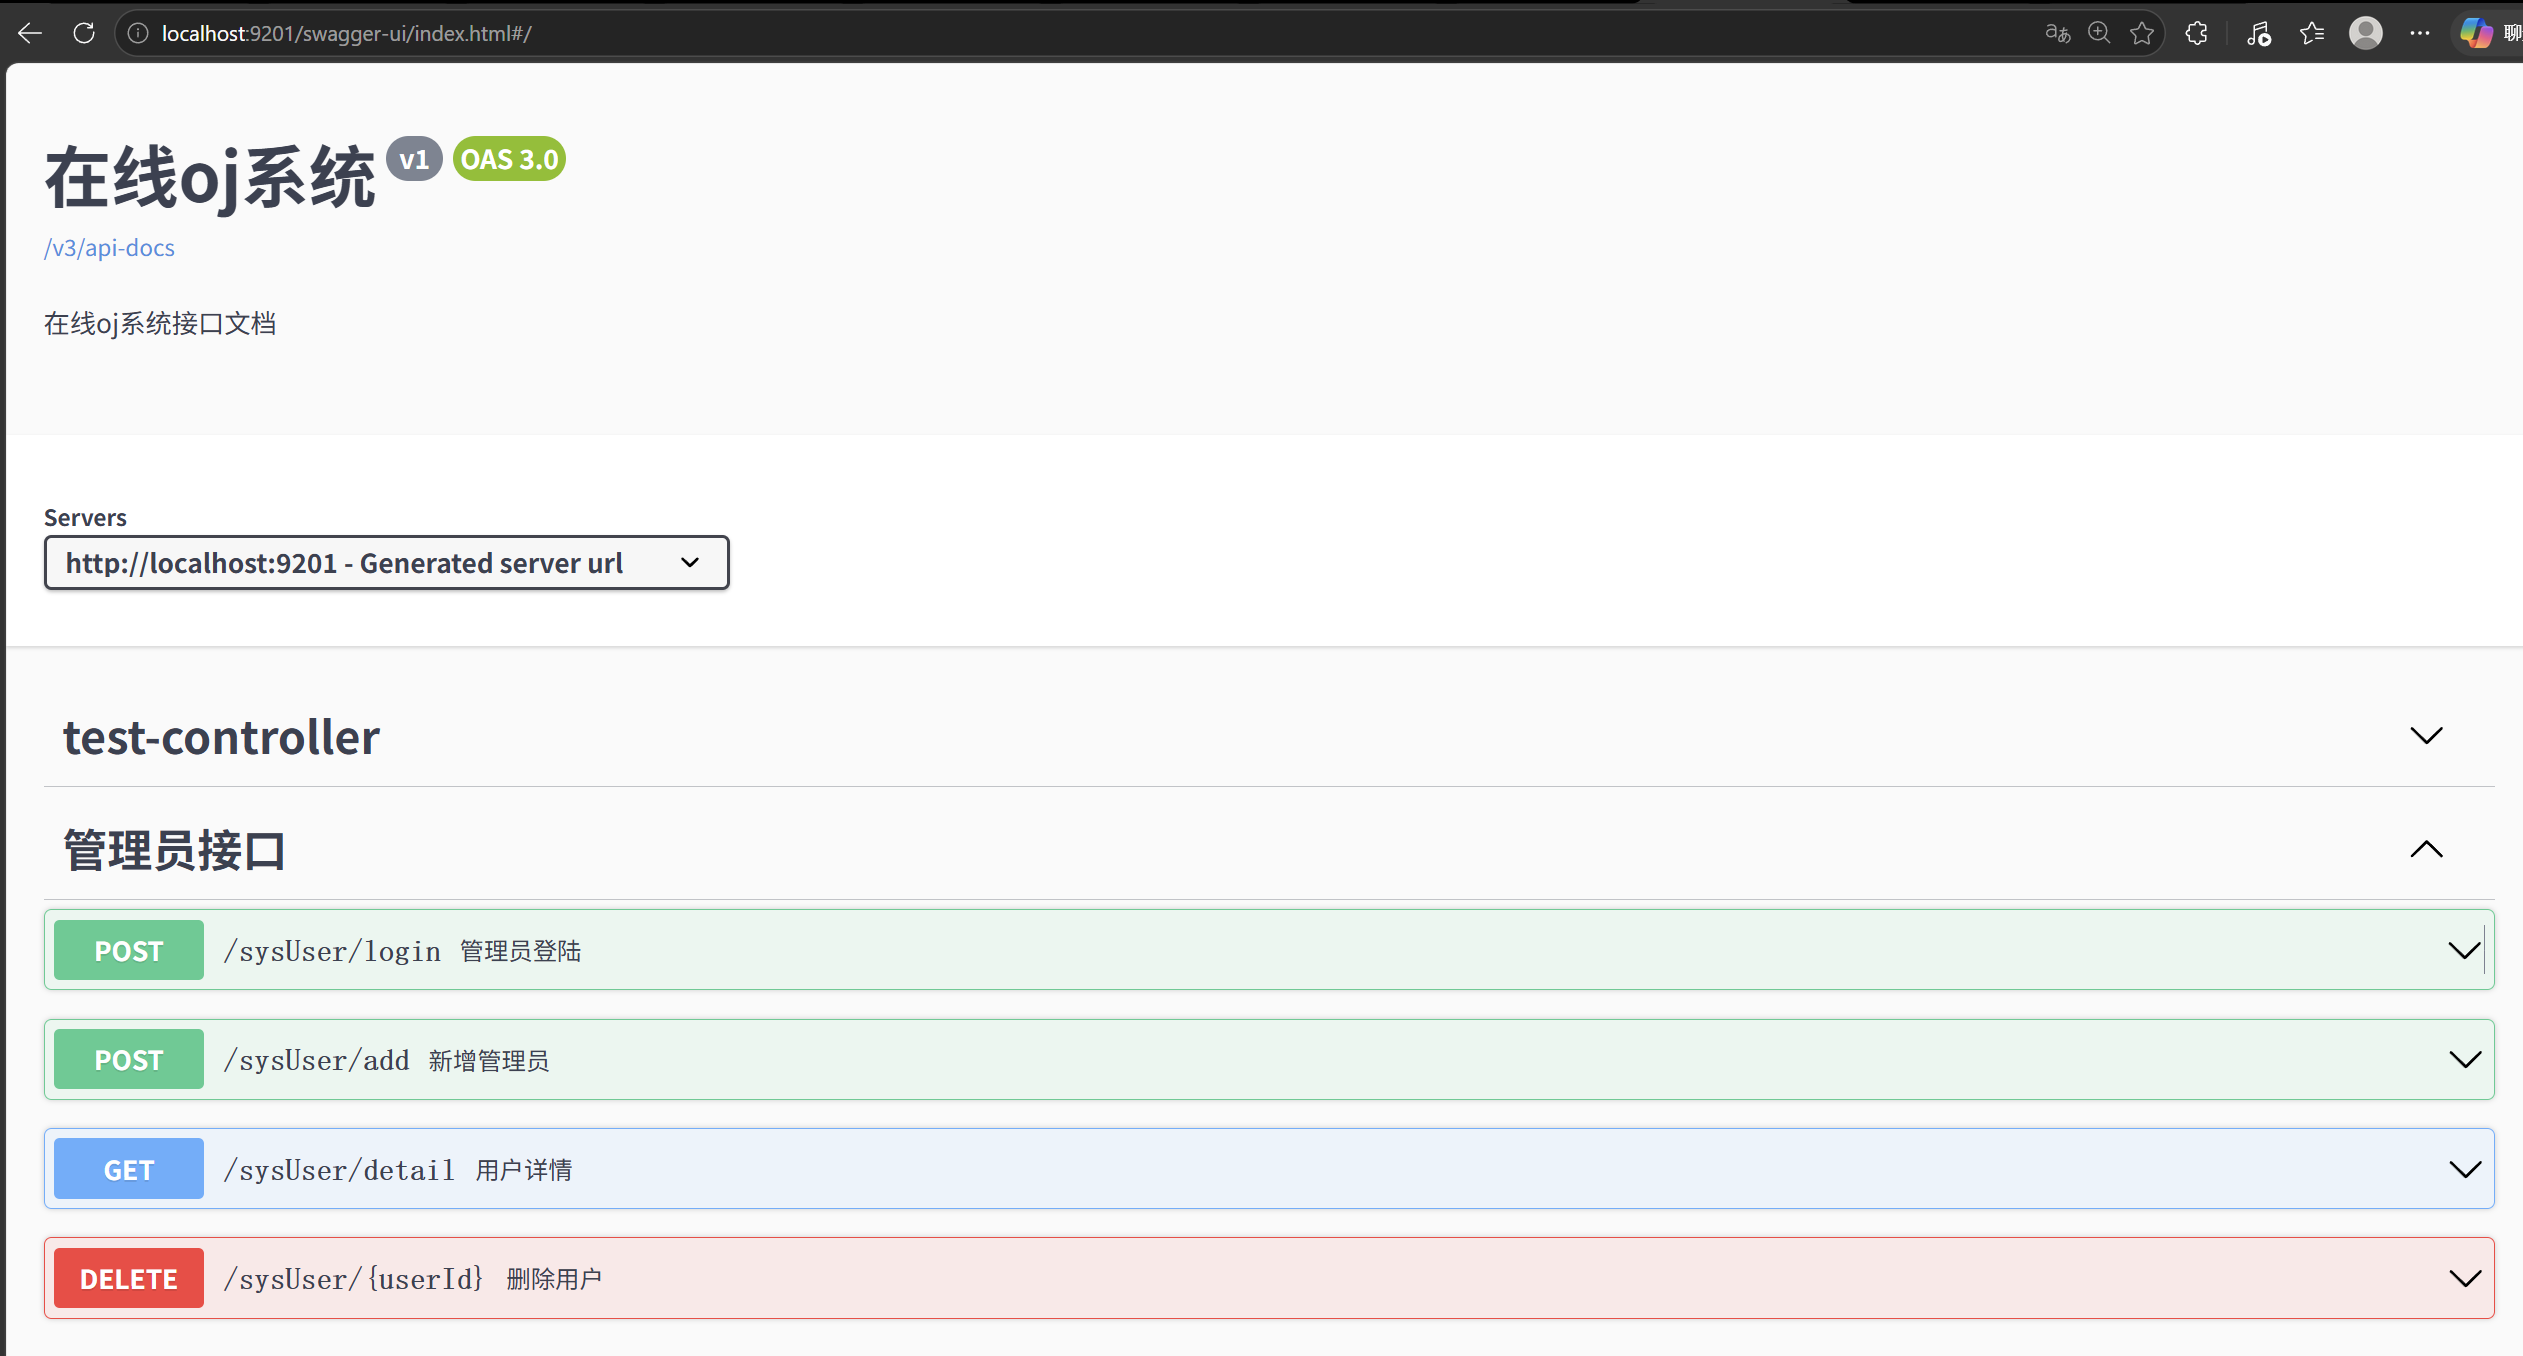 **AI Visual Insight:** This interface shows how Swagger UI centralizes API grouping, HTTP methods, parameter areas, and response areas, demonstrating that the documentation is not only readable but can also serve directly as a debugging entry point. The biggest advantage of the documentation page is that it combines API reading and API invocation into the same workflow. Developers do not need to switch back and forth to Postman to validate request bodies, status codes, and response structures.  **AI Visual Insight:** This image highlights the `Try it out` button, which indicates that Swagger UI has switched into editable mode and allows developers to enter parameters directly in the browser and send real requests. 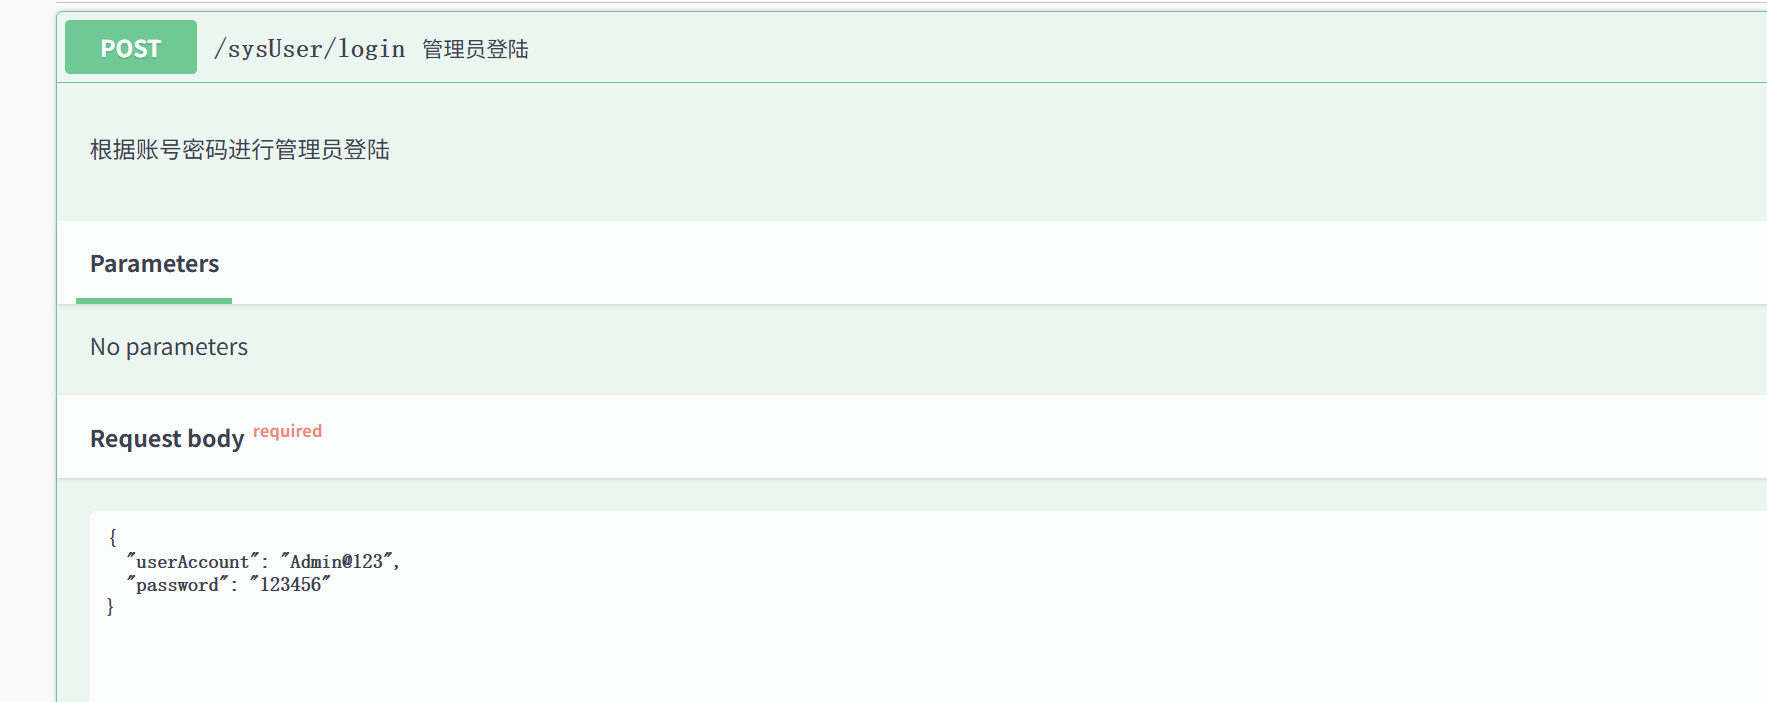 **AI Visual Insight:** This screenshot shows the request body editing area, which typically includes a JSON example, field structure, and editable content, helping developers quickly construct valid request data based on the model definition. 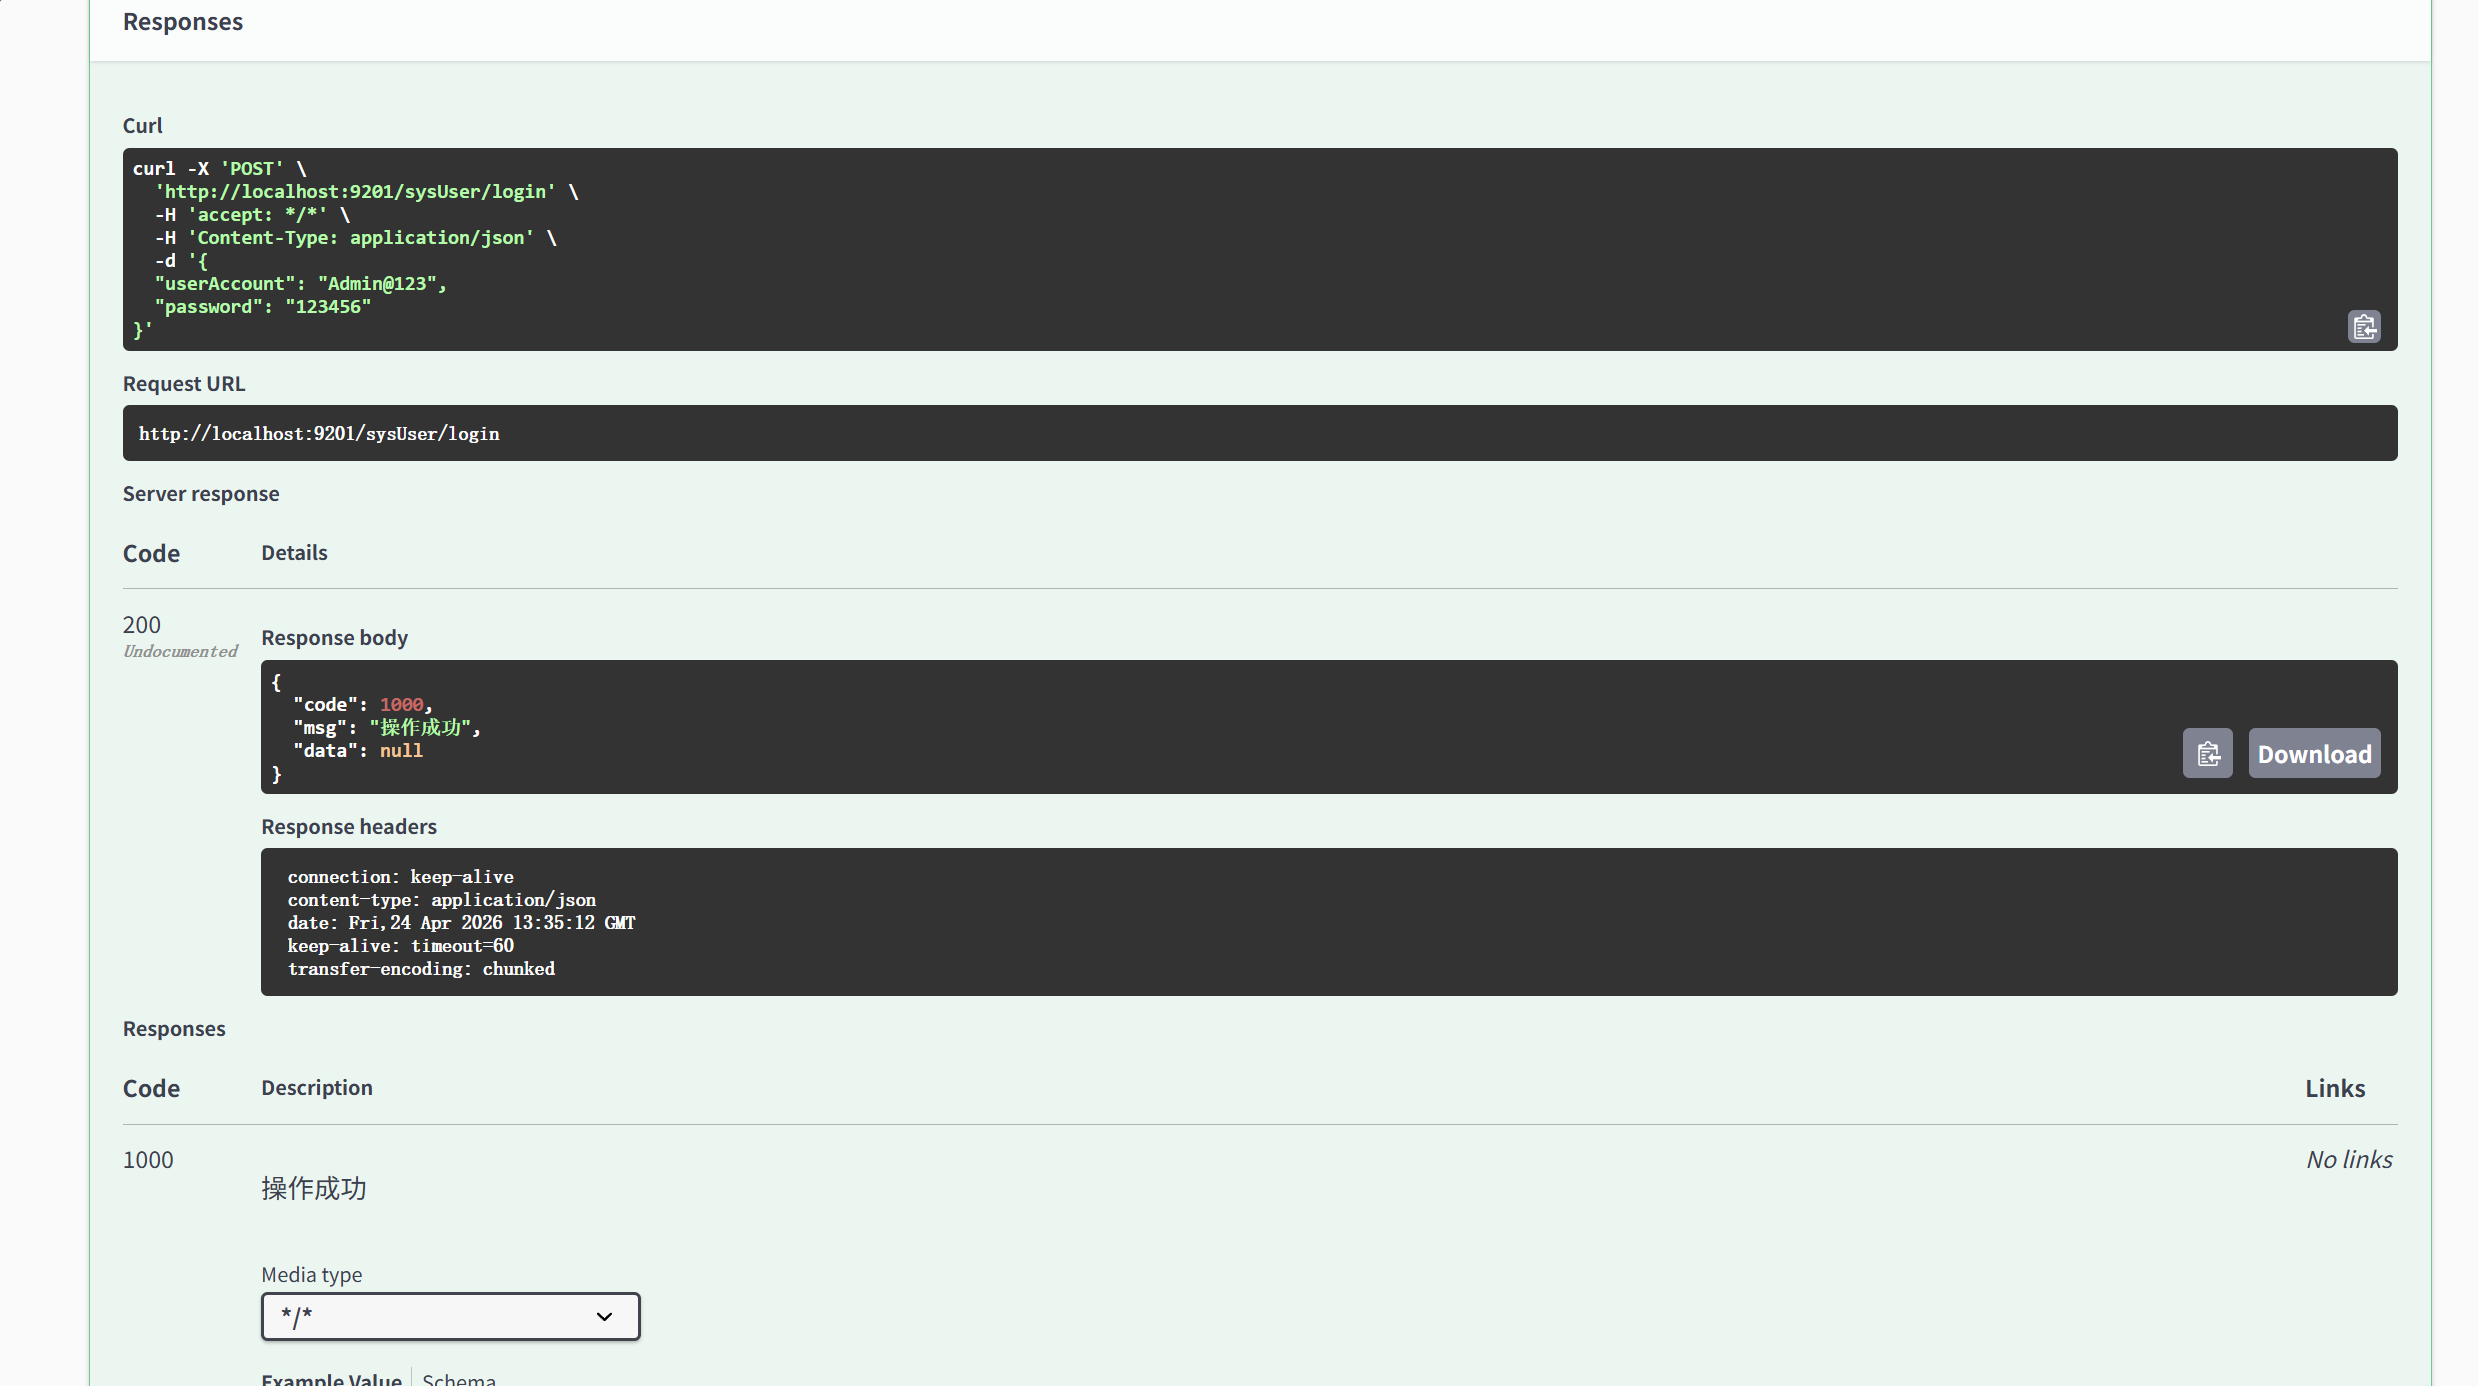 **AI Visual Insight:** This image shows the response panel after request execution, including the response code, headers, and body. It demonstrates that Swagger UI already provides a complete API verification loop and can be used directly for integration and troubleshooting. ### The access path should be part of the standard development environment guide After the project starts, you can access the documentation through the following address by default: “`text http://localhost:port/swagger-ui/index.html “` This URL serves as the unified entry point for team integration, test acceptance, and API review. ## Only a unified model and annotation system can produce truly maintainable API documentation The core benefit of Swagger / SpringDoc is not just automatic page generation. It is the ability to establish a standardized mechanism that covers response structures, status codes, and annotation-based descriptions. Code becomes documentation, and documentation becomes a testing entry point. That is where its real engineering value lies. For small and medium-sized teams, start by standardizing the response wrapper and business status codes. For medium and large systems, go further by extracting shared modules, using auto-configuration, and grouping APIs. Only then will the generated documentation provide long-term maintainability. ## FAQ ### 1. Should a Spring Boot 3 project choose Swagger or SpringDoc first? Choose SpringDoc first. It provides better support for OpenAPI 3 and newer Spring Boot versions, uses a more modern dependency model, and costs less to adopt in practice. ### 2. Why write extra annotations if the documentation can already be generated automatically? Automatic scanning only answers whether documentation exists. Annotations make the documentation clear. Without `@Operation`, `@ApiResponse`, and `@Parameter`, the documentation usually lacks business semantics. ### 3. Can Swagger UI completely replace Postman? During development and integration, Swagger UI can validate many simple APIs directly. However, Postman still remains valuable for complex testing scenarios, collection management, and automated testing. > [AI Readability Summary] > > Based on a Spring Boot project, this article reconstructs and explains the core value of Swagger and SpringDoc, including unified response structures, auto-configuration, annotation-driven enhancement, and online debugging capabilities. It helps teams maintain API documentation that is more readable, testable, and evolvable at a lower cost.