Technical Specifications at a Glance
| Parameter | Description |
|---|---|
| Core Framework | YOLOv5 master |
| Programming Language | Python 3.8 |
| Deep Learning Framework | PyTorch 2.4.1 |
| Operating System | Windows 10 / 11 |
| Collaboration Protocol | Git / HTTPS |
| Repository | ultralytics/yolov5 |
| Star Count | Not provided in the source; refer to the live GitHub page |
| Core Dependencies | torch, opencv-python, numpy, tensorboard |
This article provides a beginner-friendly path to reproducing YOLOv5 end to end
This article summarizes the complete YOLOv5 workflow on Windows, from cloning the repository, creating a Conda environment, and installing dependencies to training a custom dataset and running inference. It focuses on resolving common issues such as pip SSL errors, dataset path configuration, and training warnings. Keywords: YOLOv5, Object Detection, PyTorch.
The real value of YOLOv5 is not just that it can train a model, but that it can be reproduced reliably. The full workflow includes six stages: obtaining the code, isolating the environment, installing from a mirror source, organizing the dataset format, monitoring training, and validating inference. A failure in any one of these steps can block beginners.
For developers in bandwidth-constrained or region-specific network environments, the most common pain points are often not the model itself, but slow dependency downloads, SSL errors, incorrect paths, cache conflicts, and API warnings. Structuring these issues in advance can significantly reduce the time required to get a first successful run.
Using Git to fetch the official repository is the safest starting point
Visit the official repository first and copy the HTTPS URL. This approach is the most user-friendly option for most Windows users. After cloning, verify that train.py, detect.py, requirements.txt, and the data/ directory are present.
git clone https://github.com/ultralytics/yolov5.git
cd yolov5
dir  # List project files on Windows
This command sequence downloads the YOLOv5 source code and confirms that the core files are in place.
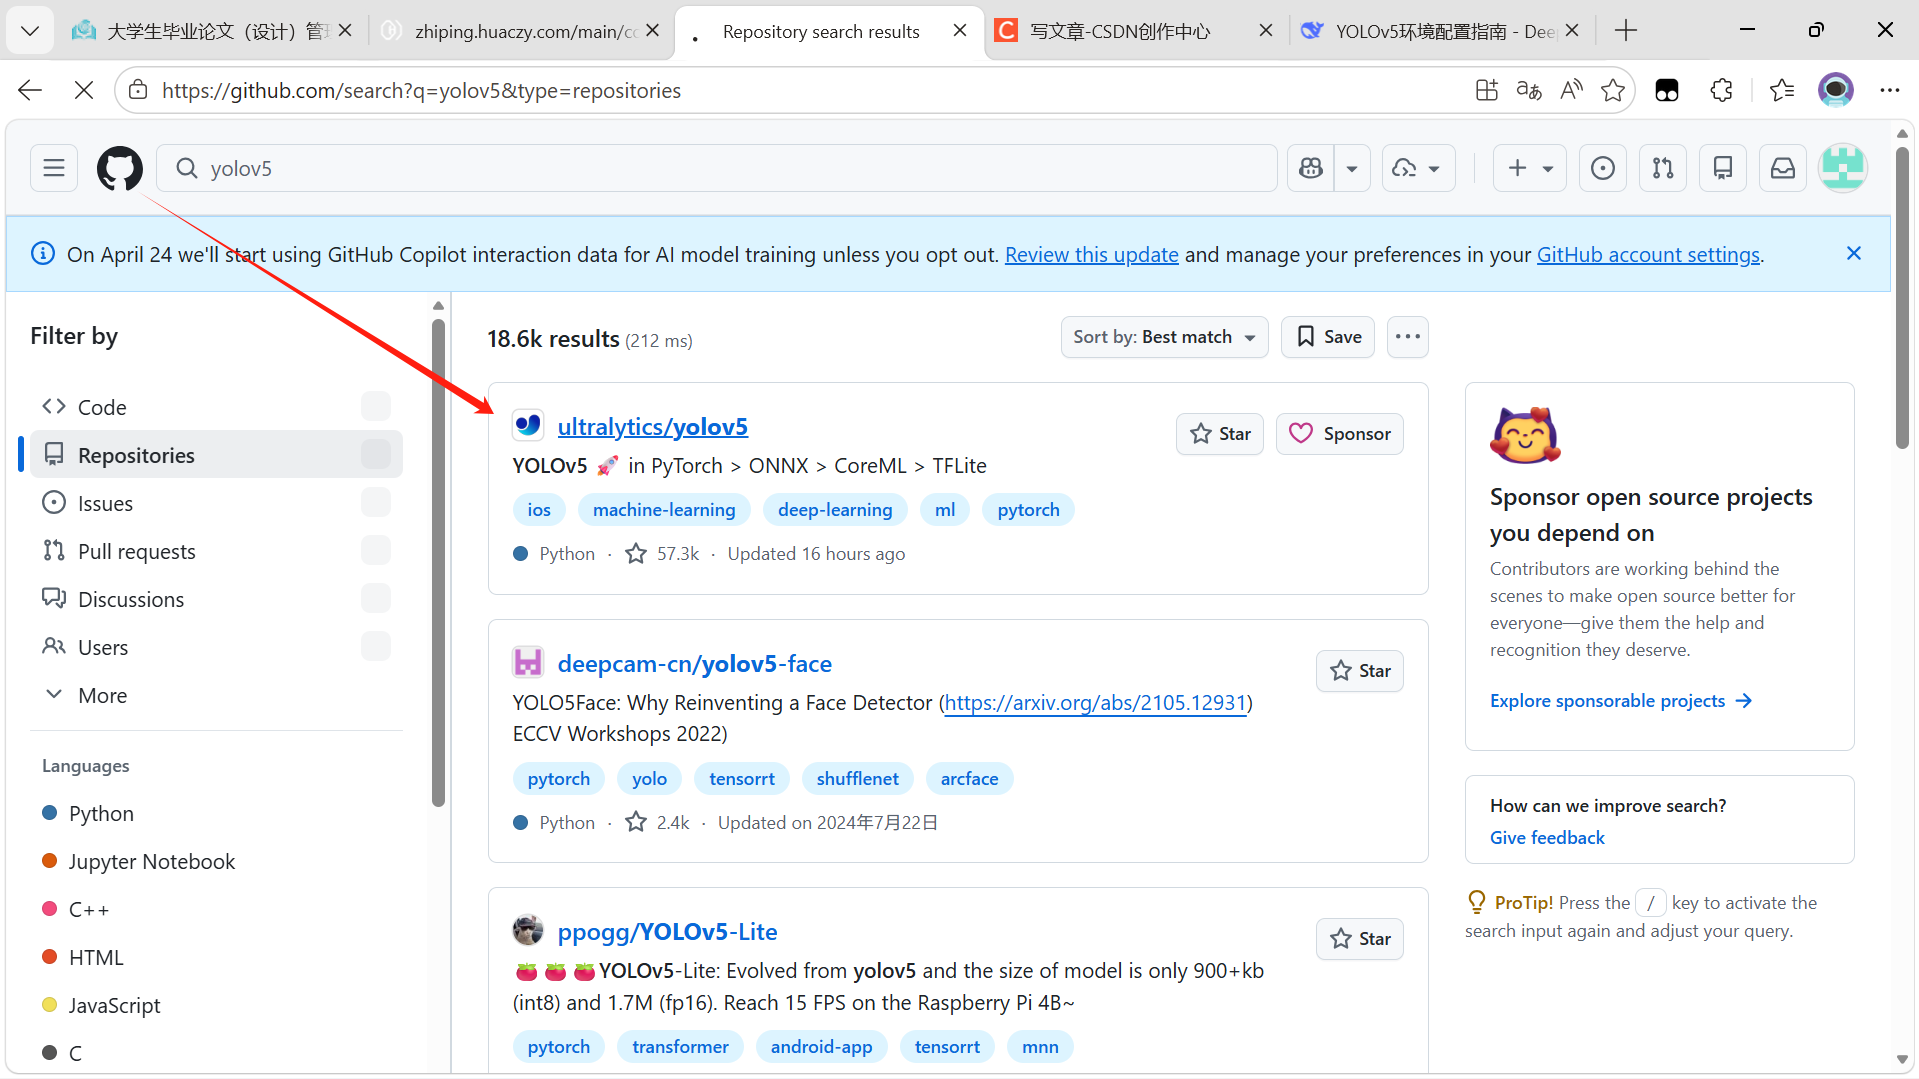 AI Visual Insight: The image shows the official YOLOv5 repository homepage on GitHub. Developers can use it to verify repository ownership, branch entry points, the README, release information, and cloning options. This is an important way to confirm that you are using the official source code.
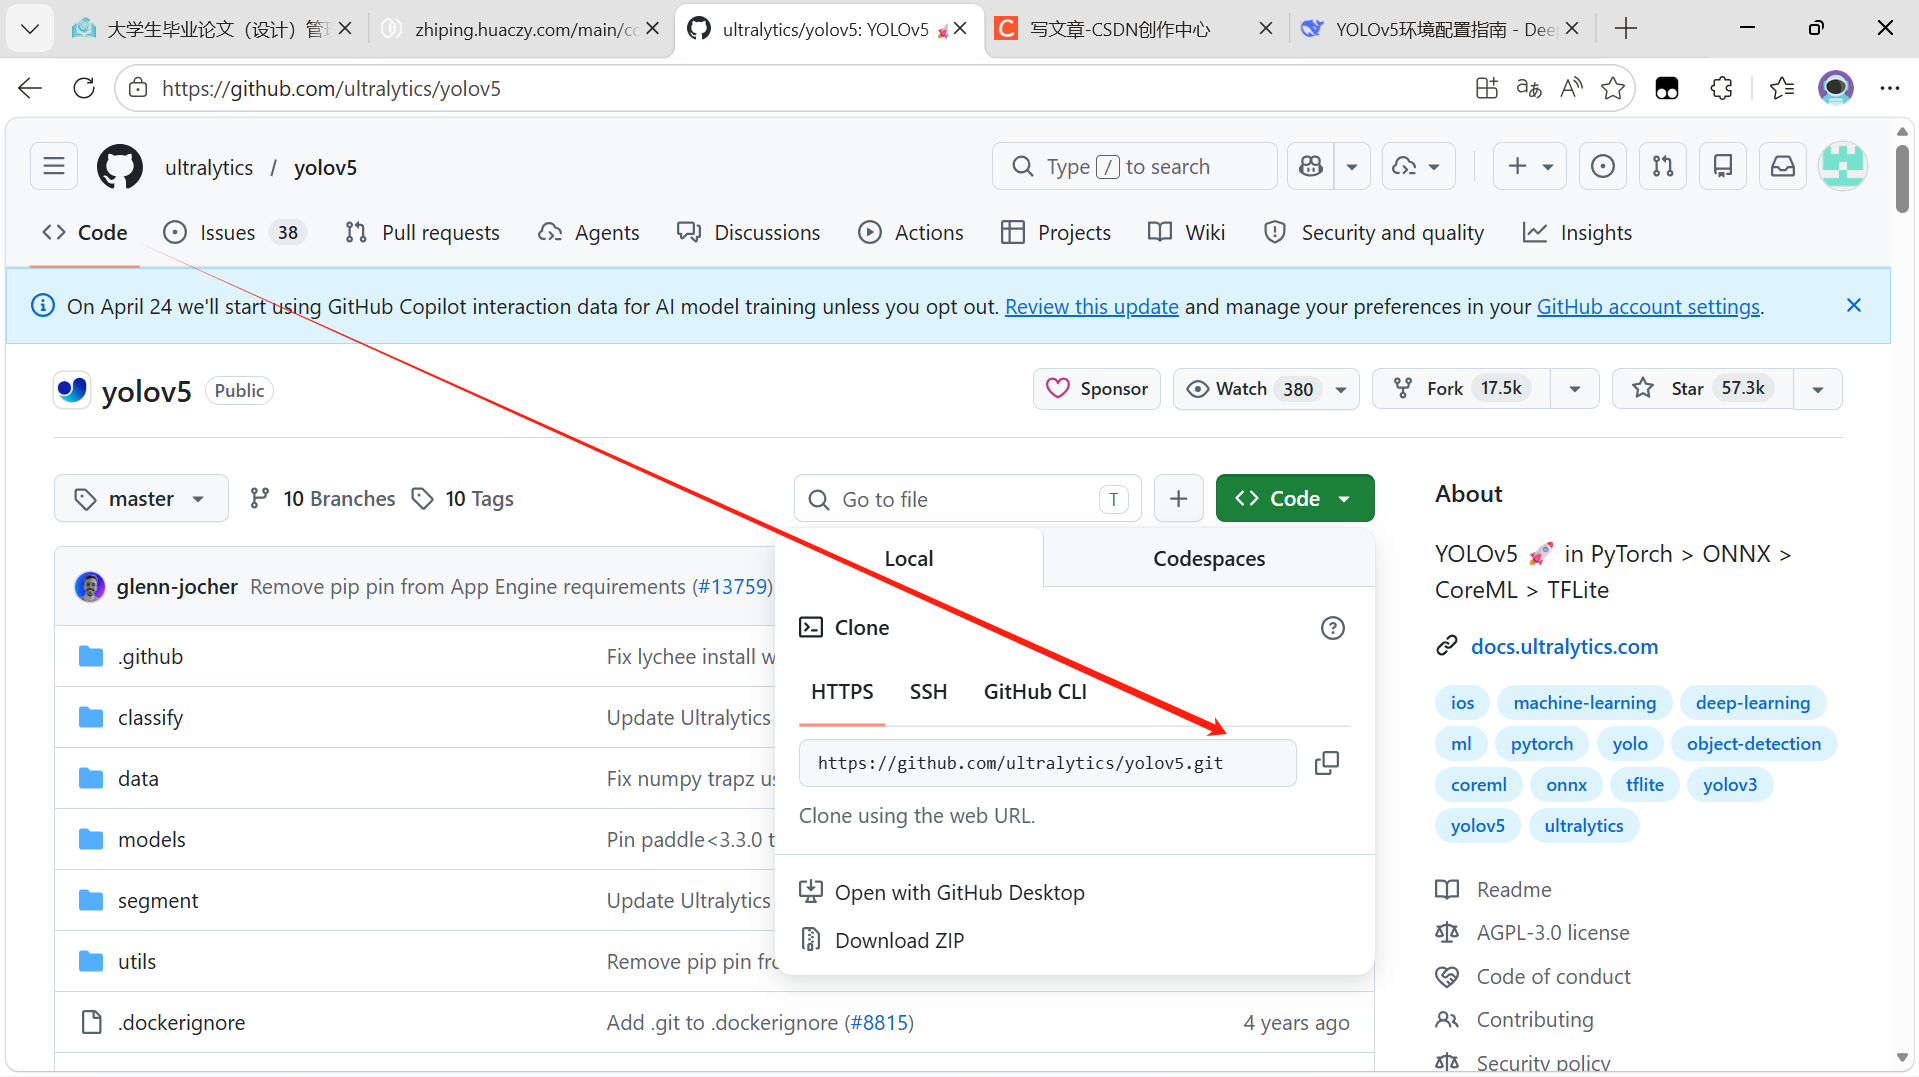 AI Visual Insight: The image shows the clone menu expanded from the green Code button. The key detail is the HTTPS copy area, which directly determines whether the remote source used by your local
 git clone command is correct.
Using Conda to isolate the environment reduces version conflicts
YOLOv5 is sensitive to Python and PyTorch versions. A dedicated environment helps avoid conflicts with existing projects. The original example uses Python 3.8 and PyTorch 2.4.1, a combination that is relatively easy to reproduce on Windows.
conda create -n yolov5_env python=3.8
conda activate yolov5_env  # Activate the isolated environment
This command sequence creates and activates a dedicated runtime environment for YOLOv5.
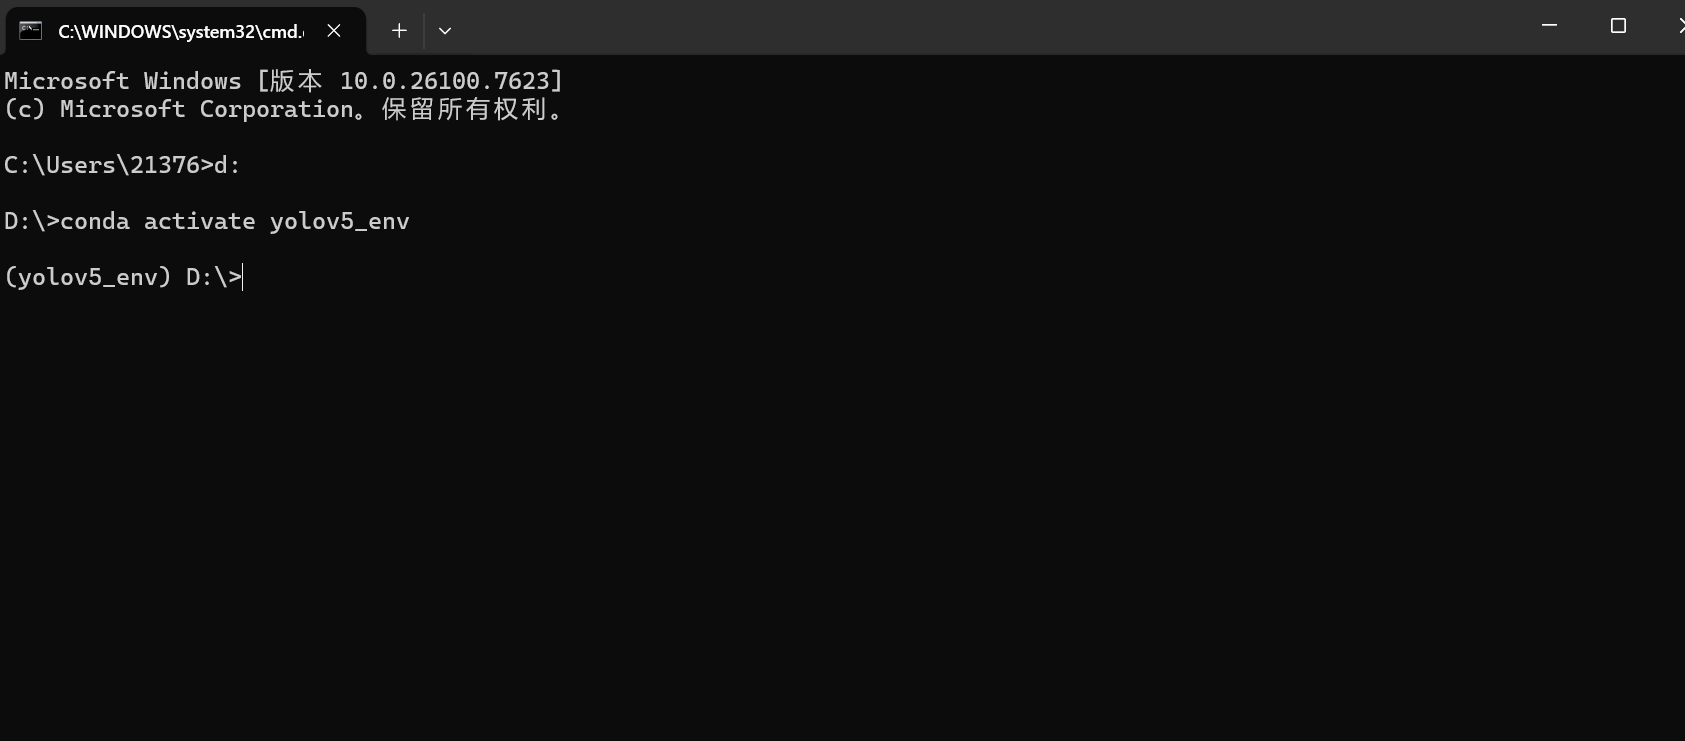 AI Visual Insight: The image captures the command-line state after creating and activating the Conda environment. The most important indicator is the
 (yolov5_env) prefix, which shows that subsequent package installations will not affect the global Python environment.
In region-specific network environments, you should prepare a mirror-based installation strategy first
Running pip install -r requirements.txt directly may trigger SSL certificate errors or network timeouts. A more practical approach is to switch to a trusted mirror and explicitly specify --trusted-host.
pip install -r requirements.txt -i http://mirrors.aliyun.com/pypi/simple/ --trusted-host mirrors.aliyun.comThis command installs YOLOv5 dependencies through the Alibaba Cloud mirror and works around common SSL-related issues.
If packages such as tensorboard are missing during training, you can install them separately without rebuilding the environment.
The custom dataset directory structure must follow YOLOv5 conventions
By default, YOLOv5 expects both the training and validation sets to contain images/ and labels/ subdirectories, and each label file must share the same base name as its corresponding image. Label files must follow the standard YOLO format: normalized class x_center y_center width height values.
MaskDataSet/
├── train/
│   ├── images/
│   └── labels/
└── valid/
    ├── images/
    └── labels/
This directory layout defines the minimum viable organization for training and validation data.
 AI Visual Insight: The image shows the local dataset directory tree. The core checkpoints are the
 train/valid split and the mirrored images/labels structure, which determine whether YOLOv5 can automatically index annotation files.
The data configuration file is the core index for training
Before training, you must create a YAML file under the data/ directory that defines the training set path, validation set path, number of classes, and class names. Absolute paths are recommended because they significantly reduce relative path errors on Windows.
train: D:/Yolov5/dataset/MaskDataSet/train/images  # Training image path
val: D:/Yolov5/dataset/MaskDataSet/valid/images    # Validation image path
nc: 2                                              # Number of classes
names: ['mask', 'no-mask']                         # Class names
This configuration maps the local dataset into a YOLOv5-recognizable training input.
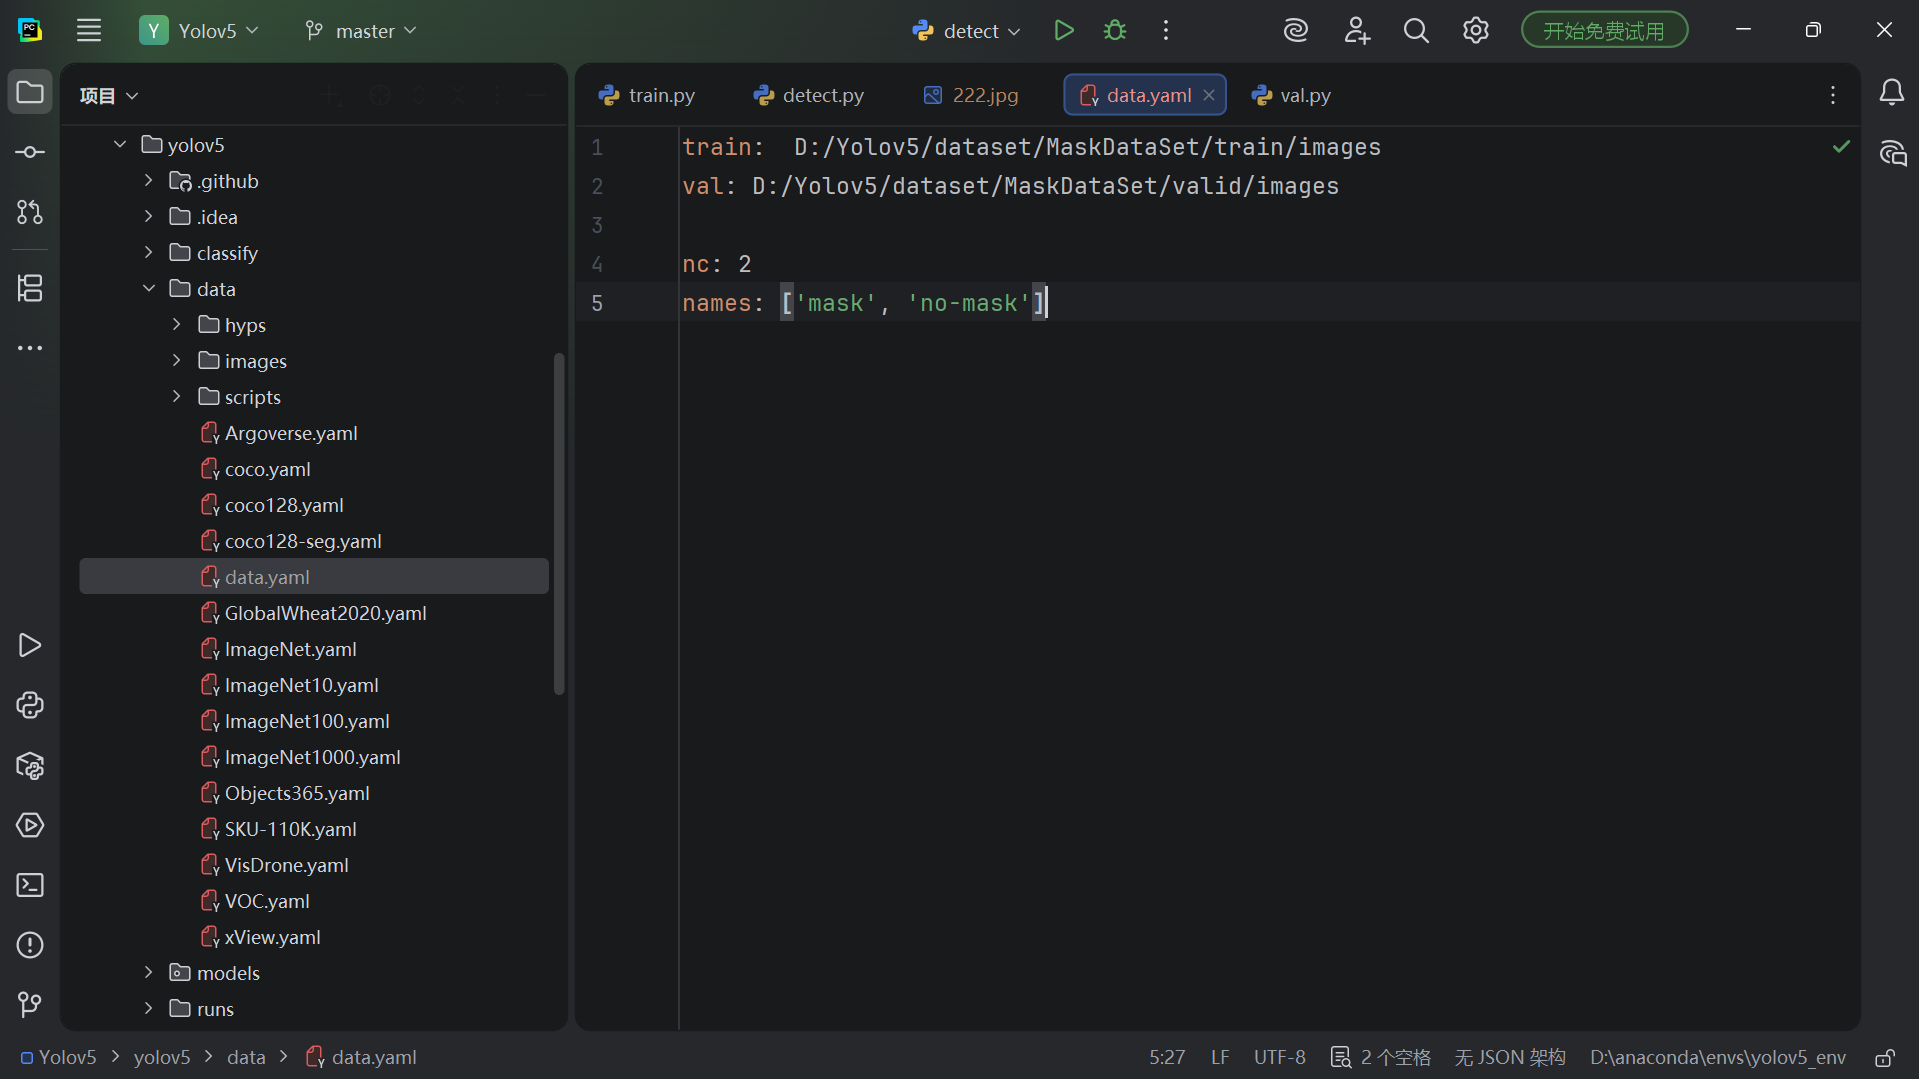 AI Visual Insight: The image reflects the actual editing state of
 mask_data.yaml. The key technical point is that train and val point to images, not labels; the framework infers the label paths automatically.
When starting training, parameters should be chosen around the device and dataset size
A minimal training command only needs the data configuration, number of epochs, batch size, and device type. CPU is sufficient for validating the workflow, while GPU is better suited for real training. For small datasets, getting the pipeline to run first and expanding parameters later is usually more efficient than trying to optimize everything at once.
python train.py --data data/mask_data.yaml --epochs 100 --batch-size 16 --device cpuThis command starts the YOLOv5 custom dataset training workflow.
 AI Visual Insight: The image shows the terminal output after training starts. Key technical signals include epoch progress, refreshed loss terms, and device information, all of which help confirm that training has actually begun.
Two common warnings usually do not block training, but they are worth fixing
The first type is the WinError 183 cache conflict, usually caused by stale labels.cache files that were not removed. The second type is the AMP API deprecation warning introduced in PyTorch 2.x. It does not affect results, but it does pollute logs.
del D:\Yolov5\dataset\MaskDataSet\train\labels.cache*
del D:\Yolov5\dataset\MaskDataSet\valid\labels.cache*  # Delete old cache files
This command removes dataset cache files and resolves cache write conflicts on Windows.
with torch.amp.autocast('cuda' if torch.cuda.is_available() else 'cpu', enabled=amp):
    pass  # Use the new AMP API for PyTorch 2.x compatibility
This code replaces the legacy mixed-precision context syntax and reduces FutureWarning noise.
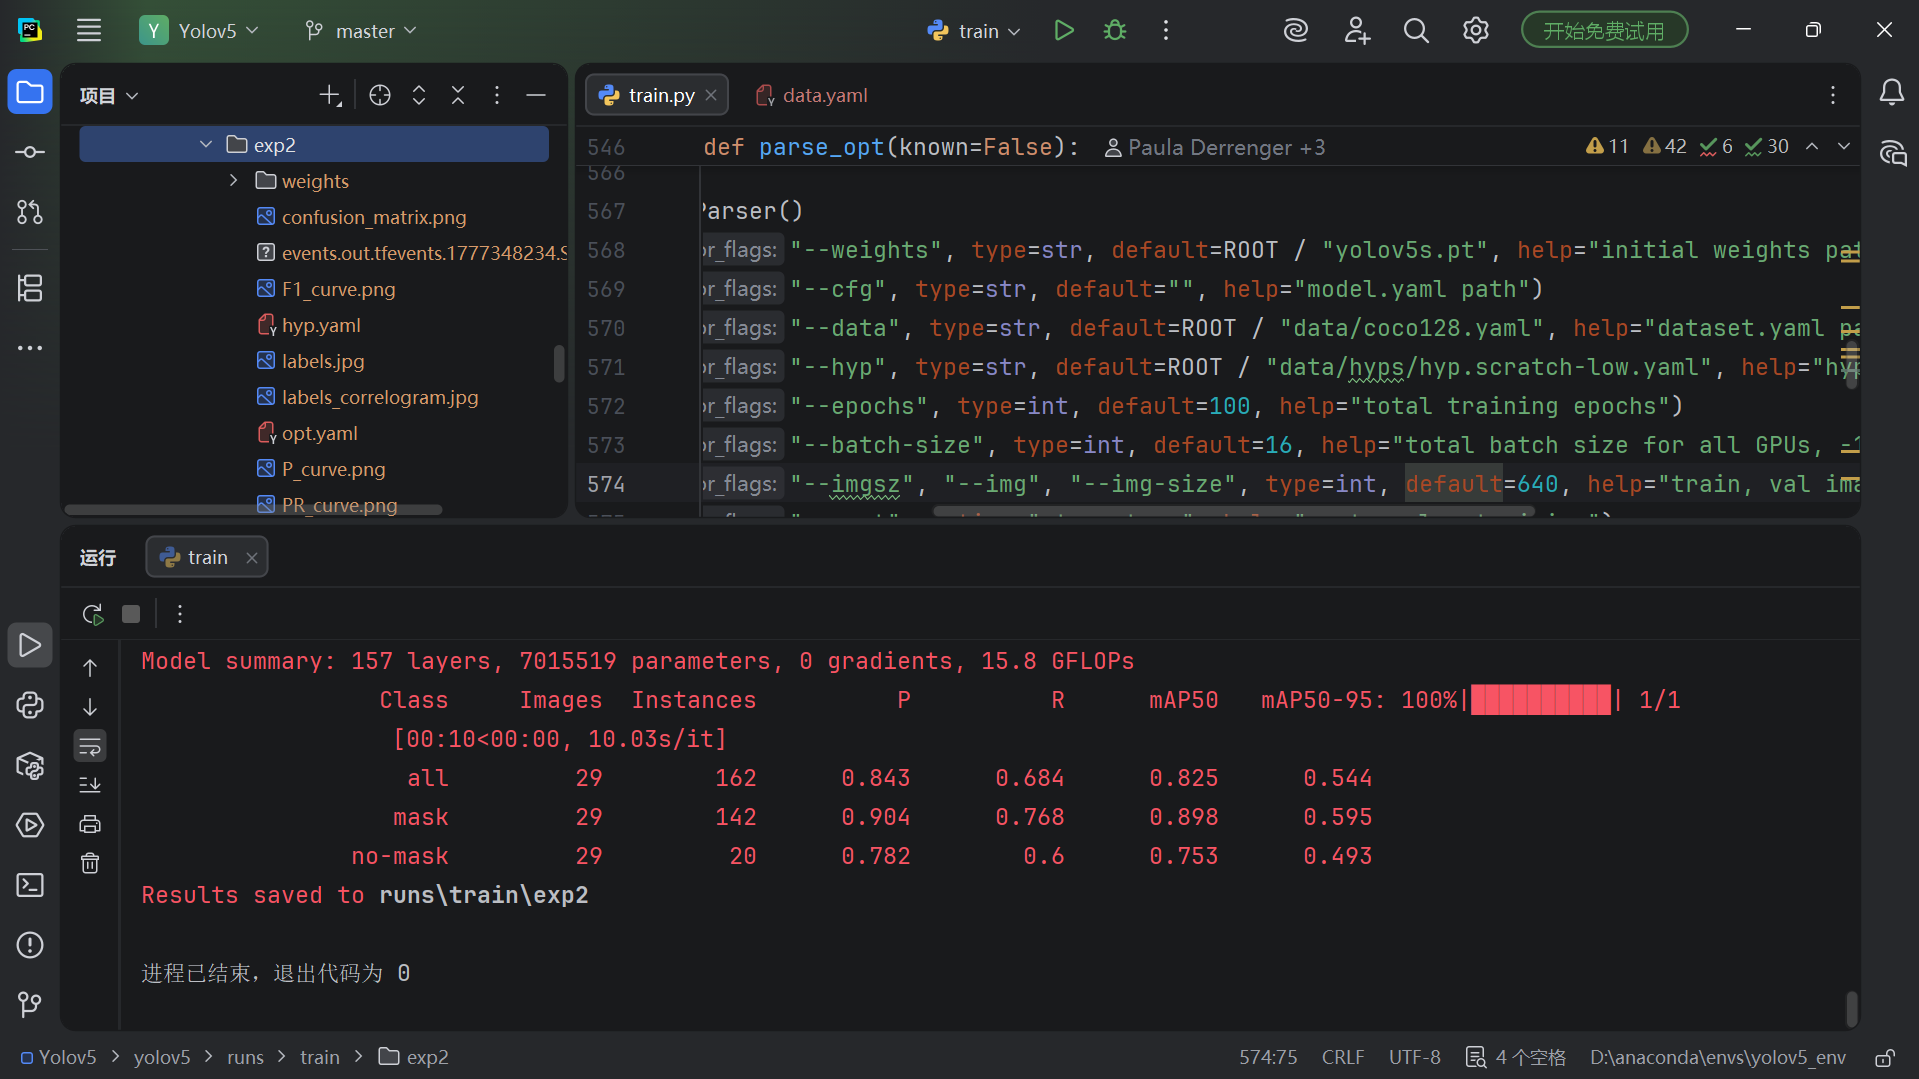
Training result validation should cover logs, weights, and visual output
After training finishes, the most important artifact is usually runs/train/exp/weights/best.pt. At the same time, monitor the downward trends of box_loss, obj_loss, and cls_loss to quickly determine whether the model is converging.
If you need to visualize training curves, you can launch TensorBoard to inspect loss, mAP, and learning rate changes, which makes subsequent tuning much easier.
tensorboard --logdir runs/trainThis command opens the training log visualization dashboard to help evaluate convergence quality.
Running inference with best.pt is the final step that validates the full loop
The inference command only needs the trained weights and the input source to detect. --source supports not only a single image, but also a directory, a video file, or a webcam ID. This gives YOLOv5 the flexibility to move quickly into real-world scenarios.
python detect.py --weights runs/train/exp2/weights/best.pt --source C:/test/222.jpgThis command loads the best weights and runs object detection on a single image.
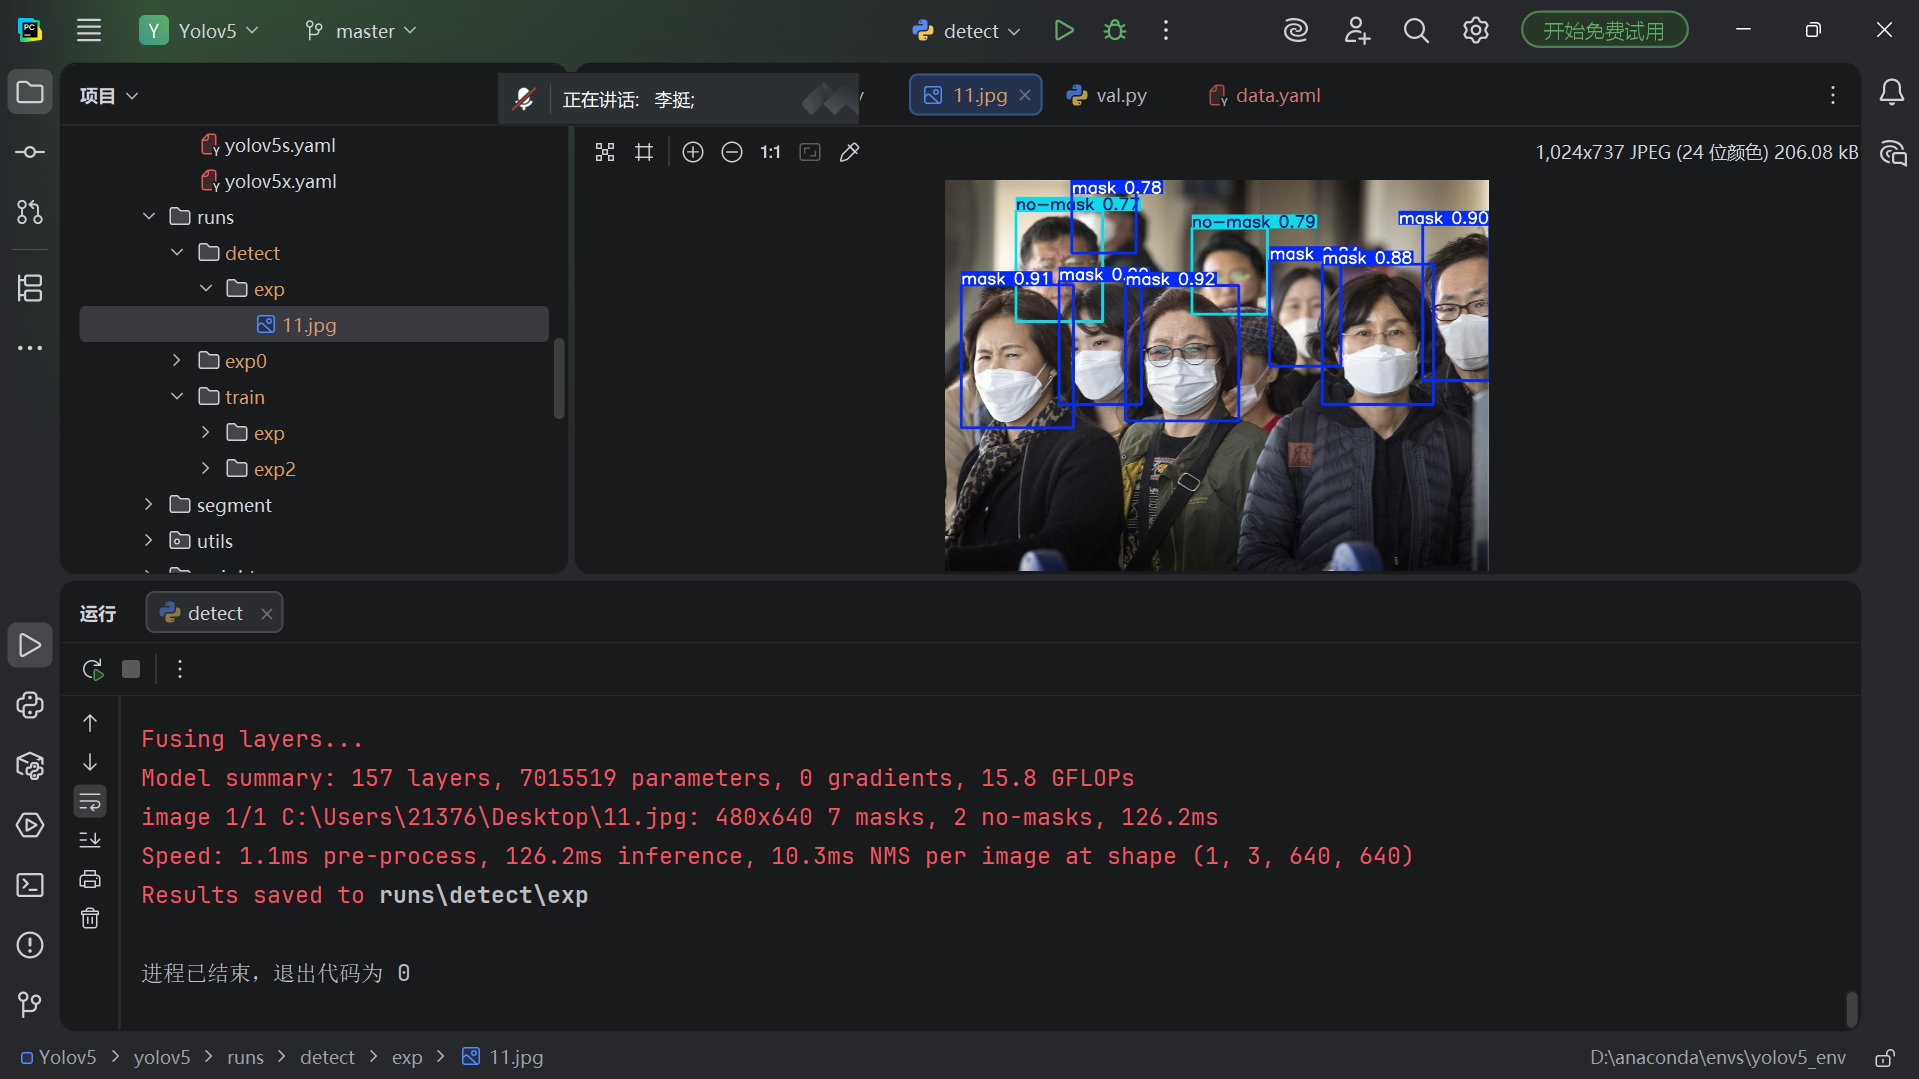 AI Visual Insight: The image presents the detection result after inference. Bounding boxes, class names, and confidence scores are overlaid on the original image, making it easy to verify that the model has distinguished the
 mask and no-mask classes.
Detection results are saved by default in the runs/detect/exp directory. If the terminal output includes the number of detected classes, inference time, and save path, the validation loop from training to pre-deployment verification is complete.
FAQ structured Q&A
Q1: Do I need a GPU to train YOLOv5?
A: No. A CPU can handle environment validation and small-scale training, but it will be slow. For production-style training, an NVIDIA GPU is recommended, and you can specify it with --device 0.
Q2: Why does data.yaml only include images paths?
A: Because YOLOv5 automatically looks for the labels folder at the same directory level. The prerequisite is that images and labels share the same base name and the directory structure follows the expected convention.
Q3: After training, should I use last.pt or best.pt first?
A: Use best.pt first. It usually corresponds to the checkpoint with the best validation metrics, making it more suitable for inference and later deployment.
Core summary
This article reconstructs the complete YOLOv5 workflow for beginners from scratch. It covers GitHub cloning, Conda-based environment isolation, pip SSL issue handling, custom dataset organization, data.yaml authoring, training startup, common warning remediation, and inference validation. It is especially suitable for Windows beginners who want to get an object detection pipeline running quickly.