GPT Image 2 is OpenAI’s production-ready image generation and editing model. It supports text-to-image generation, uploaded image editing, iterative revisions, and parameterized control, addressing common engineering challenges such as difficult integration, weak cost control, and security concerns. Keywords: GPT Image 2, Images API, Responses API.
The technical specification snapshot summarizes the core model capabilities
| Parameter | Description |
|---|---|
| Model | gpt-image-2 |
| Core capabilities | Image generation, image editing, inpainting, multi-turn image workflows |
| Input and output | Text/image input, image output |
| Main endpoints | v1/images/generations, v1/images/edits, v1/responses |
| SDK languages | Python, Node.js |
| Common parameters | size, quality, format, compression, background |
| Core dependencies | openai SDK, base64 |
| Original article traction | Approximately 300 views, 2 likes, and 7 saves |
GPT Image 2 has evolved from a simple image tool into an engineering-grade image capability
The value of gpt-image-2 is not limited to generating an image from a single prompt. Its real strength is that it supports both generation and editing. In real products, users rarely want just one image. They usually want continuous revisions, localized replacements, style consistency, and precise control over output specifications.
 AI Visual Insight: This screenshot shows the official model documentation page. Key details include the model name, its positioning for both image generation and editing, and support for high-quality output and high-fidelity image input, indicating that it is designed for production use rather than experimentation alone.
GPT Image 2 supports two integration paths
If your use case is a one-off generation or a one-off edit, the Images API is more direct. If you need conversational interaction, iterative revisions, or mixed text-image workflows, the Responses API is a better fit. This is the most important architectural boundary when choosing an integration approach.
 AI Visual Insight: This image shows the interface layering of OpenAI’s image capabilities. It clearly separates one-off image tasks from conversational multi-turn tasks, reflecting how API design has expanded from single-endpoint calls to workflow orchestration.
from openai import OpenAI

client = OpenAI()  # Read OPENAI_API_KEY from the environment by default

# The Images API is better for one-off image generation
result = client.images.generate(
    model="gpt-image-2",
    prompt="A minimalist tech-style product poster, dark background, glowing chip in the center",
    size="1024x1024",  # Control output dimensions
    quality="high"     # Control rendering quality
)
This code demonstrates the shortest path for calling the Images API and is well suited for utility-style endpoints and batch tasks.
Output parameters define the tradeoff between speed, quality, and cost
In production integration, the real question is not whether the model can generate an image, but how to configure output parameters effectively. The source material explicitly mentions size, quality, format, compression, and background. These parameters directly affect resolution, speed, file size, and delivery quality.
Common parameters make sense only in the context of business scenarios
Preview images should prioritize response speed, so quality=low or medium is often appropriate. Final downloadable assets should generally use high. For dimensions, square covers can use 1024x1024, e-commerce vertical images can use 1024x1536, and horizontal hero banners should be planned according to the required business aspect ratio.
result = client.images.generate(
    model="gpt-image-2",
    prompt="E-commerce product hero image, white background, premium studio lighting",
    size="1024x1536",      # Vertical product image
    quality="medium",      # Reduce cost during the preview stage
    background="auto"      # Let the model choose the background strategy automatically
)
This configuration works well for a two-stage strategy: preview first, then refine.
API key setup must go through the developer platform with billing enabled
When building against the API, do not confuse a ChatGPT subscription with OpenAI API access. The former is a product subscription, while the latter is a developer capability. To integrate gpt-image-2, sign in to the OpenAI Developer Platform, create a Secret API Key on the API Key page, and confirm that billing is enabled for your account.
 AI Visual Insight: This screenshot highlights the key management entry point in the developer platform. The core takeaway is that API keys must be created and managed separately on the platform, which shows that image model access belongs to the standard API system rather than permissions embedded inside the ChatGPT product.
For some developers, the source material also mentions aggregator-based integrations that are compatible with the OpenAI SDK. In practice, this means reusing existing code by configuring a compatible base_url. In production, however, you should still prioritize stability, compliance, and billing transparency.
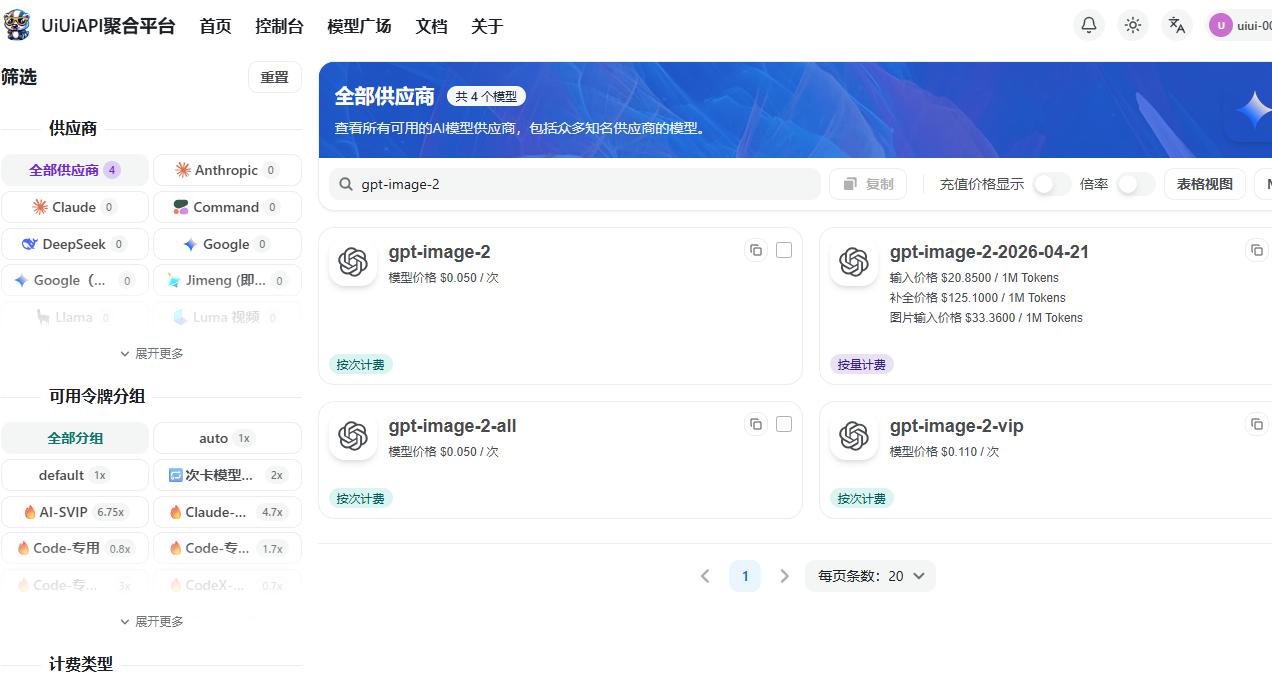 AI Visual Insight: This image shows the token creation interface of a third-party aggregation platform. The technical focus is unified gateway and token management for multi-model access, which may be relevant for teams evaluating regional optimization or multi-model routing.
Key management must remain on the backend
OpenAI’s security guidance is clear: never place your API key in the browser or a mobile client, never commit it to a repository, and always load it through environment variables. The frontend should call only your own backend, and the backend should call the model service. This is the basic security boundary for integrating image capabilities.
export OPENAI_API_KEY="your_api_key"This command injects the key on the server through an environment variable and avoids hardcoded credential exposure.
Pricing and organization verification are the two most frequently overlooked launch steps
Pricing for gpt-image-2 has moved away from the intuitive “per image” mindset and toward a combined pricing model based on input tokens, output tokens, and task type. Image input, cached input, text input, and output may have different pricing tiers. Batch usage is typically cheaper than Standard usage and is better suited for asynchronous and batch processing scenarios.
The source material also emphasizes organization verification. Even if your API key is valid and your code has no errors, image capabilities may still be unavailable if organization verification is incomplete. During troubleshooting, do not inspect only your code. Also check your organization status in the console.
 AI Visual Insight: This screenshot points to the organization verification interface. It shows that model access is not determined only by the API key, but may also depend on organization-level review or verification status. This is an important prerequisite for enterprise and team integrations.
Python and Node.js examples already cover the three main workflows: generation, editing, and multi-turn interaction
The Python minimum viable example generates an image
import base64
from openai import OpenAI

client = OpenAI()

result = client.images.generate(
    model="gpt-image-2",
    prompt="A minimalist square tech poster with a dark background, a glowing chip in the center, and space reserved for a title",
    size="1024x1024",
    quality="high"
)

image_base64 = result.data[0].b64_json
image_bytes = base64.b64decode(image_base64)  # Decode the returned image data

with open("poster.png", "wb") as f:
    f.write(image_bytes)  # Write the image to a local file
This example completes the full loop from a text prompt to a locally saved PNG file.
The Python editing example shows a typical implementation pattern
import base64
from openai import OpenAI

client = OpenAI()

result = client.images.edit(
    model="gpt-image-2",
    image=open("input.png", "rb"),
    prompt="Keep the main subject unchanged, change the background to a premium gray studio style, and add edge highlights"
)

image_base64 = result.data[0].b64_json
image_bytes = base64.b64decode(image_base64)

with open("edited.png", "wb") as f:
    f.write(image_bytes)  # Save the edited image
This code shows that gpt-image-2 is not only an image generation model. It also works well for product background replacement and localized enhancement scenarios.
Node.js is a better fit for building conversational image workflows
import OpenAI from "openai";

const openai = new OpenAI({
  apiKey: process.env.OPENAI_API_KEY, // Read the key from the environment
});

const response = await openai.responses.create({
  model: "gpt-5.4",
  input: "Generate a blue-and-white tech operations poster with a data dashboard, an AI-centered visual focus, and whitespace reserved for a title",
  tools: [{ type: "image_generation" }], // Enable image generation in the conversation
});

console.log(response);
This example shows how to embed image generation into the Responses API, making it a strong fit for AI design assistants and conversational creative products.
GPT Image 2 is a strong choice for teams that need controllable production integration
If your use case involves poster tools, product image systems, marketing design automation, or conversational visual assistants, gpt-image-2 offers clear advantages. It combines generation, editing, parameter control, and multiple integration options, which makes it well suited for real products and backend architectures.
FAQ
Q1: Should I choose the Images API or the Responses API first?
A: Choose the Images API for one-off generation, one-off editing, and batch image production. Choose the Responses API for conversational multi-turn revisions and mixed text-image workflows.
Q2: Why can’t I access image capabilities even though I have an API key?
A: In addition to checking whether billing is enabled, confirm that your organization verification is complete. Image model access may depend on organization-level validation.
Q3: How can I balance cost and output quality at the same time?
A: Use a two-stage strategy: generate previews at lower quality and smaller dimensions first, then export the final version at higher quality after the direction is confirmed. This can significantly reduce wasted spend.
Core Summary: This article systematically reconstructs the GPT Image 2 development integration path, covering model positioning, Images API and Responses API use cases, core parameters such as size and quality, API key setup, security practices, pricing considerations, and Python/Node.js examples to help developers quickly implement image generation and editing capabilities.