This article focuses on installing Ubuntu 24.04 on Windows with VMware and initializing an embedded Linux development environment to solve a common problem: building a cross-compilation environment without a native Linux machine. Keywords: VMware, Ubuntu, embedded development.
Technical Specifications at a Glance
| Parameter | Description |
|---|---|
| Target System | Ubuntu 24.04 LTS |
| Virtualization Platform | VMware |
| Host Environment | Windows |
| Network Mode | NAT |
| Recommended Memory | At least 4 GB |
| Recommended Disk | 64 GB or more |
| Development Language | C |
| Package Management Protocols | APT / HTTP / HTTPS |
| Build Tools | GCC, make, binutils |
| Core Dependencies | build-essential, vim |
| Article Popularity | 65 views, 1 recommendation |
Embedded Linux Development Typically Requires a Native Ubuntu-Like Environment
Embedded Linux build workflows are usually rooted in the Linux ecosystem. Whether you use GCC cross-compilers, Make, Binutils, Kconfig, or Kbuild, they all assume Linux file systems, process models, and shell semantics by default.
That means even if your day-to-day operating system is Windows, you still need a stable and reproducible Linux terminal. Compared with dual boot, a virtual machine is lighter, easier to migrate, and better suited for beginners who want to set up a test environment quickly.
VMware Is a Common Choice for Good Reasons
VMware stands out because it offers a mature graphical workflow, intuitive hardware virtualization settings, and solid compatibility with Ubuntu Desktop. It works well for end-to-end preparation, from OS installation to compile-time verification.
# Check whether the host machine is suitable for running a virtual machine
# Focus on whether memory, disk space, and CPU threads are sufficient
systeminfo
This command helps you quickly verify the host-side resource baseline on Windows.
Downloading the Correct Ubuntu Image Is a Prerequisite for a Successful Installation
Ubuntu publishes official releases at https://releases.ubuntu.com/. If your network connection is unstable or bandwidth is limited, use a regional mirror such as the Tsinghua University mirror to reduce interruptions and improve download consistency.
The example in this article uses Ubuntu 24.04. For embedded development, an LTS release is the safer option because it provides a more stable software ecosystem, better documentation coverage, and longer maintenance support.
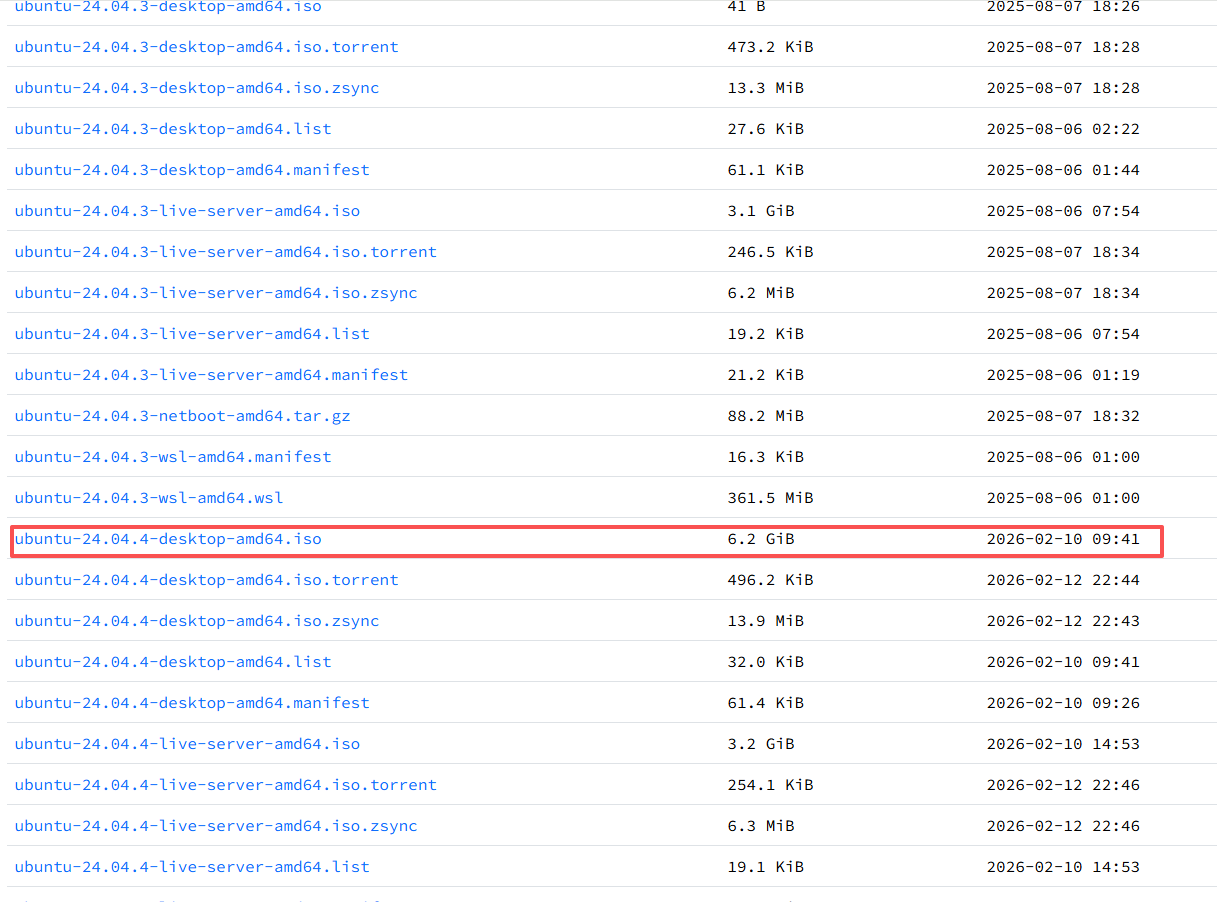 AI Visual Insight: This image shows the Ubuntu release download page where you choose a version and access the corresponding image file. The key point is to confirm that you are selecting an LTS release and that the ISO version matches the software repository version you plan to use later.
Reasonable Resource Allocation Should Come First When You Create the Virtual Machine
When you create a new VM in VMware, choose Custom (Advanced) and select I will install the operating system later during the OS installation step. This approach gives you clearer control over hardware parameters and reduces the chance of the wizard making incorrect assumptions.
Set the guest OS type to Linux, then mount the Ubuntu ISO manually afterward. It is also a good idea to manage the VM name and storage directory independently so packaging, backup, and migration stay simple.
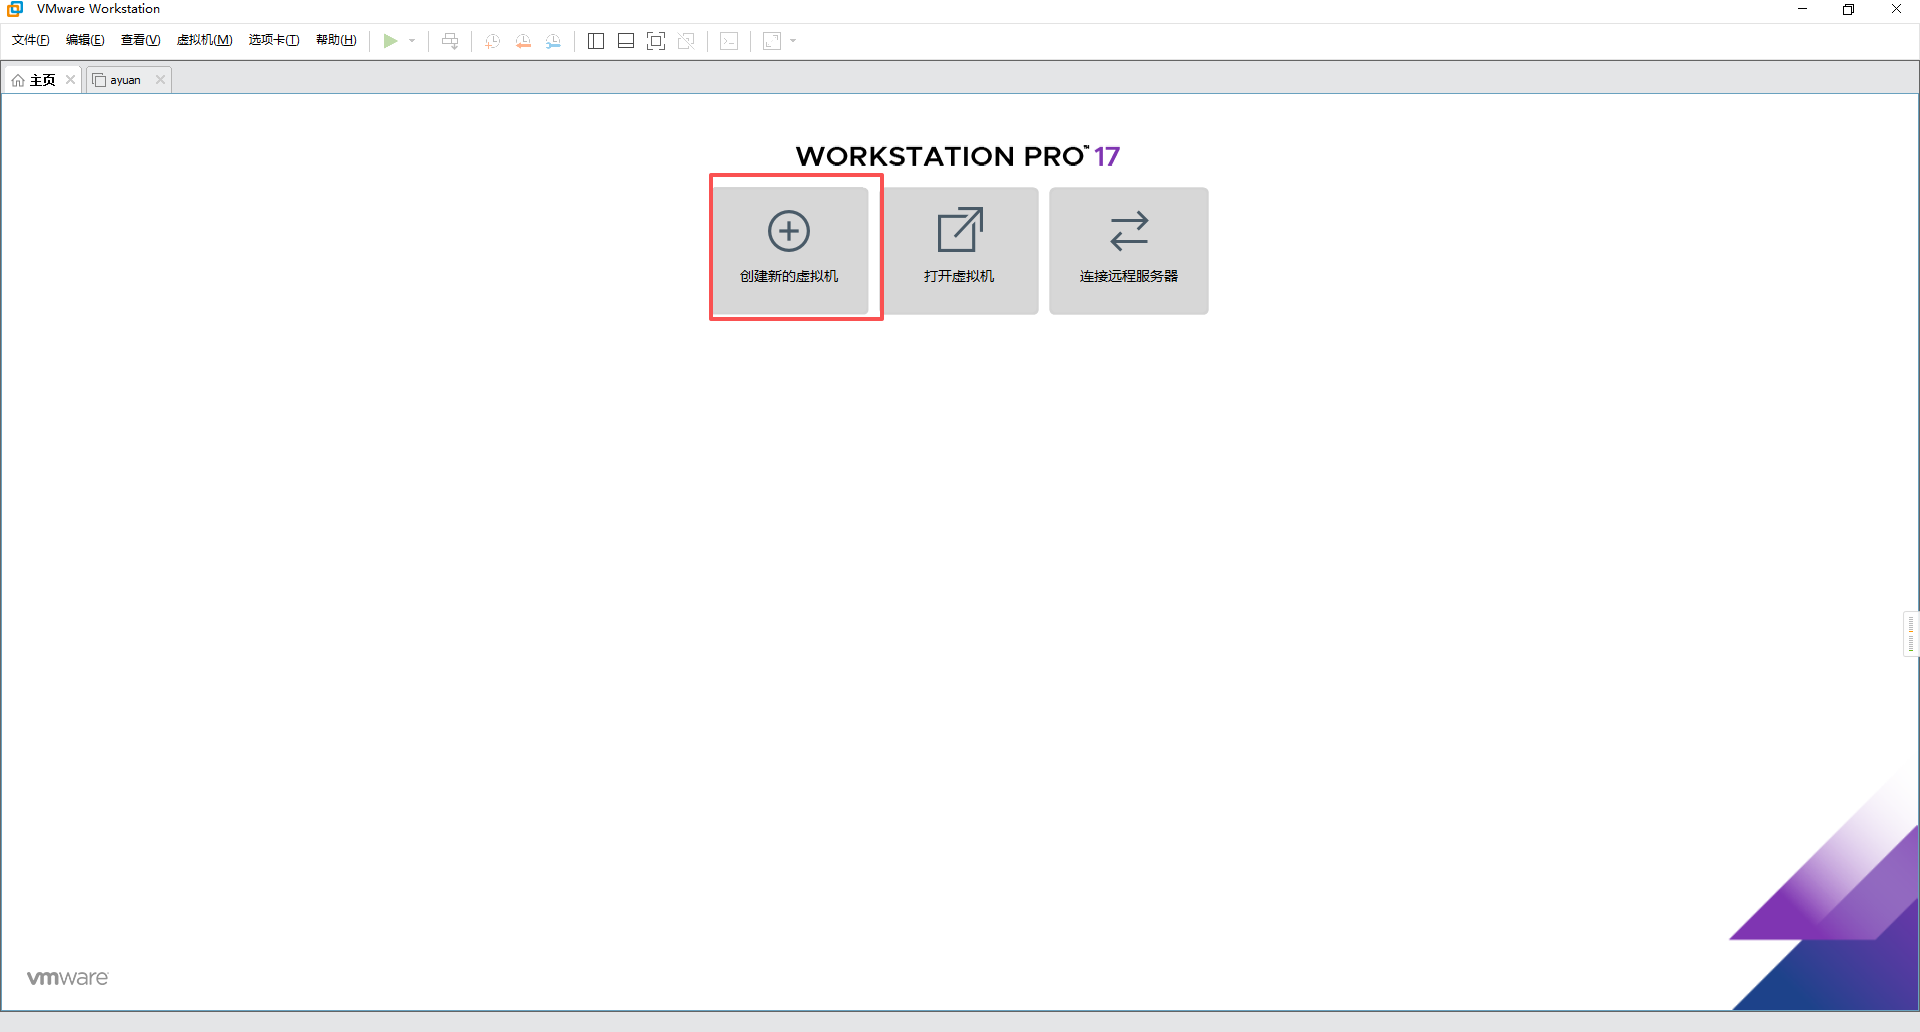 AI Visual Insight: This image shows the entry point for creating a new VMware virtual machine. It highlights that the installation flow starts from a virtual hardware template rather than booting directly from an ISO, which is ideal when you need custom CPU, memory, networking, and disk settings.
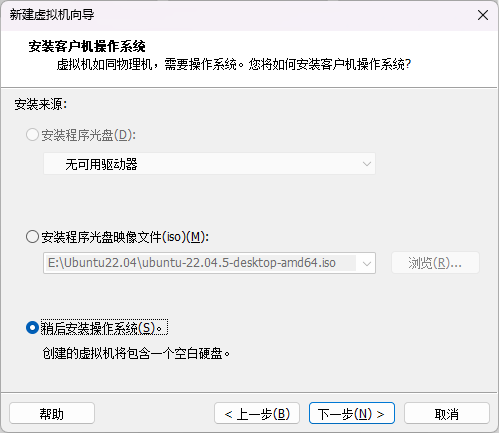 AI Visual Insight: This image shows the Install the operating system later option. Its technical value is that you define the VM hardware topology first and bind the ISO afterward, which reduces compatibility noise during installation and gives you full control over boot media and OS type.
CPU, Memory, and Disk Strategy Define the Practical Ceiling of the Virtual Machine
A vCPU does not physically carve out a real CPU core for the virtual machine. Instead, it provides the guest operating system with a schedulable virtual execution unit. The host still schedules all of that work onto physical cores and threads.
On a 4-core, 8-thread host, allocating 2 to 4 vCPUs is usually a balanced choice. Too few vCPUs will hurt compilation performance, while too many can make both Windows and the VM feel sluggish.
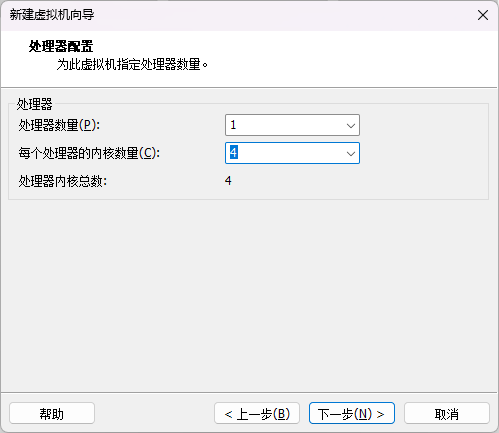 AI Visual Insight: This image shows the VMware processor configuration page. The main focus is the vCPU topology defined by Number of processors and Number of cores per processor, which helps explain that logical concurrency does not map one-to-one to physical cores.
You should allocate at least 4 GB of memory. Once the VM starts, it will reserve that memory first, which reduces the resources available to the host. For that reason, always leave enough headroom for Windows.
A 64 GB virtual disk is a practical starting point. You should also prefer thin provisioning so the VM consumes only a small amount of host disk space initially and grows as Ubuntu data increases over time. This model works especially well for personal development and lab environments.
# Recommended minimum resources for a software development VM
# Evaluate CPU and memory together with the host's total resources
vCPU=2~4
RAM=4G+
DISK=64G+
NETWORK=NAT
Use this configuration as a conservative starting baseline for an Ubuntu Desktop development VM.
NAT Networking and ISO Mounting Are Enough for Most Development Setups
NAT is the recommended network mode. It lets the virtual machine share the host’s network connection to access the internet, which is enough for tasks such as apt update, compiler installation, and dependency downloads. It is also simpler to configure than bridged networking.
After you finish setting CPU, memory, and disk parameters, mount the downloaded Ubuntu ISO in Customize Hardware, then start the VM to enter the installation workflow.
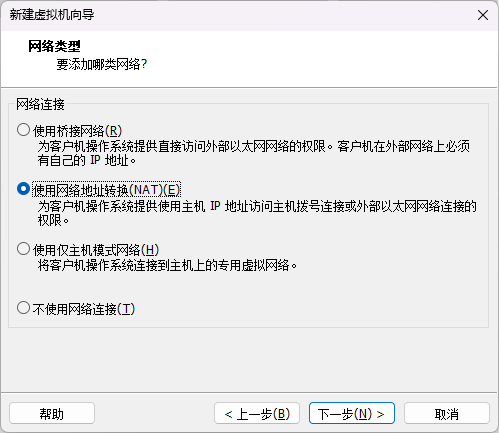 AI Visual Insight: This image shows the NAT network configuration page. The technical takeaway is that the VM reaches the internet through host-side address translation, which is ideal for software installation, source downloads, and repository updates without exposing a separate IP on the local network.
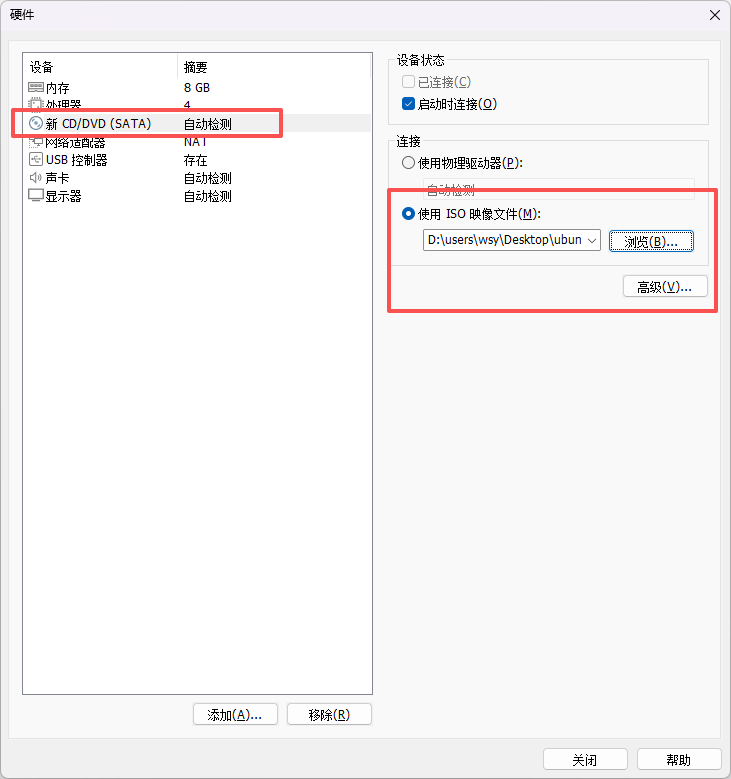 AI Visual Insight: This image shows the ISO import interface, indicating that VMware has already bound the virtual optical drive to the Ubuntu installation media. On the next boot, the bootloader will start the installer directly from this image.
During Ubuntu Initialization, You Should Prioritize a Minimal Working Installation
After the VM boots, simply keep the default BootLoader option, Try or Install Ubuntu. Once you enter the graphical installer, complete the basic initialization in order by setting the language, keyboard layout, network, and region.
For the installation type, use the interactive installer, keep the default software selection, and enable the recommended proprietary software. In most cases, this leads to better driver compatibility and a smoother desktop experience.
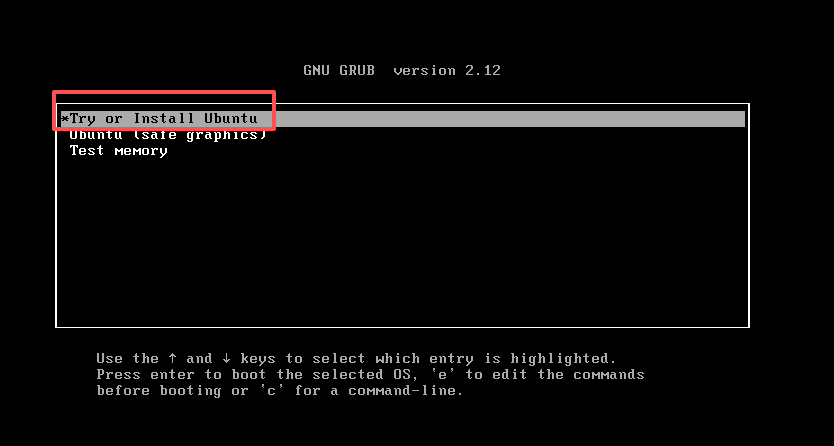 AI Visual Insight: This image shows the Ubuntu boot menu. It confirms that the installation media started correctly and provides both trial and installation options. If you can see this screen, the ISO mount and VM firmware boot chain are usually working as expected.
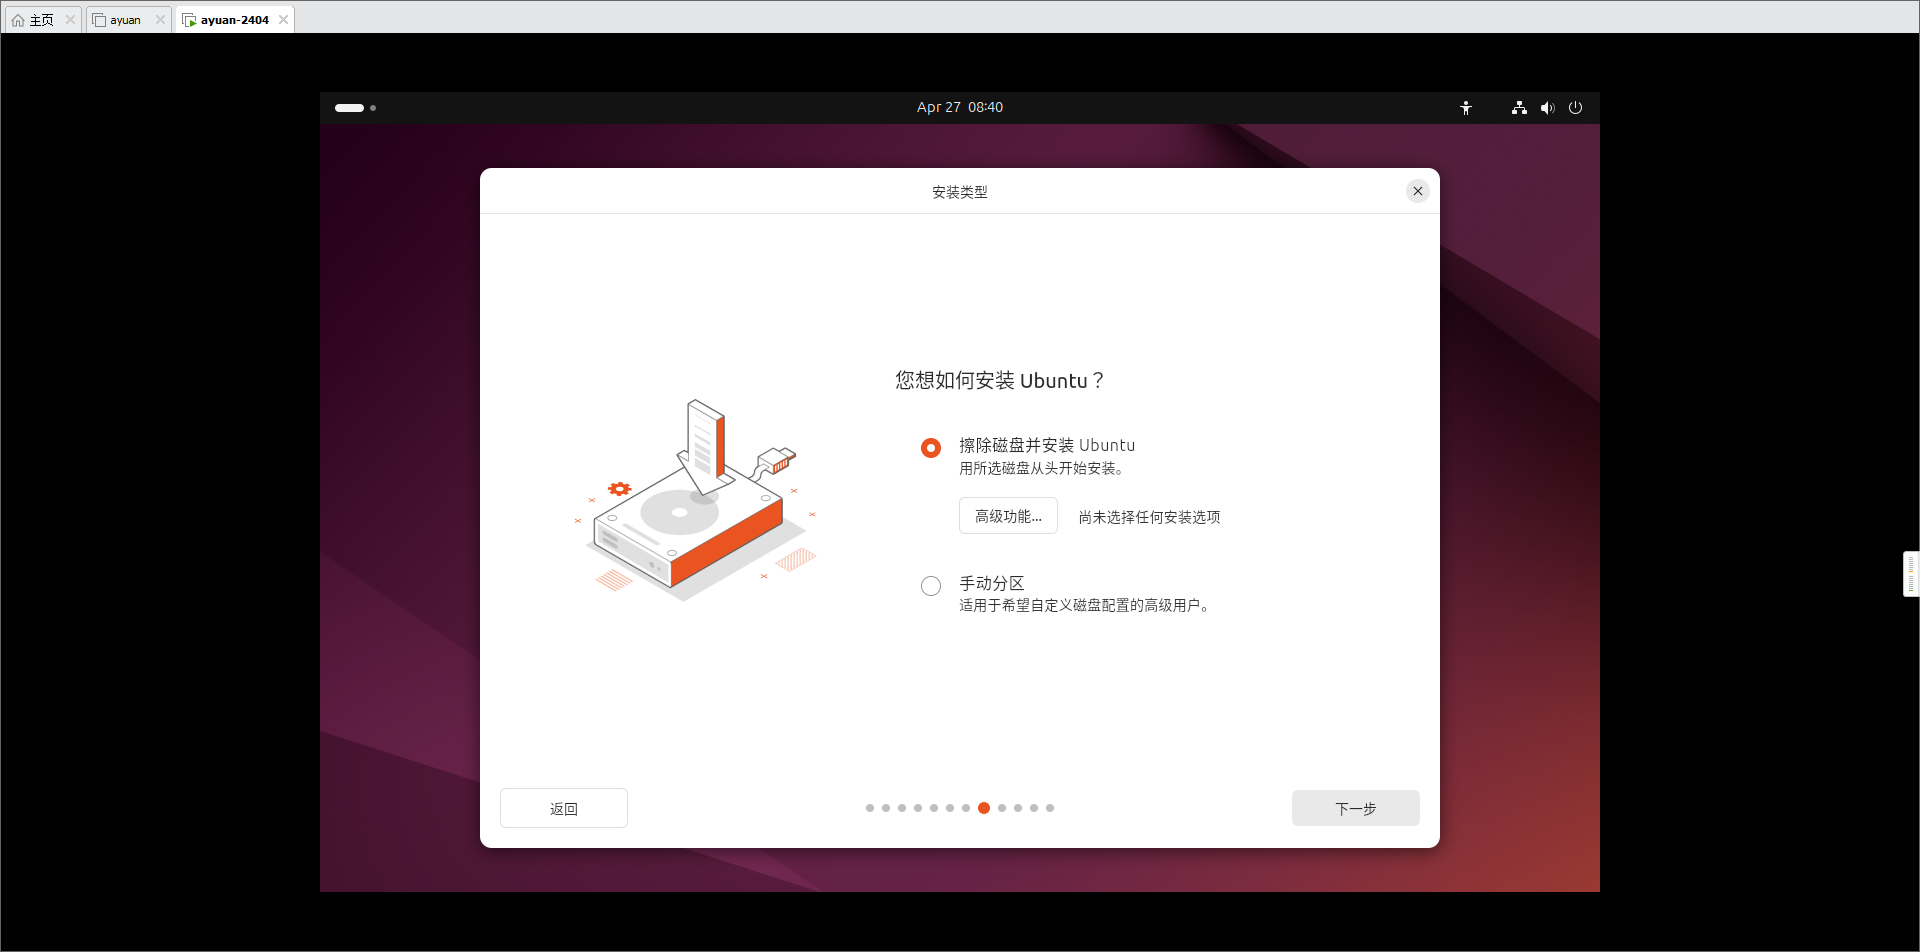 AI Visual Insight: This image shows the Erase disk and install Ubuntu option. In a virtual machine, this operation affects only the current virtual disk file. It does not directly overwrite physical Windows partitions on the host, which is a critical point for beginners.
Optimizing Software Repositories Will Significantly Improve Development Efficiency
Ubuntu’s default package sources are often hosted overseas, which can lead to slower access in some regions. If you switch sources.list to a mirror such as Tsinghua’s, package updates and software installation will usually become faster and more reliable.
# Back up the original repository configuration
sudo cp /etc/apt/sources.list /etc/apt/sources.list.backup

# Edit the repository list
sudo vim /etc/apt/sources.list
This command sequence backs up the original configuration before editing it, so you can recover easily if something goes wrong.
# Example Tsinghua mirror for Ubuntu 24.04 Noble
deb https://mirrors.tuna.tsinghua.edu.cn/ubuntu/ noble main restricted universe multiverse
deb https://mirrors.tuna.tsinghua.edu.cn/ubuntu/ noble-updates main restricted universe multiverse
deb https://mirrors.tuna.tsinghua.edu.cn/ubuntu/ noble-backports main restricted universe multiverse
deb http://security.ubuntu.com/ubuntu/ noble-security main restricted universe multiverse

# Refresh package indexes
sudo apt update
This configuration switches APT downloads to a regional mirror and refreshes the package index.
Installing GCC and Compiling Hello World Verifies That the Environment Works
The minimum proof that your Ubuntu development environment is ready is the ability to install the build toolchain and run a simple C program. The most direct approach is to install build-essential, which includes GCC, make, and common build components.
# Update indexes and install the basic compilation toolchain
sudo apt update                    # Refresh package lists
sudo apt install build-essential   # Install GCC, make, and other development tools
gcc --version                      # Verify that GCC is available
This command sequence initializes the compilation environment and confirms that GCC was installed successfully.
If you prefer terminal-based development, you can also install vim, create a source directory, and edit a test program.
# Install an editor and create a test directory
sudo apt install vim         # Install the vim editor
cd ~                         # Enter the user's home directory
mkdir C-Code                 # Create a code directory
cd C-Code                    # Enter the code directory
vim HelloWorld.c             # Edit the C source file
This command sequence prepares the most basic terminal-based development workspace.
#include <stdio.h>

int main() {
    printf("Hello, World!\n");  // Print a test string
    return 0;                    // Exit the program successfully
}
This code verifies that the GCC toolchain and terminal execution path work correctly.
# Compile and run the program
gcc HelloWorld.c -o HelloWorld  # Generate the executable
./HelloWorld                    # Run the program from the current directory
This command sequence compiles the C source file into an ELF executable and runs it directly.
 AI Visual Insight: This image shows GCC compilation and program output in the terminal. The key detail is that
 ./HelloWorld prints the expected string successfully, which proves that APT, GCC, file editing, executable generation, and current-directory execution are all functioning correctly.
This Workflow Effectively Builds a Maintainable Linux Development Foundation on Windows
From downloading the Ubuntu image and configuring VMware hardware to optimizing package sources and validating GCC, the full workflow is not complicated, but every step directly affects your later embedded development experience.
If your goal is to cross-compile kernels, drivers, or user-space applications, it is more important to turn this Ubuntu VM into a stable foundation than to install tools blindly. When the environment is correct, the cost of learning everything that follows drops significantly.
FAQ
Why does embedded Linux development so often require an Ubuntu environment?
Because cross-compilers, Make, Kconfig, shell scripts, and many open source build systems assume Linux runtime semantics by default. Ubuntu is widely used because it offers strong compatibility and abundant documentation.
Does assigning 4 cores in VMware mean the host permanently loses 4 physical cores?
No. VMware assigns a vCPU topology, but the host still schedules execution onto physical cores. It defines the upper bound of concurrent execution rather than physically partitioning cores away from the host.
Will choosing “Erase disk” during Ubuntu installation delete Windows data?
No. In a virtual machine, that action affects only the current virtual disk file. It does not directly modify physical disk partitions on the host, as long as you are operating inside the VM installer.
AI Readability Summary: This guide walks through the complete process of installing Ubuntu 24.04 on a Windows host with VMware. It covers image download, virtual machine creation, CPU, memory, and disk allocation, Ubuntu initialization, APT mirror optimization, and GCC plus Hello World validation. It is a practical quick-start setup for beginners entering embedded Linux development.