Blender’s curve system excels at streamlined profiles, path-based deformation, plant branches, and procedural surface variation. It solves common issues where mesh-based hard modeling becomes inefficient, bending is difficult to control, and detail generation is tedious. Core topics include Bezier curves, NURBS curves, and curve-based modifiers. Keywords: Blender curve modeling, NURBS, Displacement Modifier.
Technical specifications at a glance
| Parameter | Description |
|---|---|
| Software/Language | Blender 3D modeling environment |
| Core object types | Bezier Curve, NURBS Curve, Path, Mesh |
| Common protocols/formats | .blend project files, procedural textures, modifier-based workflows |
| Stars | Not provided in the original content |
| Core dependencies | Curve properties, Curve Modifier, Skin Modifier, Displacement Modifier, Subdivision Surface |
This article builds the minimum complete mental model for Blender curve modeling
Blender separates meshes and curves into two object systems. Meshes let you edit vertices, edges, and faces directly. Curves, by contrast, use control points, handles, or weights to drive continuous forms. That makes them a better fit for pipes, outlines, vines, branches, hair paths, and procedural surfaces.
For beginners, the challenge is not the number of commands. The real difficulty is the object relationships: the curve itself, the profile shape, modifiers, parenting, and subdivision density all affect one another. Once you understand those connections, many natural forms become much faster to build.
Start by memorizing these 4 high-frequency operations
Tab        # Enter Edit Mode
F          # Connect two endpoints
Alt+C      # Close the entire curve
Alt+S      # Scale local control point radius/thickness
These shortcuts cover the core operations for connecting curves, closing them, and controlling local thickness.
Bezier curves are better for intuitive contour control
Bezier curves consist of control points and handles. The curve passes through the control points, while the handles directly determine the direction of curvature. Their main advantage is visual clarity: drag a handle and the feedback is immediate. This makes Bezier curves ideal for logo outlines, decorative lines, cartoon contours, and irregular borders.
In Blender, once you create a Bezier curve and enter Edit Mode, each point displays its own control handles. You can edit the curve almost like working with “directional vertices,” adjusting arc flow, creating sharp corners, or smoothing transitions.
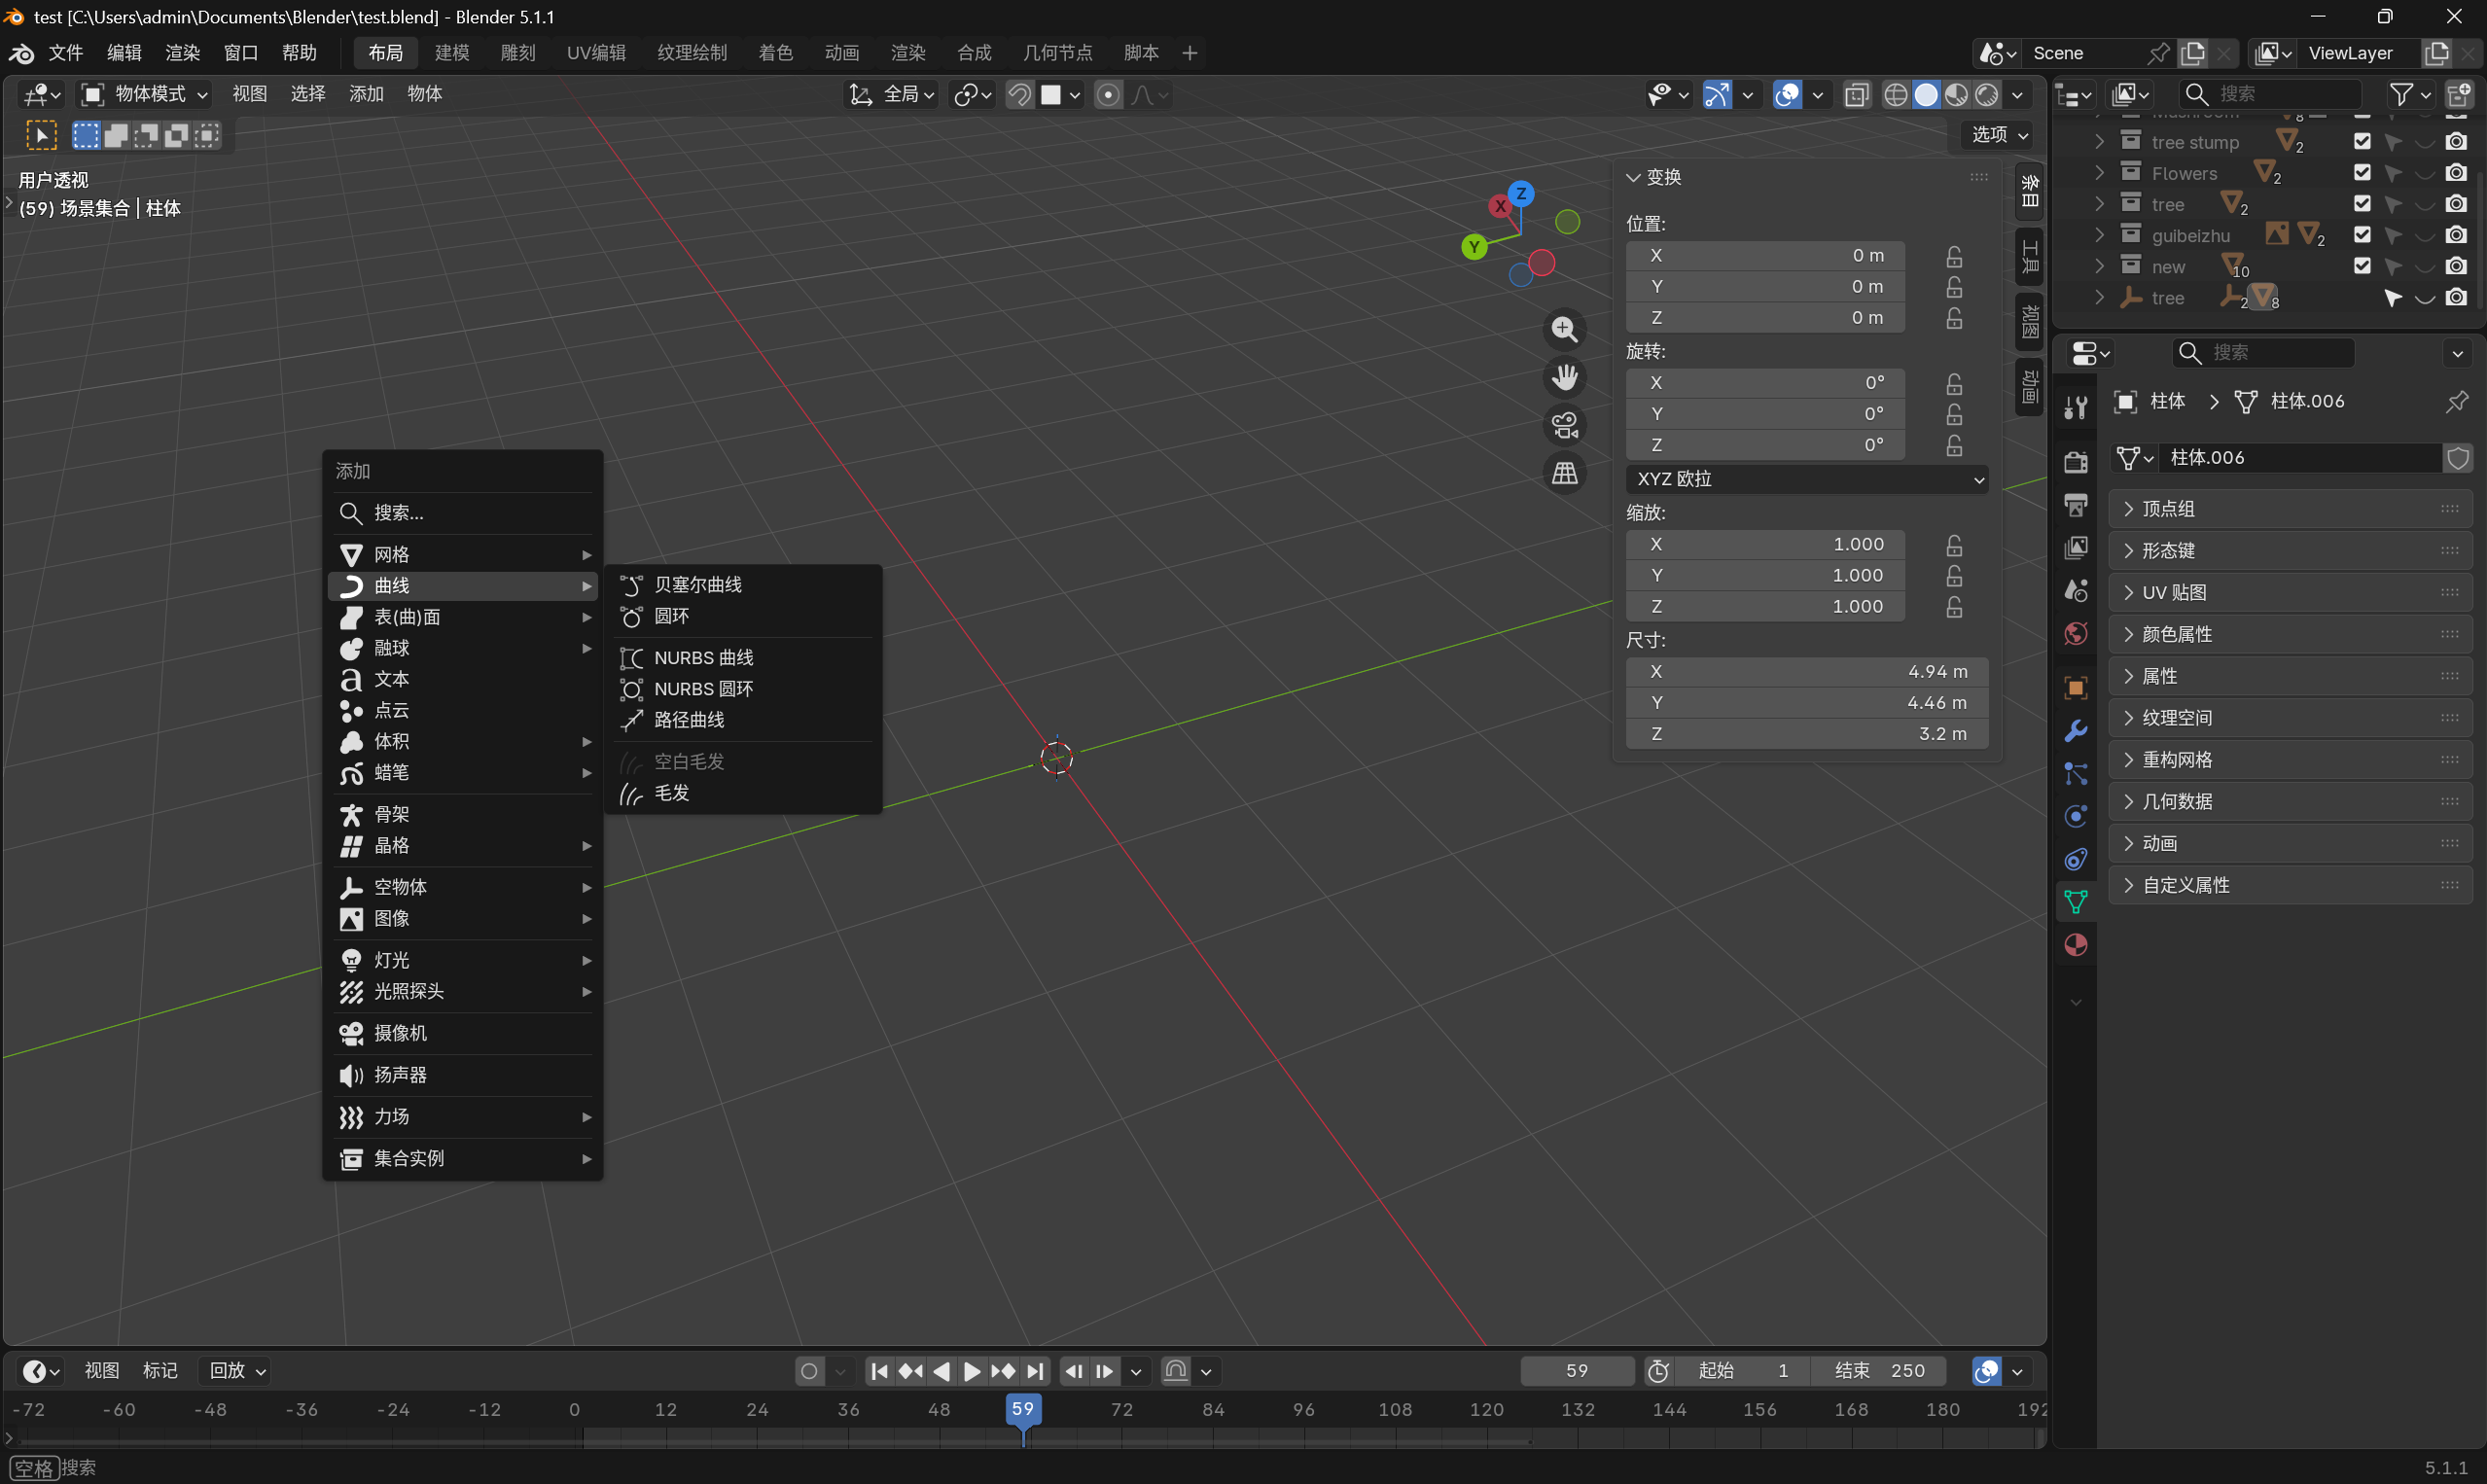 AI Visual Insight: This image shows the control point and handle structure of a Bezier curve in Edit Mode. It highlights the relationship between endpoints, directional handles, and local curvature control, making it a key reference for understanding that points lie on the curve while handles define the curvature.
Deleting segments matters more than deleting vertices
When you want to break a curve, you should not apply mesh deletion logic directly. Deleting a point alone often does not produce the break you expect. The correct method is to select two adjacent points and use Delete Segment so Blender cuts the curve exactly where intended.
 AI Visual Insight: This image compares Delete Vertex with Delete Segment for curves. It shows that curve objects do not behave like simple mesh topology, and that break operations act on spline segments rather than isolated vertices.
# Blender operation logic example: curve break workflow
curve_points = ["p1", "p2"]
selected = curve_points  # Select adjacent control points
if len(selected) == 2:
    action = "delete_segment"  # Delete the segment to cut the curve precisely
This example captures the core idea behind splitting curves: the real target is the segment, not a standard vertex.
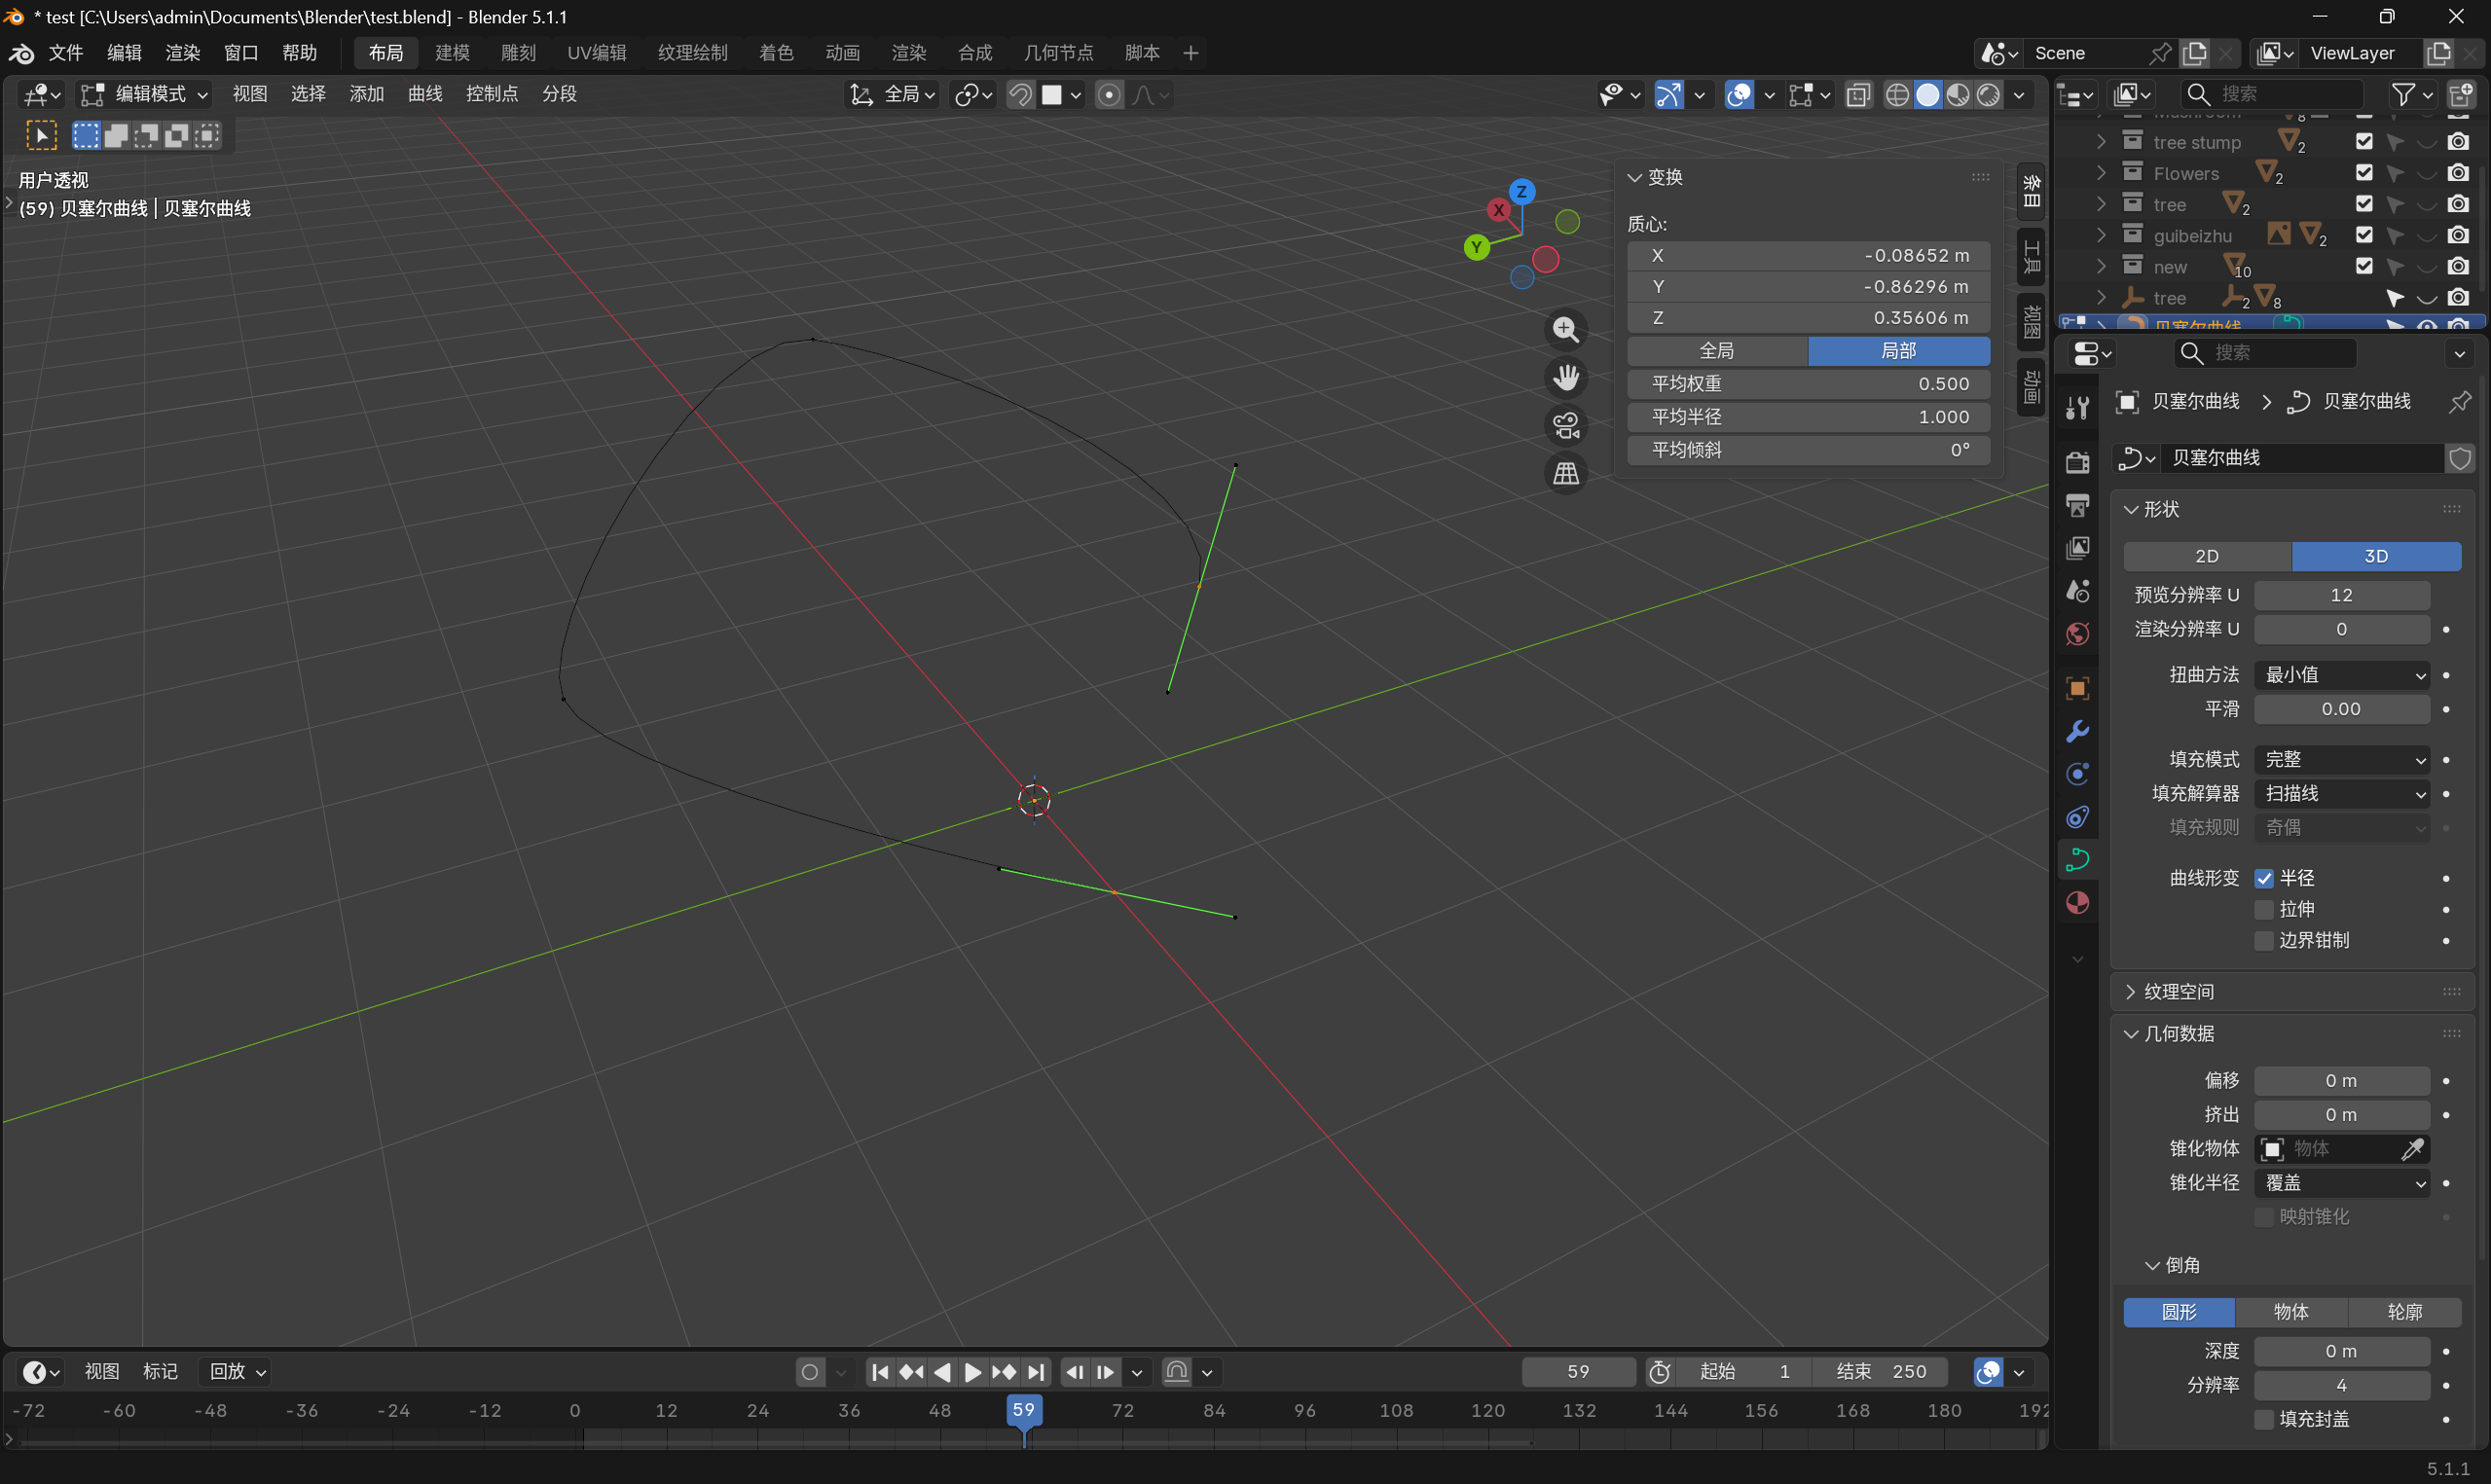
NURBS curves are better for highly smooth and precise paths
NURBS curves do not pass directly through their control points. Instead, the control points pull the curve into shape. Unlike Bezier curves, NURBS do not use handles. They rely on point distribution and W weights to control overall smoothness, which makes them suitable for industrial contours, camera paths, smooth loops, and guide curves for continuous surfaces.
Path curves, NURBS curves, and NURBS circles all belong to the same NURBS family. The difference is mainly their preset form. For beginners, the most important distinction is simple: Bezier curves are shaped by handles, while NURBS curves are shaped by the distribution of control points.
 AI Visual Insight: This image shows the control point layout and fitted result of a NURBS or path curve. You can see that the curve does not strictly pass through each point. Instead, it forms a continuous smooth path based on point order and weight influence.
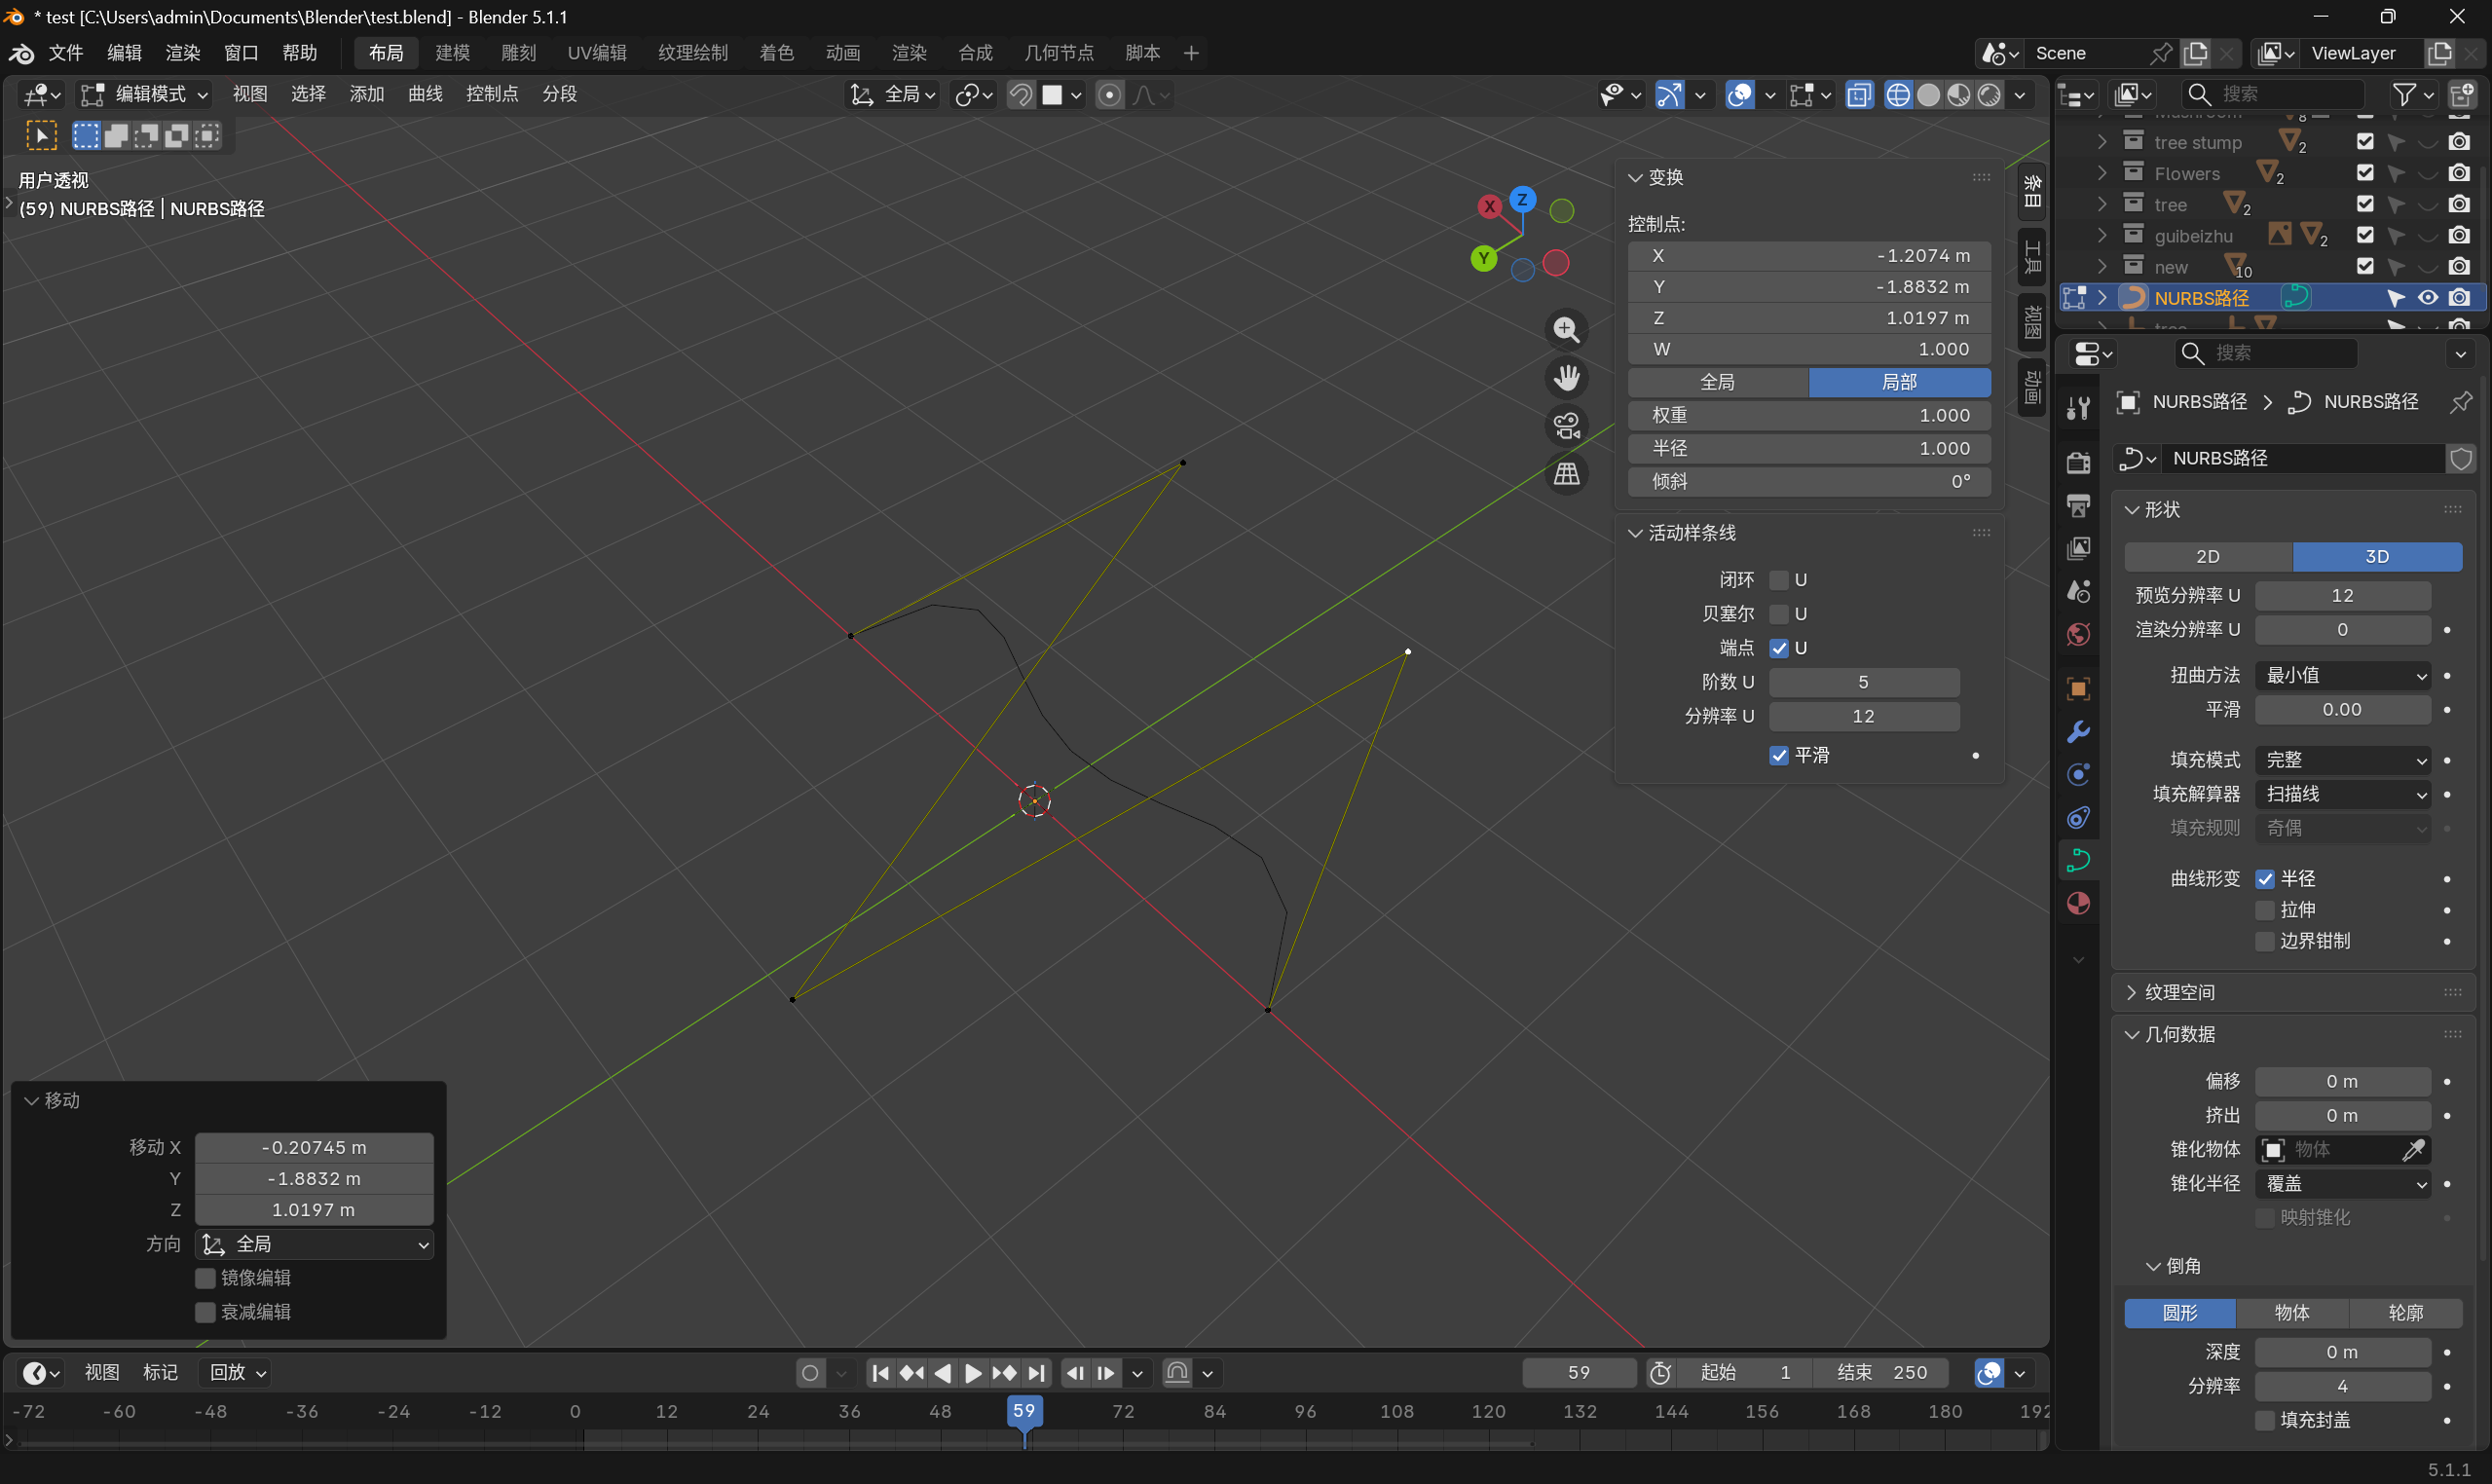
Using a profile object gives you more flexible curve geometry
If you only adjust curve depth, Blender usually generates a standard tube. But if you switch the bevel mode to Object and assign a custom Bezier circle as the profile, the curve will replicate that shape instead. This gives you much more control for building ribbons, hair strands, or flowing strips.
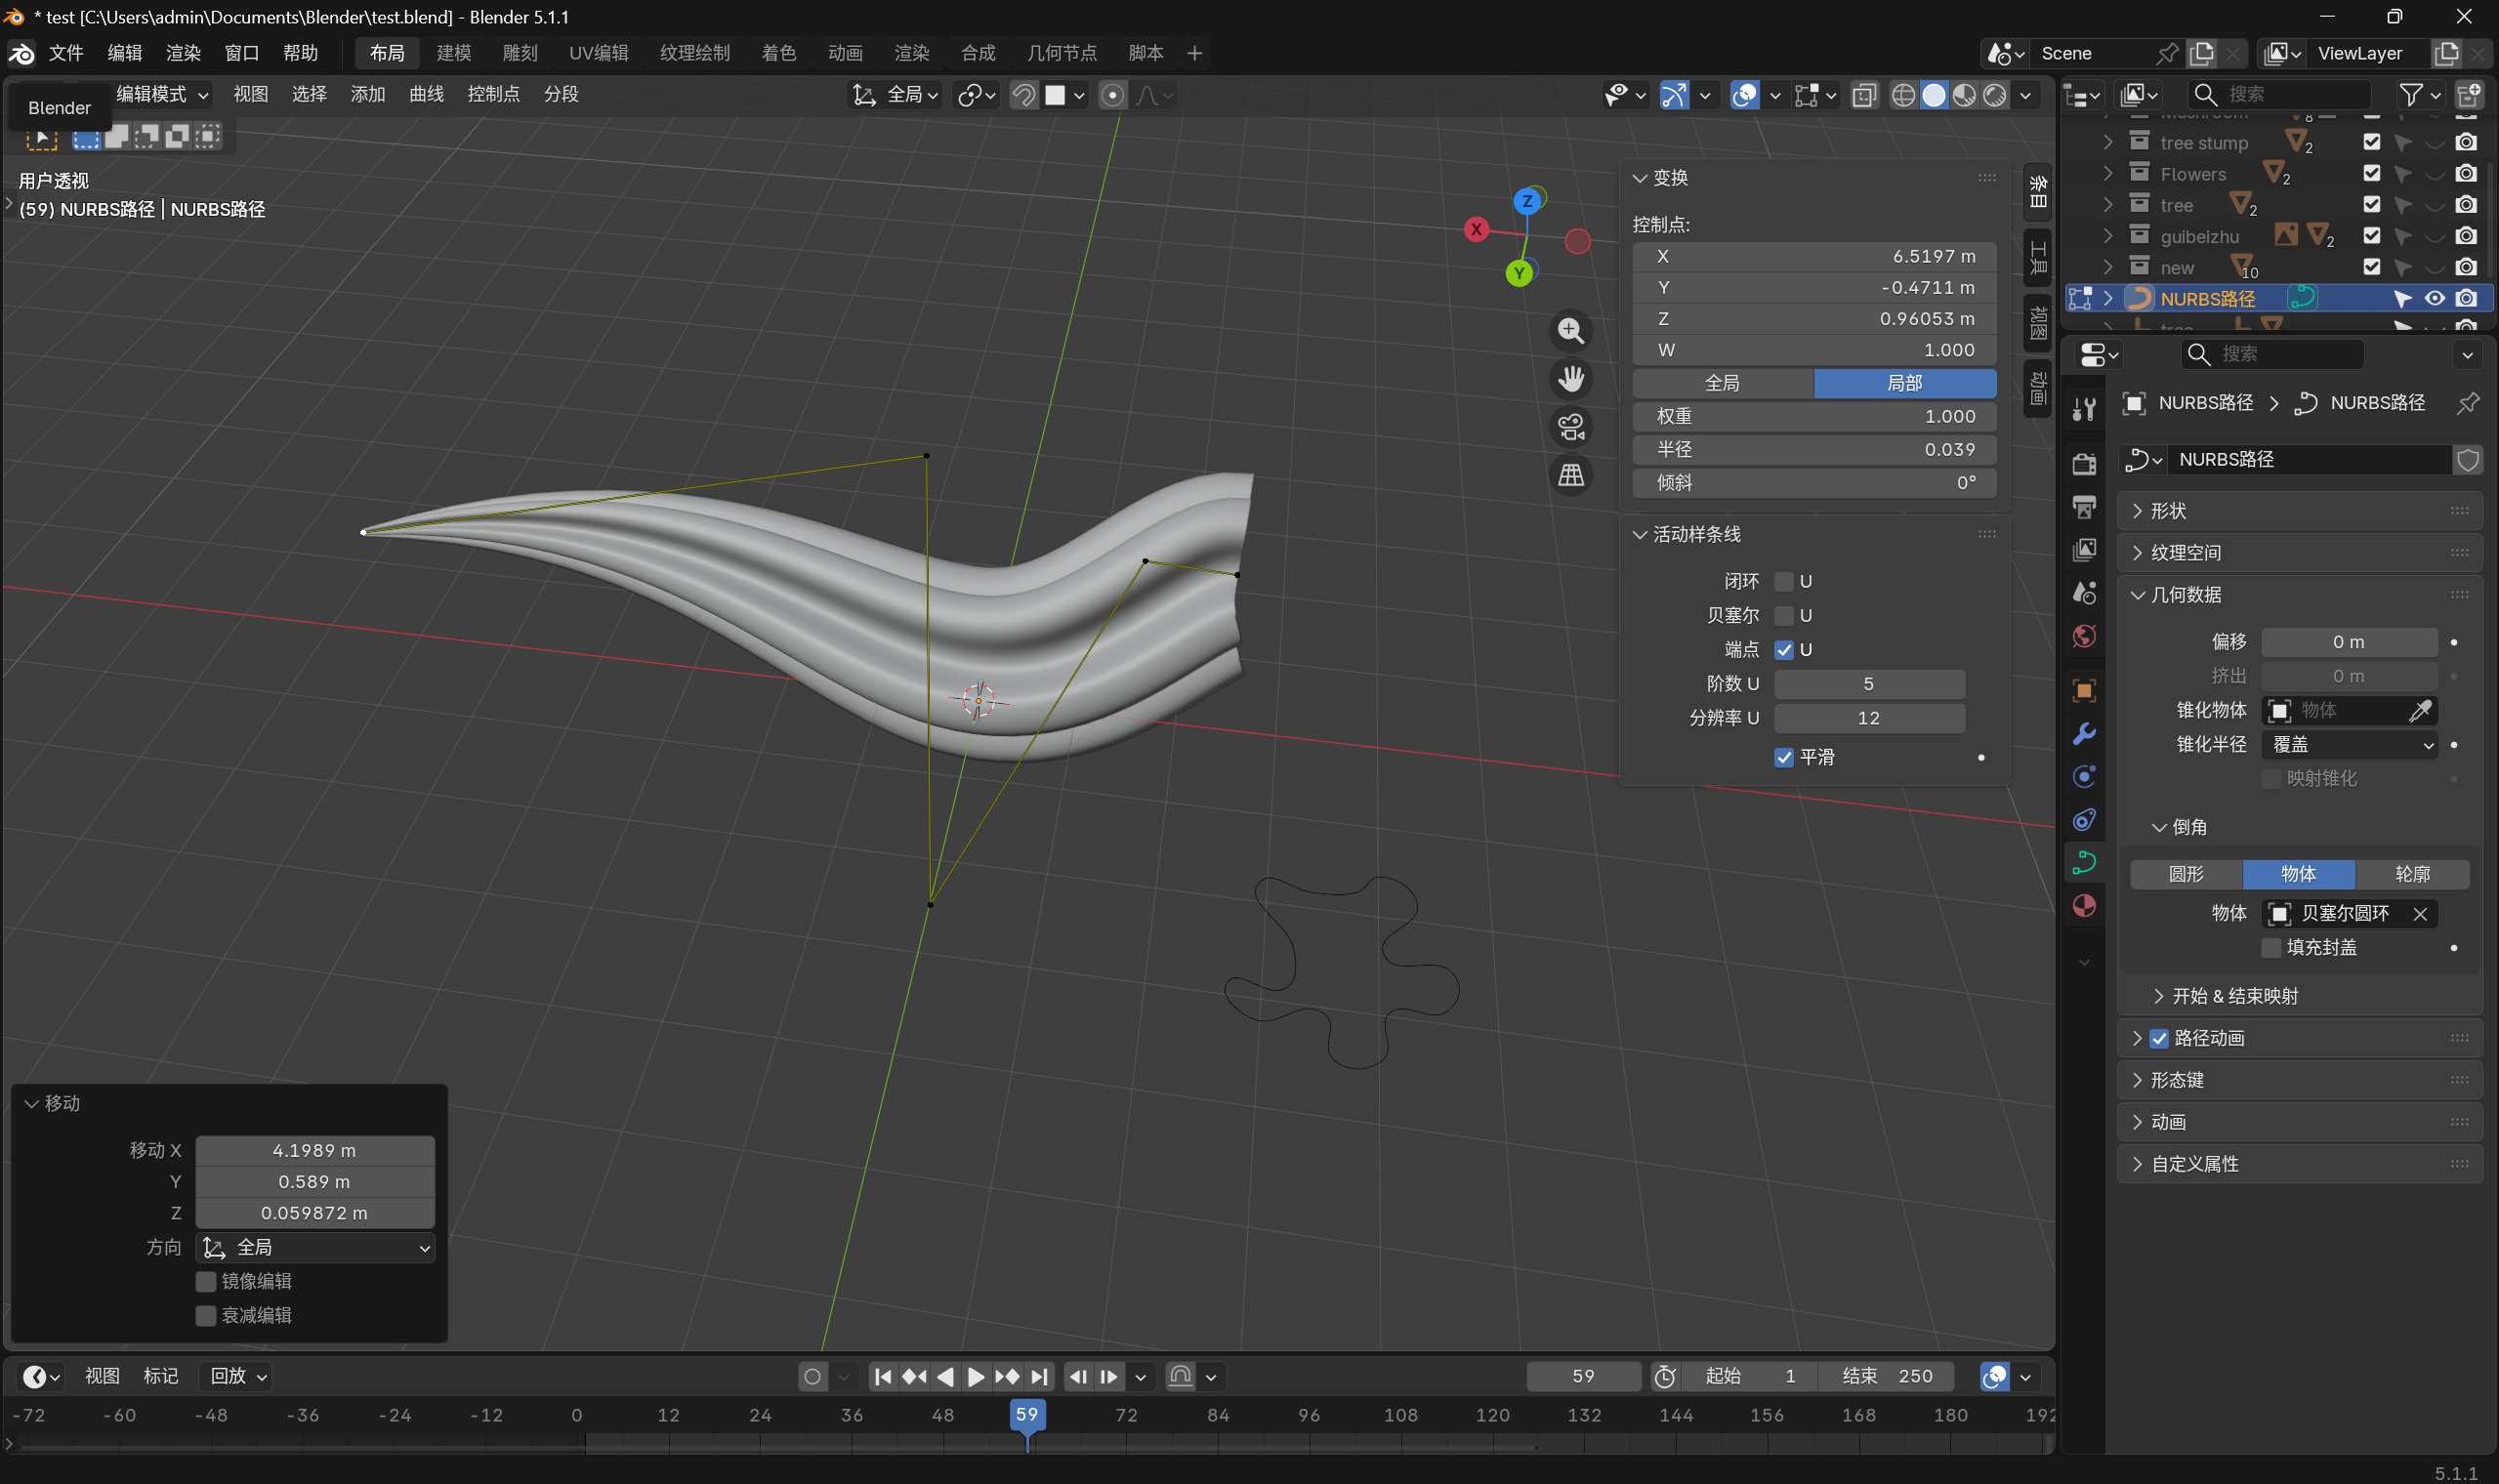 AI Visual Insight: This image demonstrates the solidified result of a path curve combined with a custom profile object. It shows that curve geometry is not limited to circular tubes. The final silhouette is defined jointly by the path and the profile.
The Curve Modifier is a more reliable alternative to Simple Deform for path bending
When you need to bend leaves, vines, or ribbon-like objects along a natural arc, the Curve Modifier is usually more stable than Simple Deform. It projects a mesh object onto the spatial direction of a target curve, which makes it ideal for plant leaves, soft trim pieces, and bent pipes.
The standard workflow is straightforward: first create a path curve, adjust its orientation, and shape the arc. Then add a Curve Modifier to the mesh object, assign the path as the target, and set the correct deformation axis.
leaf.modifier = "Curve"          # Add the Curve Modifier
leaf.target_curve = "Path"       # Assign the target path curve
leaf.deform_axis = "Z"           # Choose the deformation axis based on the model's main orientation
leaf.parent = "Path"             # Create a parent-child relationship to avoid offset issues after movement
This example summarizes the minimum configuration chain for using the Curve Modifier.
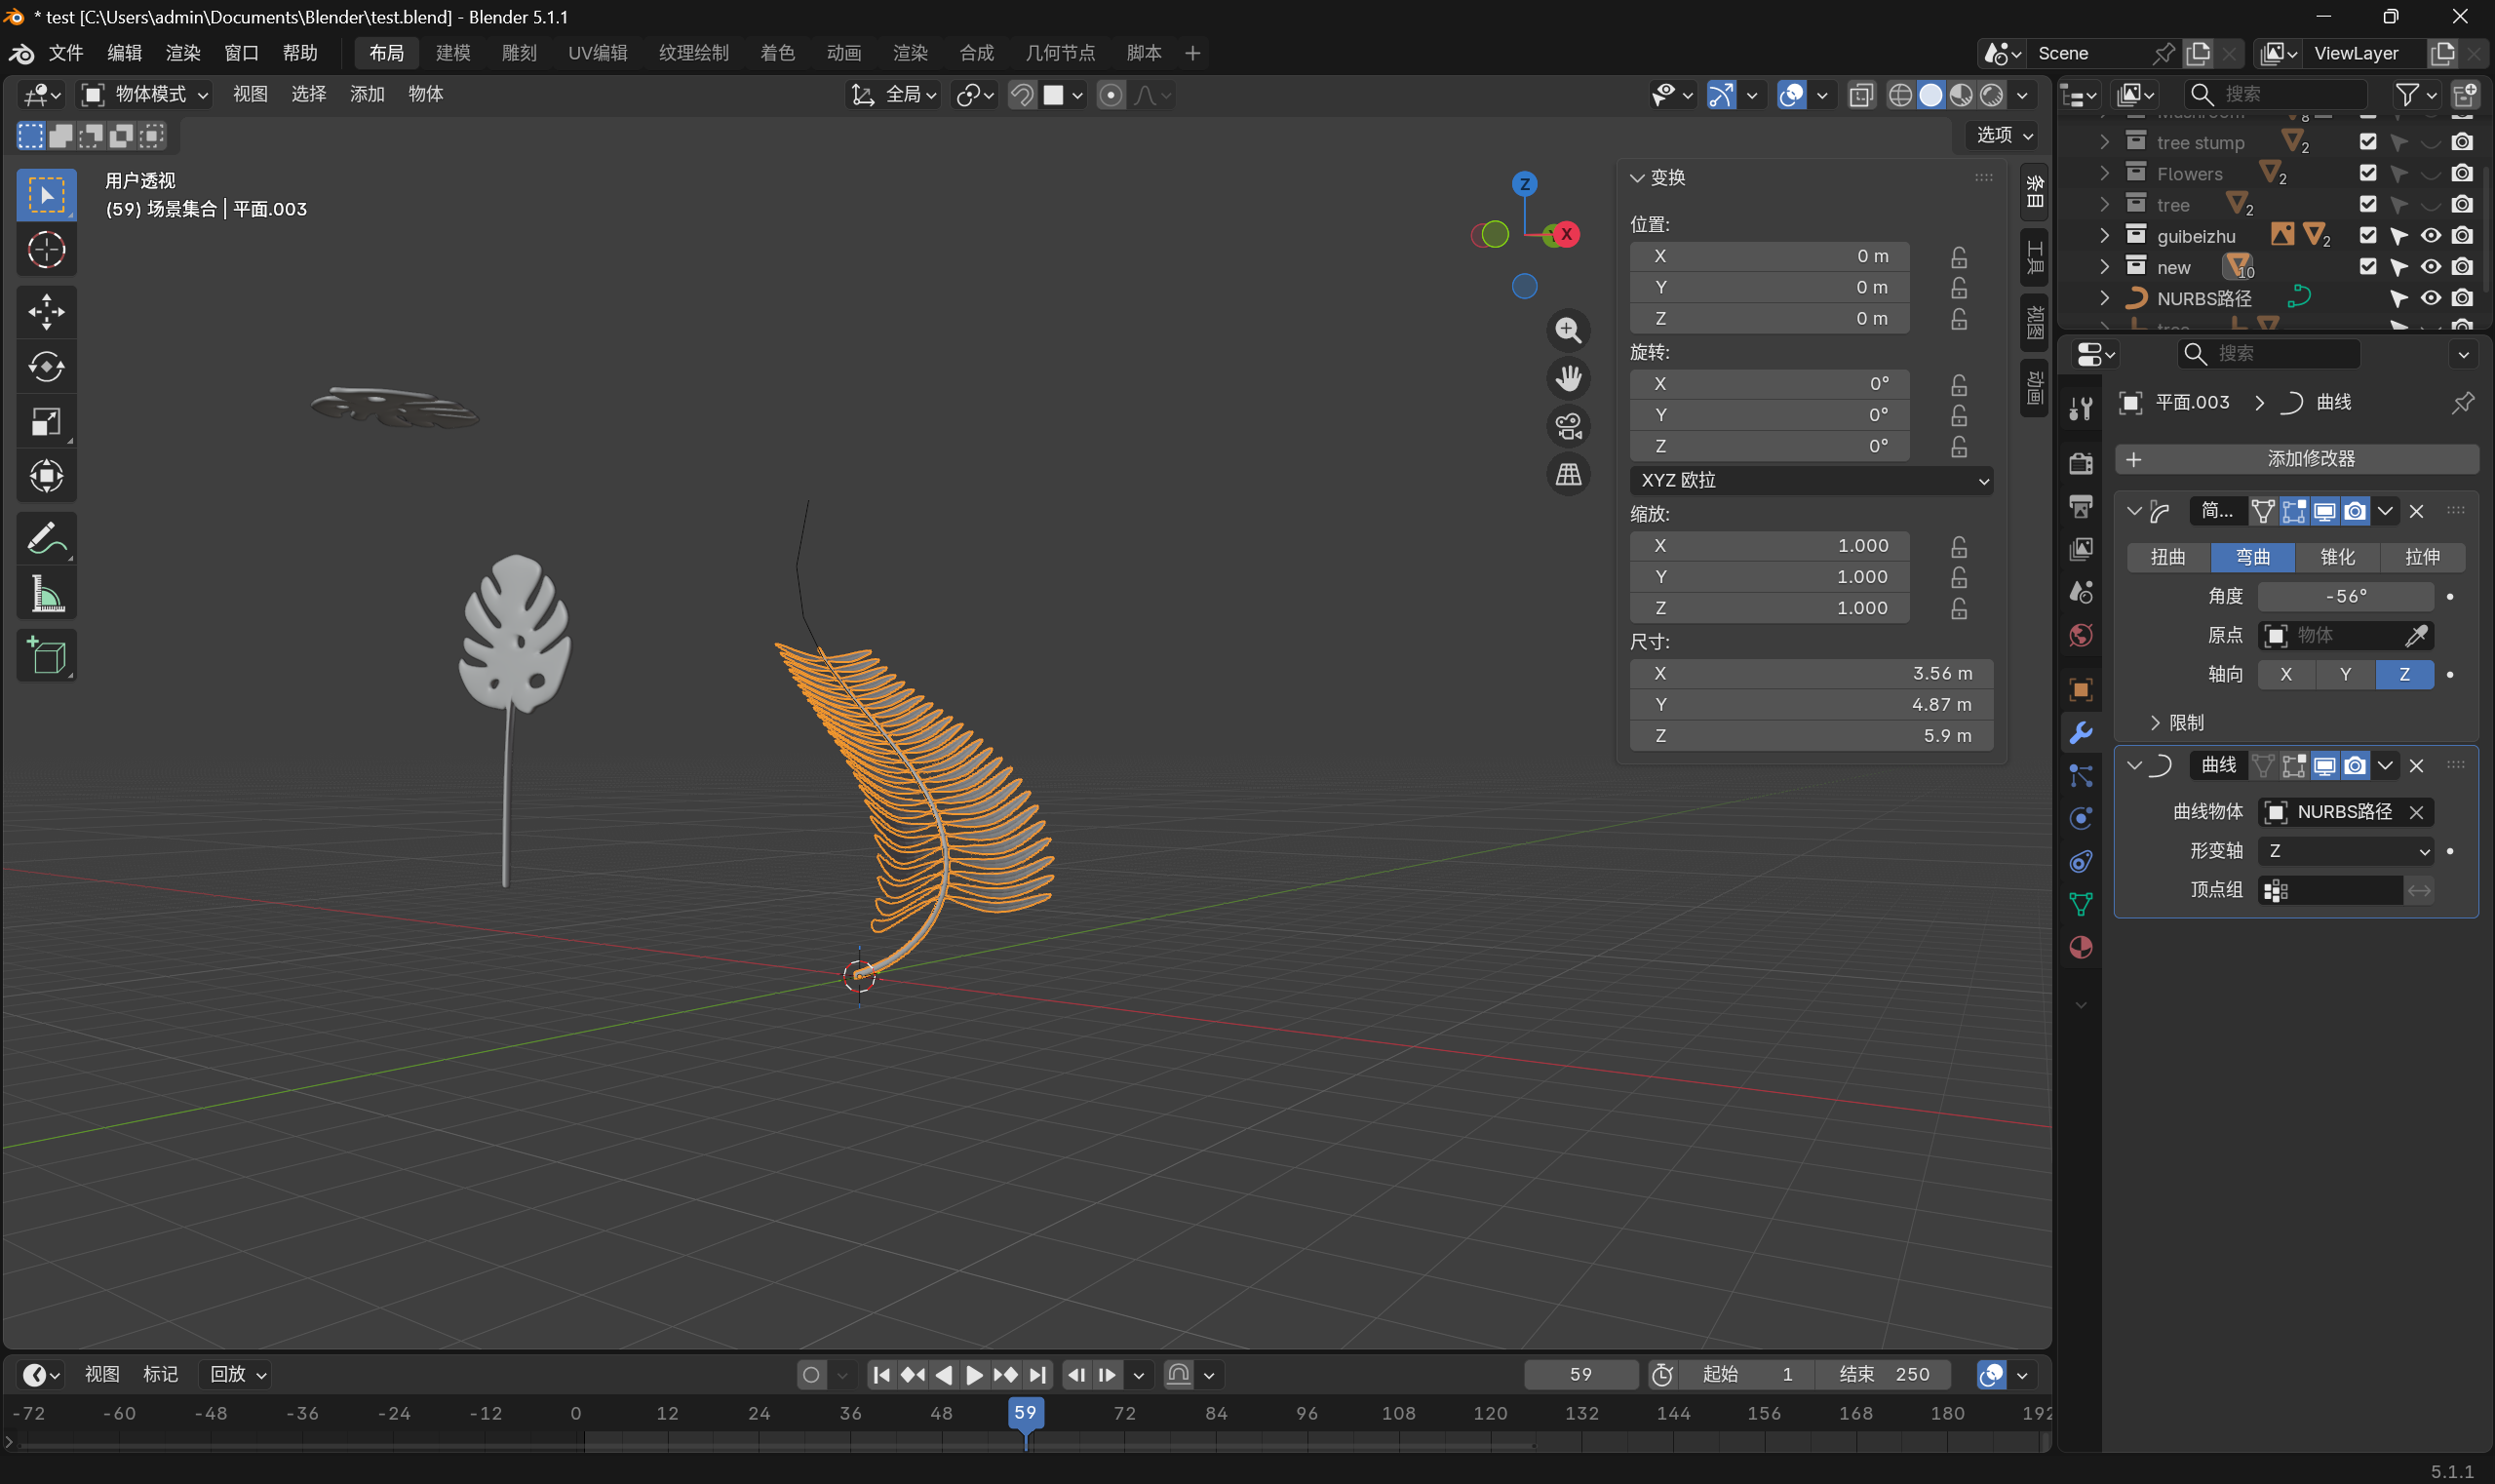 AI Visual Insight: This image shows a leaf mesh bending continuously along a path curve. It highlights the stability of the Curve Modifier in preserving local thickness while controlling overall arc shape and direction.
Parenting determines whether the modifier stays stable
Once the Curve Modifier is active, you should avoid moving the deformed mesh independently. Doing so separates the mesh object space from the curve space and often causes misalignment. The correct approach is to parent the mesh to the path object and move them together.
The common rule is simple: select the child first, then the parent, and press Ctrl+P. In most cases, Object (Keep Transform) is the best option because it preserves the current visual result.
Vertex parenting is for attachment, while object parenting is for overall control
If you only want a leaf to follow a vine as a whole, use standard object parenting first. If you need a small object to stick to a deforming surface, then consider Vertex Parent or Vertex (Triangle) Parent.
A Vertex Parent transfers position only, not rotation. A Vertex (Triangle) Parent also inherits local orientation, which makes it a better fit for badges, leaves, and decorative parts that need to align to a surface.
The vine example shows how curves and hierarchy work together
Start with a sufficiently subdivided cylinder as the vine body. Duplicate the leaf meshes and parent them to the cylinder. Then add a Curve Modifier to the cylinder. When the vine bends, the leaves follow the parent consistently, which keeps the setup stable and makes batch adjustment easier.
One important detail: do not move the starting point at the base of the path casually. Once objects are attached, changing that point can easily introduce twisting, flipping, or incorrect orientation.
The Skin Modifier is ideal for quickly building trees and branching structures
The value of the Skin Modifier is simple: draw the skeleton first, then let Blender wrap it into volume automatically. For branching forms such as trunks, limbs, blood vessels, or coral, this is much more efficient than traditional face extrusion workflows.
A common approach is to merge the four vertices of a plane into the center first, then keep extruding a single edge to create a branching network. After that, add the Skin Modifier and the wireframe instantly becomes visible volume.
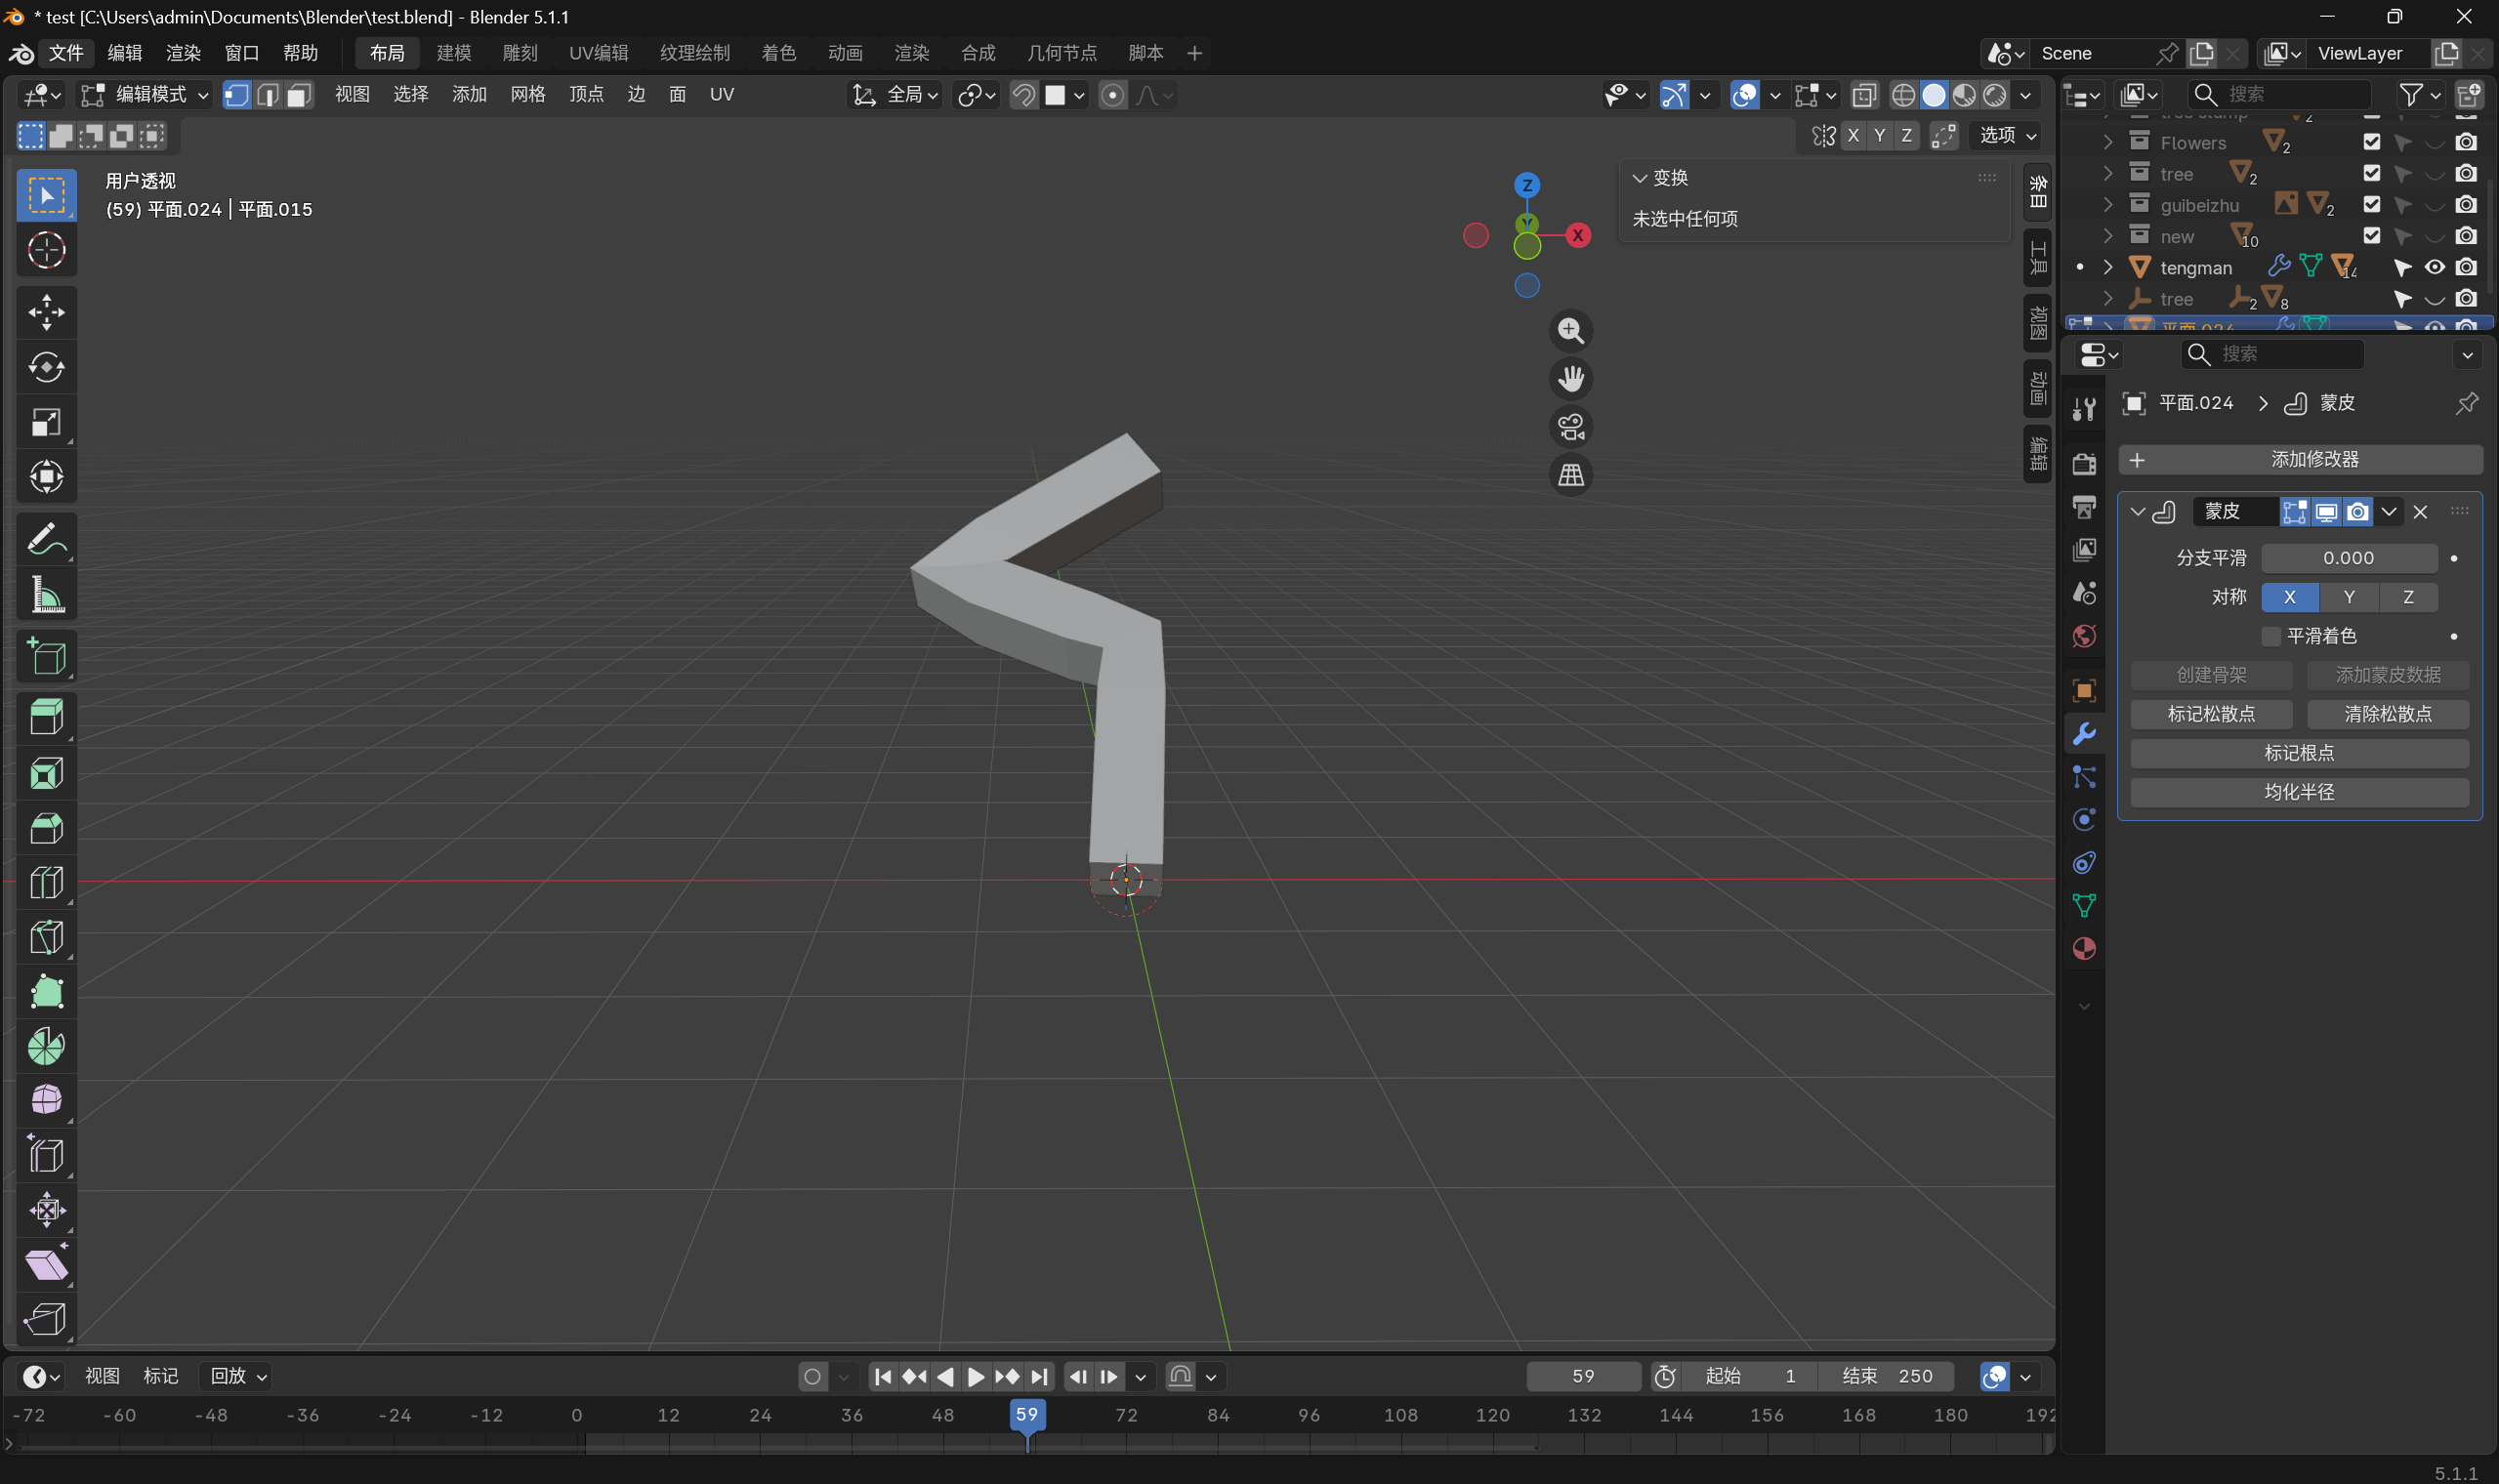 AI Visual Insight: This image shows how a linear skeleton is converted into tree-trunk volume with the Skin Modifier. It demonstrates a modeling pattern where the topological skeleton comes first and the solid surface is generated afterward.
tree_base = "single_vertex"      # Start from a single vertex
extrude_times = 12                # Extrude multiple times to build the branch skeleton
modifier_stack = ["Skin", "Subdivision"]  # Apply Skin first, then Subdivision for smoother results
This example expresses the common modifier order used in fast tree modeling.
The Displacement Modifier depends on sufficient geometry and grayscale height data
The core logic of the Displacement Modifier is straightforward: it moves vertices according to grayscale values. White pushes higher, black pushes lower, and gray creates the transition. That means the model must have enough subdivisions first. Without enough geometry, even a great texture cannot produce fine deformation.
A common beginner mistake is adding displacement directly to a low-poly plane or cube. The result usually looks broken and harsh. The correct workflow is to subdivide the mesh first or add a Subdivision Surface Modifier before stacking the Displacement Modifier.
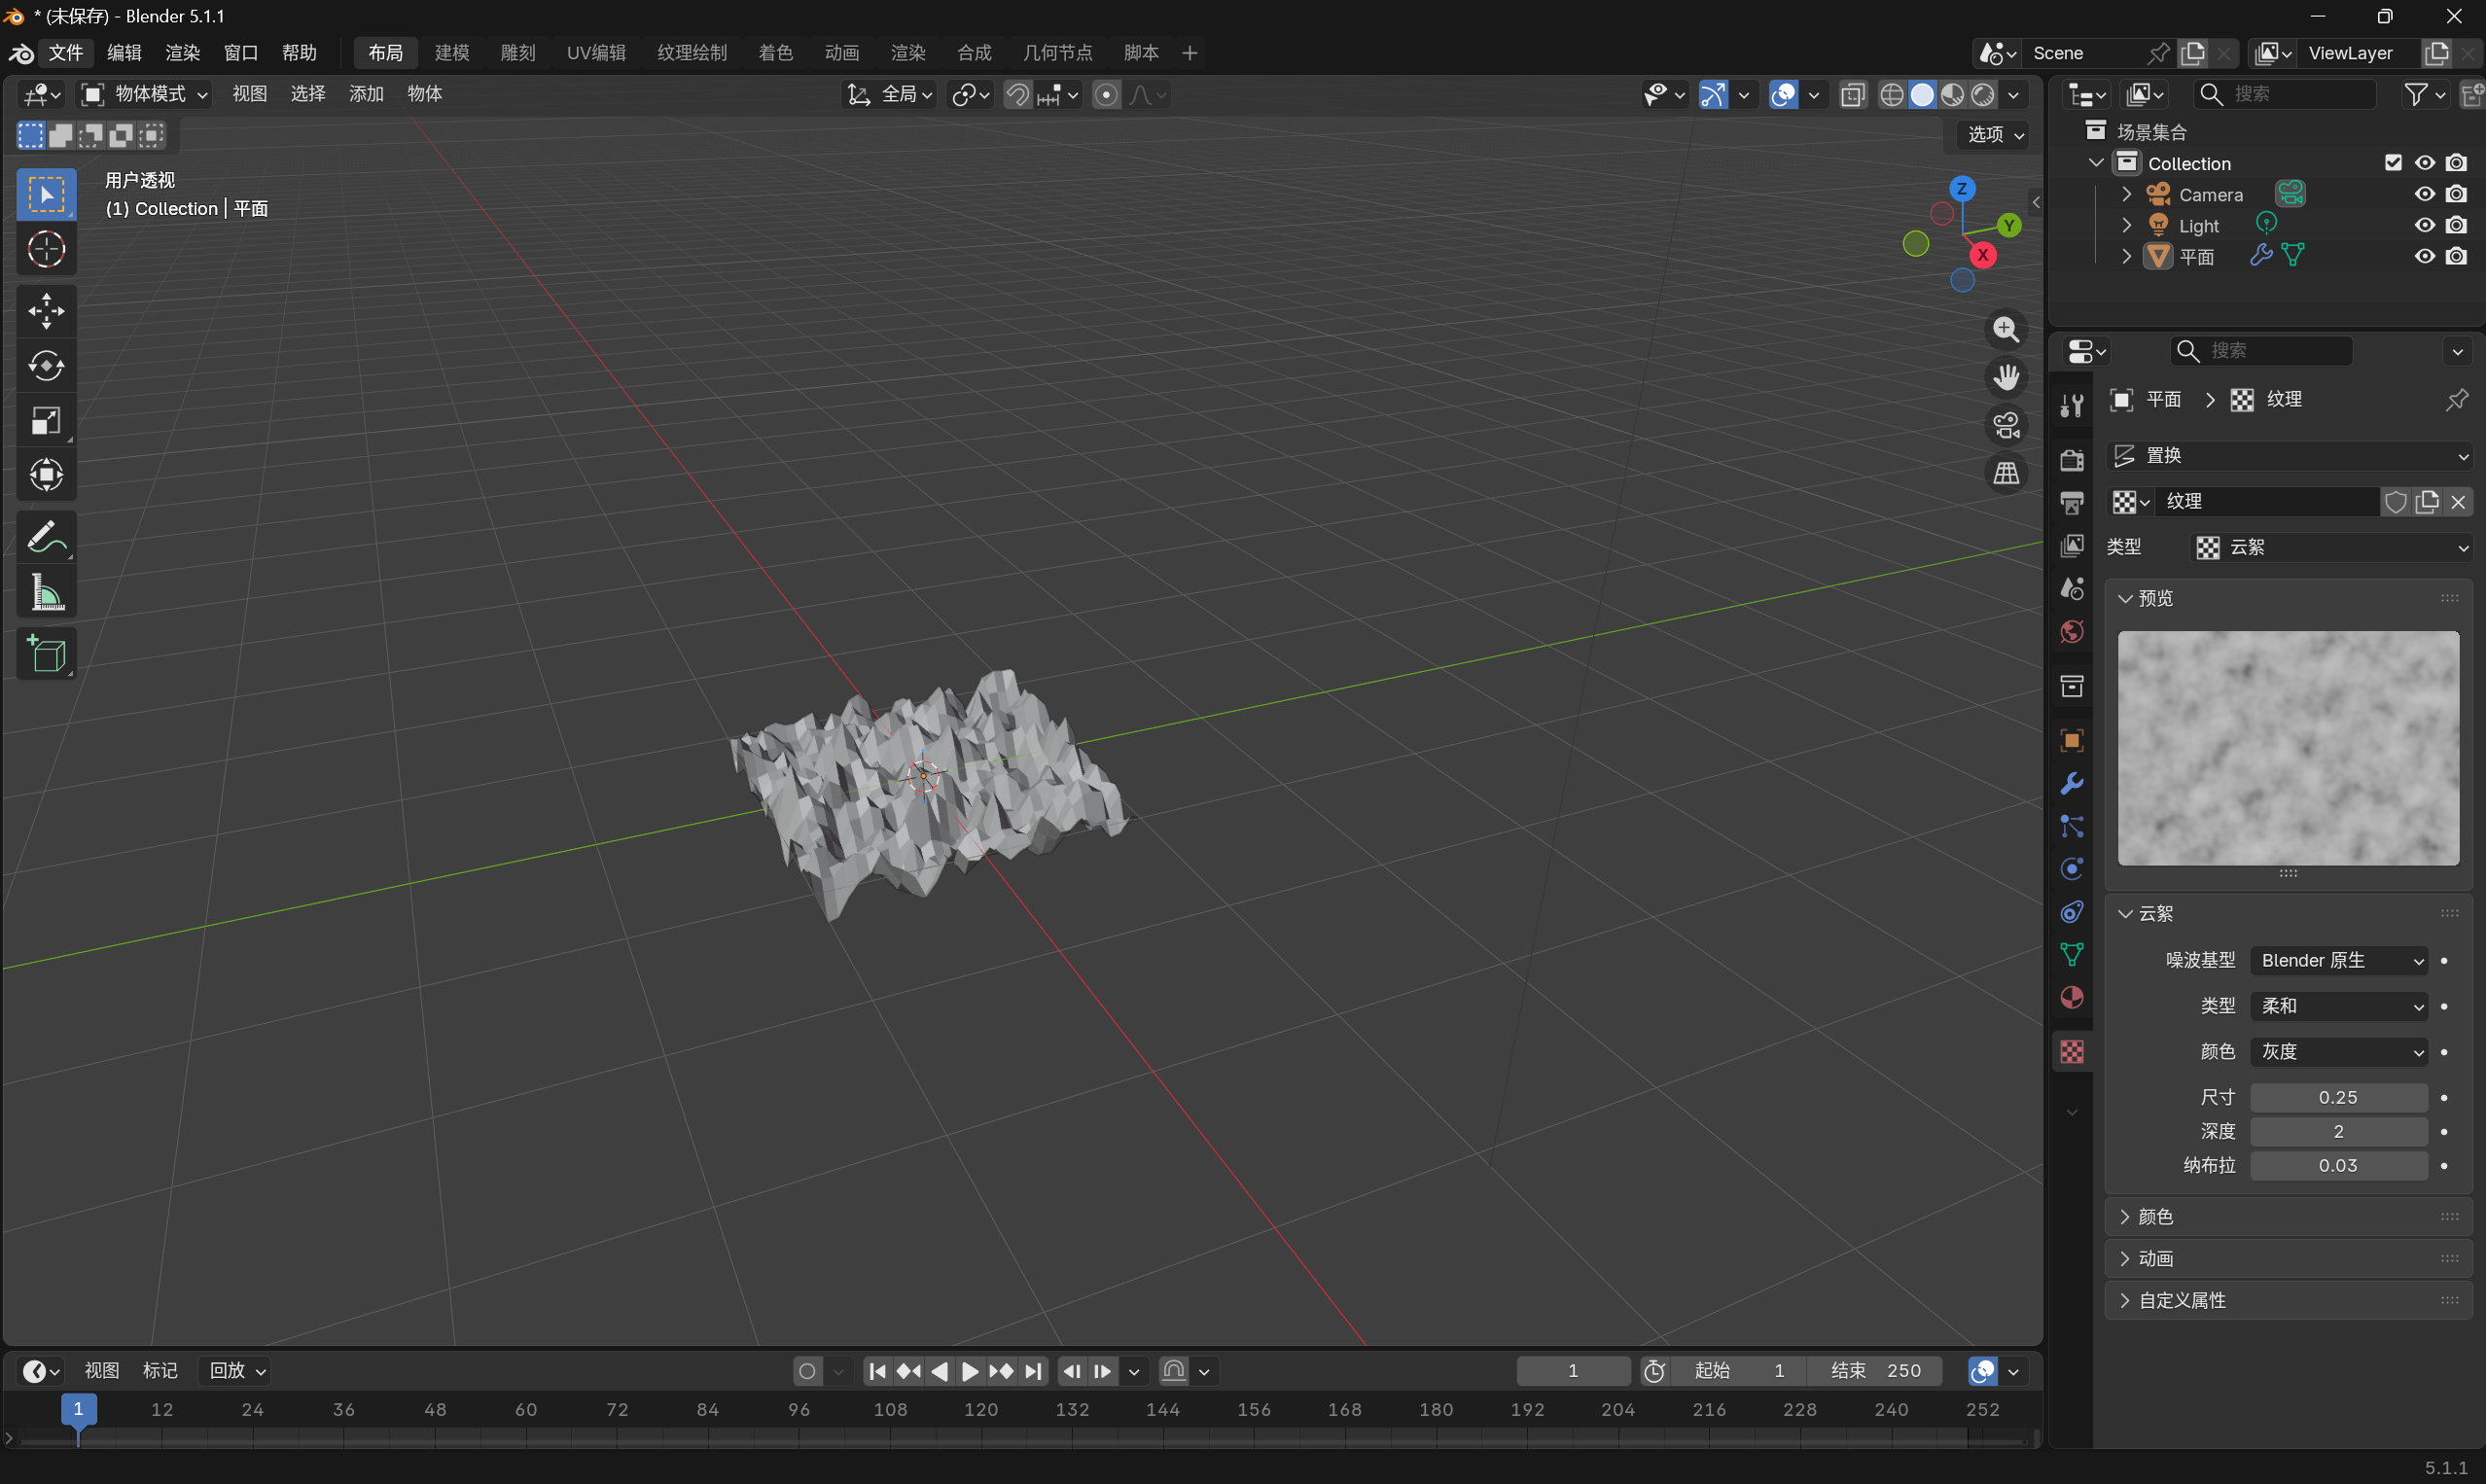 AI Visual Insight: This image shows height variation on a plane driven by a procedural texture. It illustrates how texture parameters and displacement strength together determine surface granularity, amplitude, and transition smoothness.
Using Voronoi texture for rocks is a high-value workflow
Rocks need irregular, chunky, and fractured natural forms, and Voronoi texture fits that requirement extremely well. Add Subdivision Surface to a cube, drive displacement with Voronoi, and enable smooth shading. In many cases, that is enough to produce a convincing rock mass quickly.
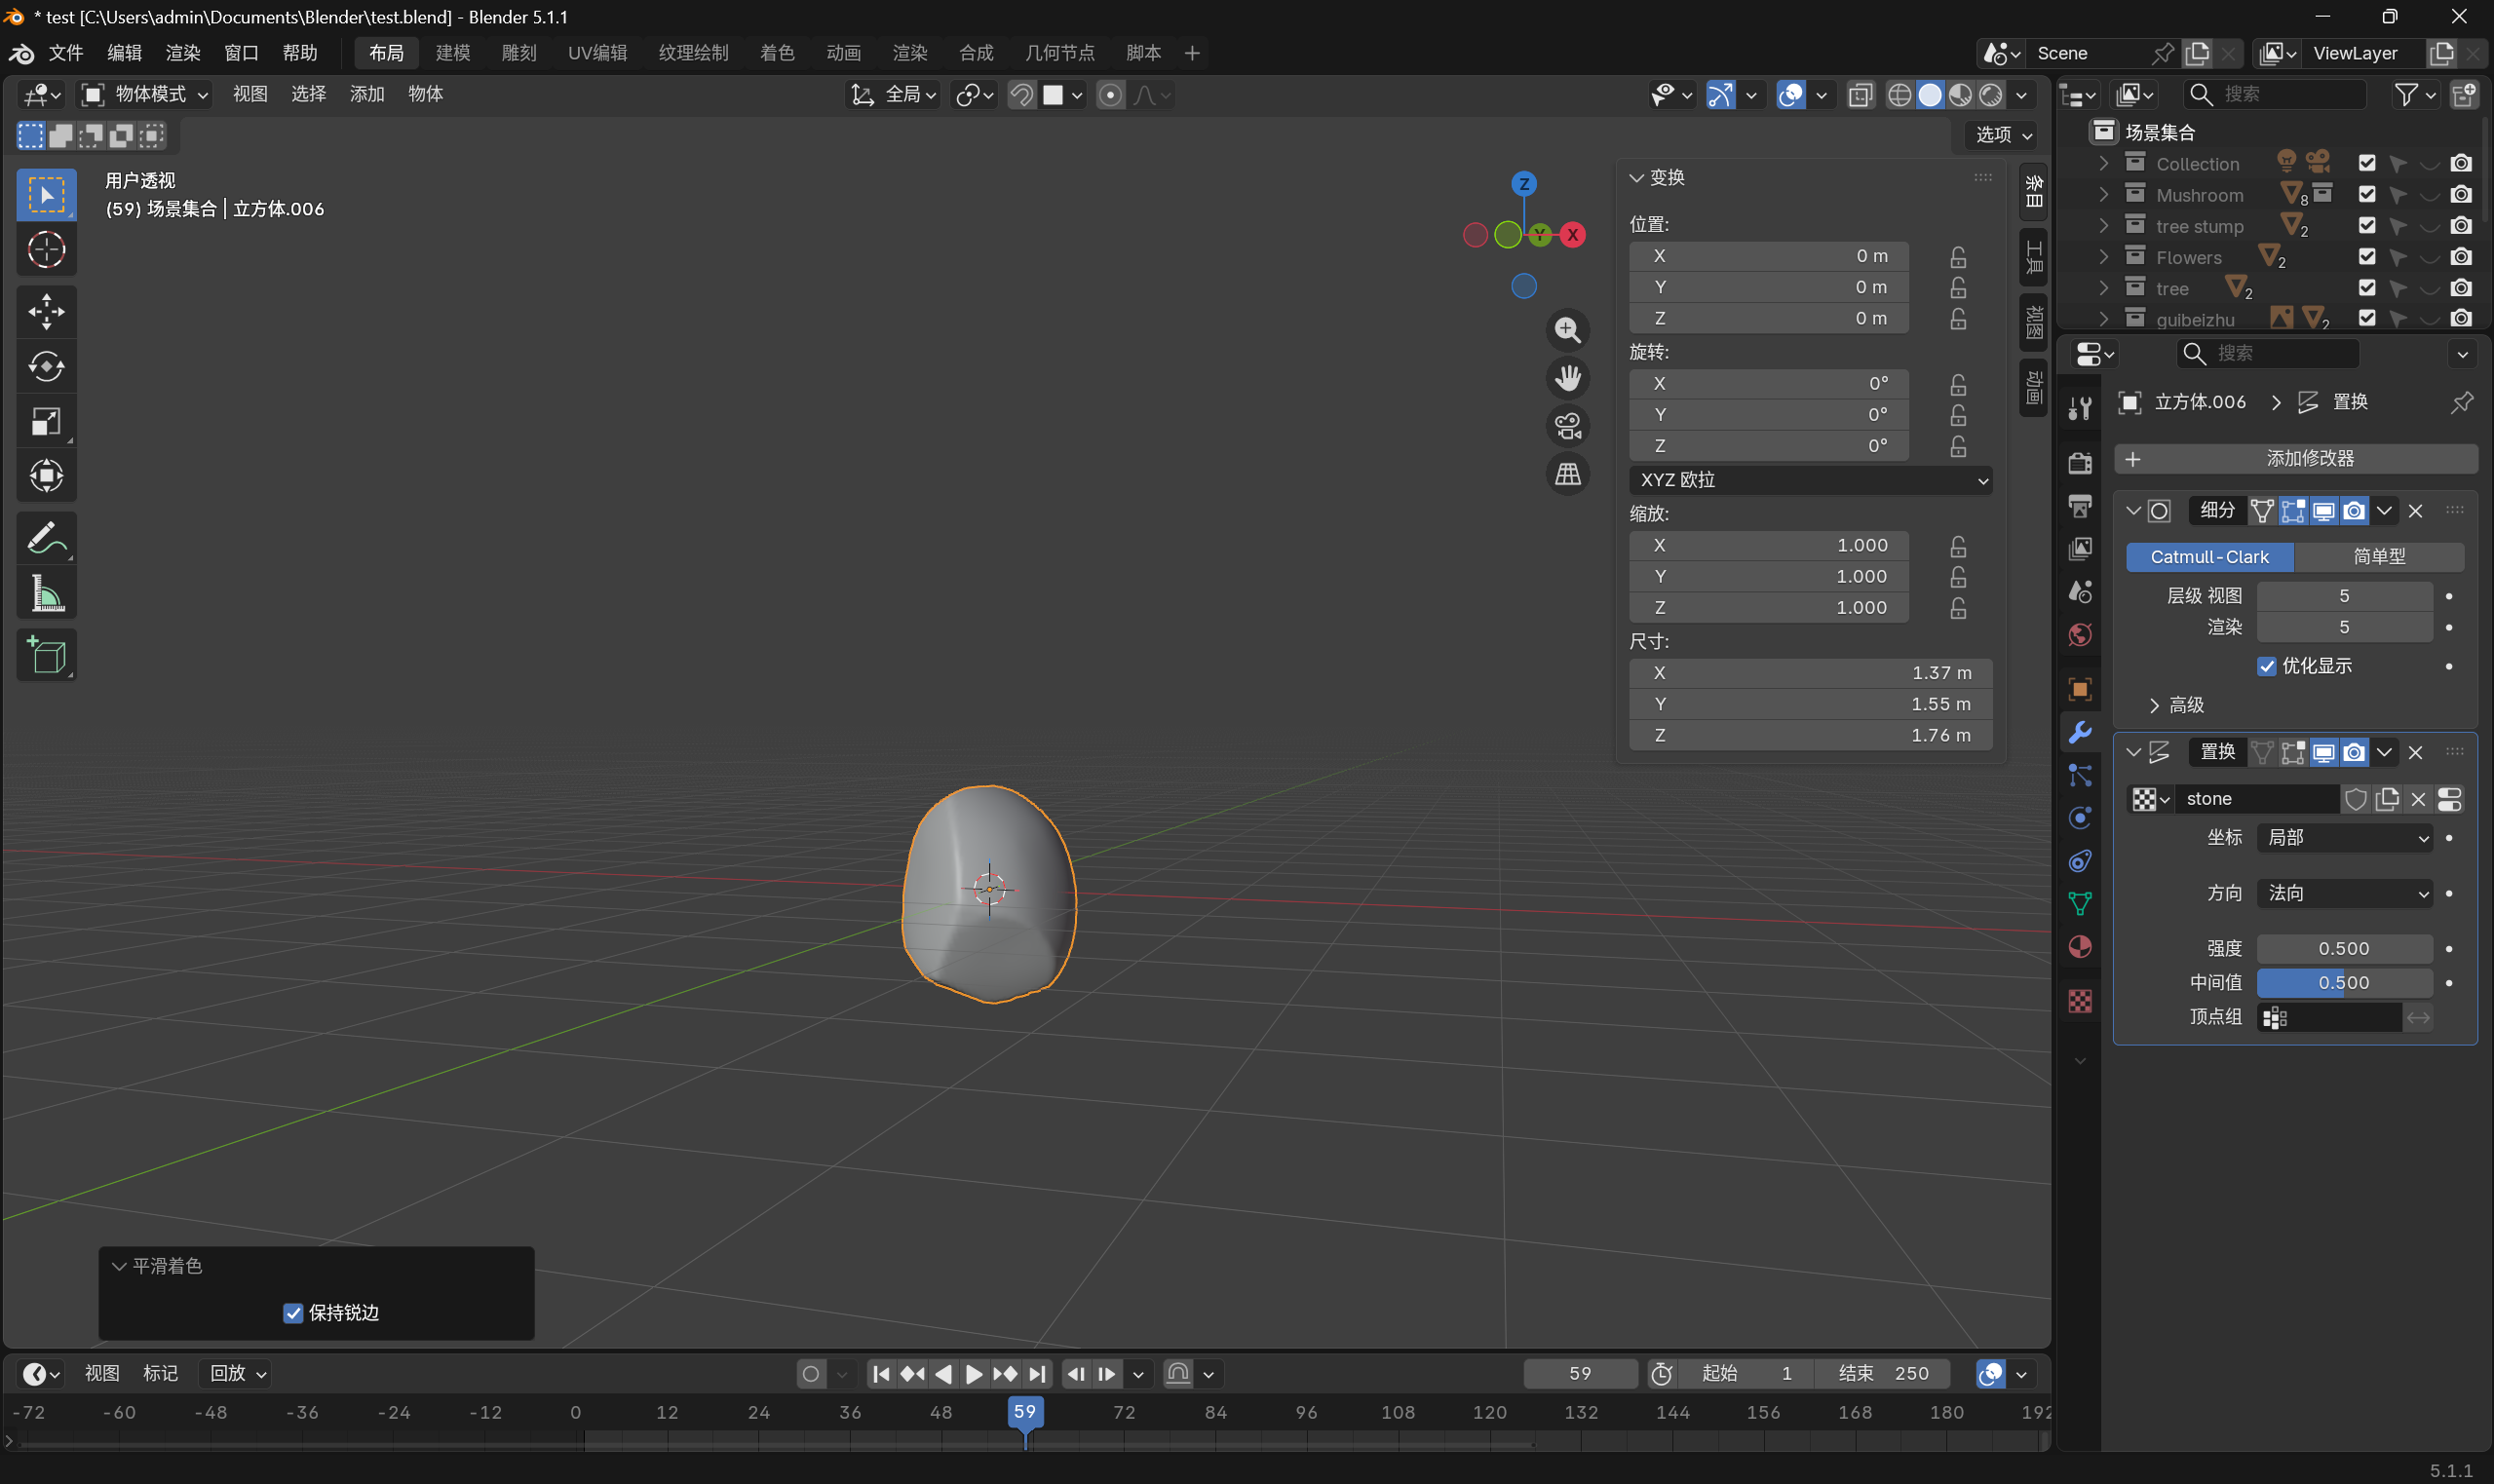 AI Visual Insight: This image shows the rock effect generated by Voronoi-based displacement. The surface features uneven depressions, blocky fractures, and naturally broken boundaries, all of which match the micro-terrain characteristics of realistic stone.
rock.modifiers = ["Subdivision", "Displace"]   # Add geometry first, then apply displacement
rock.texture = "Voronoi"                         # Choose a procedural texture suitable for rocks
rock.strength = 0.25                              # Control bump intensity to avoid exaggeration
rock.shading = "Smooth"                          # Use smooth shading for a better visual result
This example summarizes the core parameter combination for procedural rock generation.
The conclusion is that different curve types and modifiers map to different modeling tasks
Bezier curves are best for intuitive contour editing, while NURBS curves are better for highly smooth paths. The Curve Modifier handles deformation along a path, the Skin Modifier turns a skeleton into volume, and the Displacement Modifier generates detail from grayscale information.
If you remember these three relationships clearly—curve type selection, object hierarchy and parenting, and modifier order—you will find it much easier to build plants, pipes, ribbons, trees, and rocks.
FAQ
Should Blender beginners learn Bezier curves or NURBS first?
Start with Bezier curves. They offer more direct visual feedback and help you quickly understand control points, closing curves, breaking curves, and local thickness control. Once you are comfortable with path shaping, move on to NURBS for more industrial and high-smoothness workflows.
Why does the Curve Modifier often twist my model?
There are usually three causes: the model’s main axis is incorrect, the path’s starting direction is wrong, or the object has not been parented properly. In addition, accidentally moving the key point at the base of the path can cause flipping and twisting across the entire setup.
Why does the Displacement Modifier have little or no visible effect?
In most cases, the mesh does not have enough subdivisions, or the texture strength is too low. Displacement works by moving vertices, so without enough vertices you cannot get enough deformation precision. Add geometry first, then tune texture scale and strength.
Core summary
This article systematically reconstructs the Blender curve modeling knowledge system. It covers the differences between Bezier and NURBS curves, the Curve Modifier workflow, parenting and hierarchy setup, tree creation with the Skin Modifier, and rock generation with the Displacement Modifier, helping beginners build a complete understanding from theory to practical application.