This article explains how to fetch only the RT-Thread BSP required for GD32VW553H-EVAL and complete the build successfully. It focuses on solving common issues caused by cloning the full repository, inconsistent toolchain paths, and missing dependencies. Keywords: GD32VW553, RT-Thread, sparse checkout.
Technical Specifications at a Glance
| Parameter | Description |
|---|---|
| Target board | GD32VW553H-EVAL |
| Languages | C, Shell |
| Architecture | RISC-V |
| Build system | SCons |
| Repository protocol | Git / HTTPS |
| Runtime environments | Windows / Linux / macOS |
| Core dependencies | Git 2.25+, RISC-V GCC, RT-Thread ENV, pkgs |
| Repository | RT-Thread/rt-thread |
| GitHub stars | Not provided in the source; refer to the live repository page |
This article provides a more efficient BSP retrieval workflow
The official RT-Thread repository contains a large number of BSPs. Cloning the entire repository increases both download time and disk usage significantly. If you only need to validate GD32VW553H-EVAL, sparse checkout is the more practical approach.
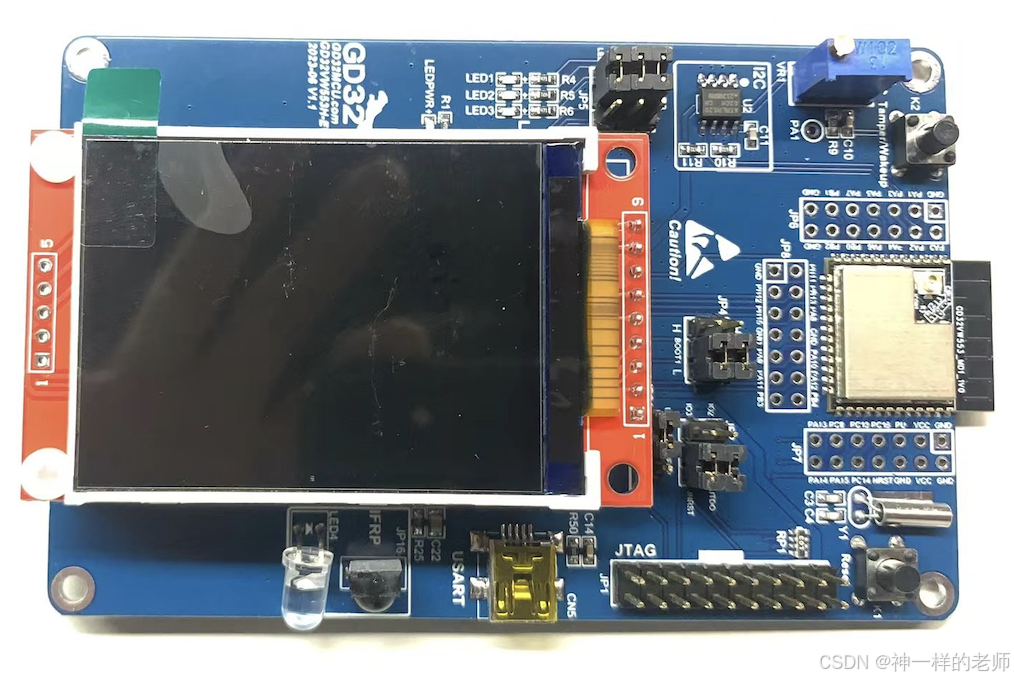 AI Visual Insight: The image shows the physical GD32VW553H-EVAL development board. You can identify the main controller chip area, debugging and power interfaces, pin header expansion area, and the surrounding evaluation-board circuitry. This type of image helps developers quickly locate the physical interfaces they will use during downloading, debugging, and peripheral validation.
The goal of this workflow is straightforward: download only the target BSP, dependency libraries, kernel, and build tools, then use ENV + SCons to complete the build while minimizing interference from unrelated files.
Sparse checkout delivers the core value of minimal downloads
Sparse checkout is not a replacement for shallow clone. Instead, it trims the working tree by path. It is well suited for single-board development, driver debugging, and CI scenarios that require a minimal subset of a large monorepo.
mkdir rt-thread && cd rt-thread  # Create the working directory

git init                         # Initialize the local repository
git remote add origin https://github.com/RT-Thread/rt-thread.git
git config core.sparseCheckout true  # Enable sparse checkout

echo "/*" >> .git/info/sparse-checkout
echo "!/bsp/*" >> .git/info/sparse-checkout          # Exclude all BSPs
echo "/bsp/gd32/risc-v/gd32vw553h-eval/" >> .git/info/sparse-checkout  # Keep the target BSP
echo "/bsp/gd32/risc-v/libraries/" >> .git/info/sparse-checkout        # Keep the chip libraries
echo "/libcpu/" >> .git/info/sparse-checkout
echo "/src/" >> .git/info/sparse-checkout
echo "/include/" >> .git/info/sparse-checkout
echo "/components/" >> .git/info/sparse-checkout
echo "/tools/" >> .git/info/sparse-checkout

git pull origin master          # Pull the target content
These commands fetch only the source code and foundational build directories required for GD32VW553H-EVAL.
Environment preparation determines whether the build succeeds on the first attempt
Use Git 2.25 or later. Earlier versions may not handle sparse checkout completely. For the toolchain, you need a working RISC-V Embedded GCC installation, and its prefix must match the BSP configuration.
The original source notes that the RISC-V GCC toolchain can be extracted from GigaDevice’s GD32 Embedded Builder. In practice, the IDE itself is not the key point. What matters is the bin directory and the toolchain prefix riscv-none-embed-.
The recommended approach combines the toolchain with RT-Thread ENV
This GD32VW553 BSP is not ideal for building directly in RT-Thread Studio. A more reliable approach is to use RT-Thread ENV. If RT-Thread Studio is already installed on your machine, you can also reuse its bundled ENV directory.
# Windows CMD example
set RTT_EXEC_PATH=D:\gd32\RISCVEmbeddedGCC\bin  # Specify the toolchain path
scons -j%NUMBER_OF_PROCESSORS%                    # Run a parallel build
These commands specify the GCC path in CMD and trigger a parallel build.
The BSP build workflow depends on three key actions
First, enter the target BSP directory. Second, run pkgs --update to download package dependencies. Third, start the actual build.
cd rt-thread/bsp/gd32/risc-v/gd32vw553h-eval  # Enter the BSP directory
pkgs --update                                 # Fetch dependency packages
These two commands locate the project and synchronize external software packages.
If you use PowerShell, you can replace the CMD syntax with PowerShell environment variable syntax. The logic is identical; only the syntax differs.
$env:RTT_EXEC_PATH="D:\gd32\RISCVEmbeddedGCC\bin"  # Set the toolchain path
scons -j$env:NUMBER_OF_PROCESSORS                     # Run a parallel build
These commands perform the same build steps in PowerShell.
Build artifacts can be used directly for debugging and flashing
After a successful build, the directory usually contains rtthread.elf, rtthread.bin, and rtthread.map. The ELF file is used for debugging, the BIN file for flashing, and the MAP file for analyzing link layout and memory usage.
Memory region         Used Size  Region Size  %age Used
flash:                72404 B    4 MB         1.73%
ram:                  288 KB     288 KB       100.00%
text    data    bss   dec   hex  filename
71156   1200    7620  79976 13868 rtthread.elf
This output helps you quickly determine whether Flash and RAM usage fit within the board-level resource limits.
Common build failures usually come from incomplete paths and dependencies
If you see scons: *** missing SConscript file, SCons itself is usually not the root cause. In most cases, sparse checkout missed required directories. The most commonly omitted paths are /bsp/gd32/risc-v/libraries/ and /libcpu/.
If the toolchain path does not exist, the issue is usually a mismatch between the default path in rtconfig.py and the actual installation path on your machine. It is safer to override the path with RTT_EXEC_PATH than to modify project files directly.
When dependency downloads fail, check network access first
Failures in pkgs --update are often caused by an inability to access GitHub. In that case, configure a Git proxy or manually download gd32-riscv-series and place it in the packages/ directory.
git config --global http.proxy http://proxy:port  # Configure a proxy for Git
scons -c                                          # Clean previous build artifacts
menuconfig                                        # Trim features to reduce RAM usage
These commands configure a network proxy, clear the build cache, and reduce component size.
RAM usage showing 100% does not necessarily mean the program cannot run, but it does mean the configuration is already at the limit. Disable unnecessary drivers and components first, then link again to verify the remaining headroom.
Reference resources should stay aligned with official sources
Prioritize the RT-Thread GitHub repository, official RT-Thread documentation, the GD32VW553 datasheet, and the official SCons website. This keeps your BSP, toolchain, and build-system references aligned and helps you avoid inaccuracies from secondary tutorials.
FAQ
Q1: Why is sparse checkout recommended instead of a full clone?
A: The RT-Thread repository includes many BSPs, so a full clone is expensive in both time and storage. Sparse checkout keeps only the target board and required dependencies, making downloads faster and the workspace smaller. It is especially useful for single-board validation and quick evaluation.
Q2: Why does the build still report a missing path after I set the toolchain?
A: In most cases, RTT_EXEC_PATH does not point to the actual bin directory, or the toolchain prefix does not match the project configuration. Verify that the final directory is correct and confirm that the prefix is riscv-none-embed-.
Q3: Is it normal for RAM usage to show 100% after a successful build?
A: It means the link result has fully consumed the default RAM allocation. Even a small increase in enabled components may cause the next build to fail. Run menuconfig immediately to trim drivers, file systems, or network components, then rebuild to verify the new memory margin.
Core summary
This article focuses on the GD32VW553H-EVAL development board and reconstructs a minimal RT-Thread BSP download and build workflow. It covers Git sparse checkout, RISC-V toolchain configuration, ENV-based building, dependency installation, build artifacts, and common troubleshooting so developers can complete BSP retrieval and project builds faster with lower bandwidth usage and less disk consumption.